Import Themes
Customize your libraries with your own theme.
Theming works the same for all Skeleton-based libraries — both the legacy Skeleton v3.x.fig file and the newer Primitives v4.x.fig (Skeleton v4).
Only the Primitives / Skeleton file receives themes directly. The Auth Kit always inherits its look from the Primitives Kit once you connect it as a library.
The theme itself lives in the Theme Editor. Themes are stored in your organization and can be installed or updated with one click via the Figma plugin – no more copy & paste.
Import Custom Theme
Before you start
Open the Theme Editor, sign in, and create or edit a theme. Every theme is stored in your organization and will be available inside the Figma plugin.
You can manage multiple themes per organization – for example, one per brand or product line – and switch between them later in Figma.
1. Open Primitives Library
In Figma, open either Skeleton v3.x.fig or Primitives v4.x.fig.
2. Open the Skeleton Figma plugin
Click Actions¹ in the toolbar, search for Skeleton Themes², and choose it from the list³.
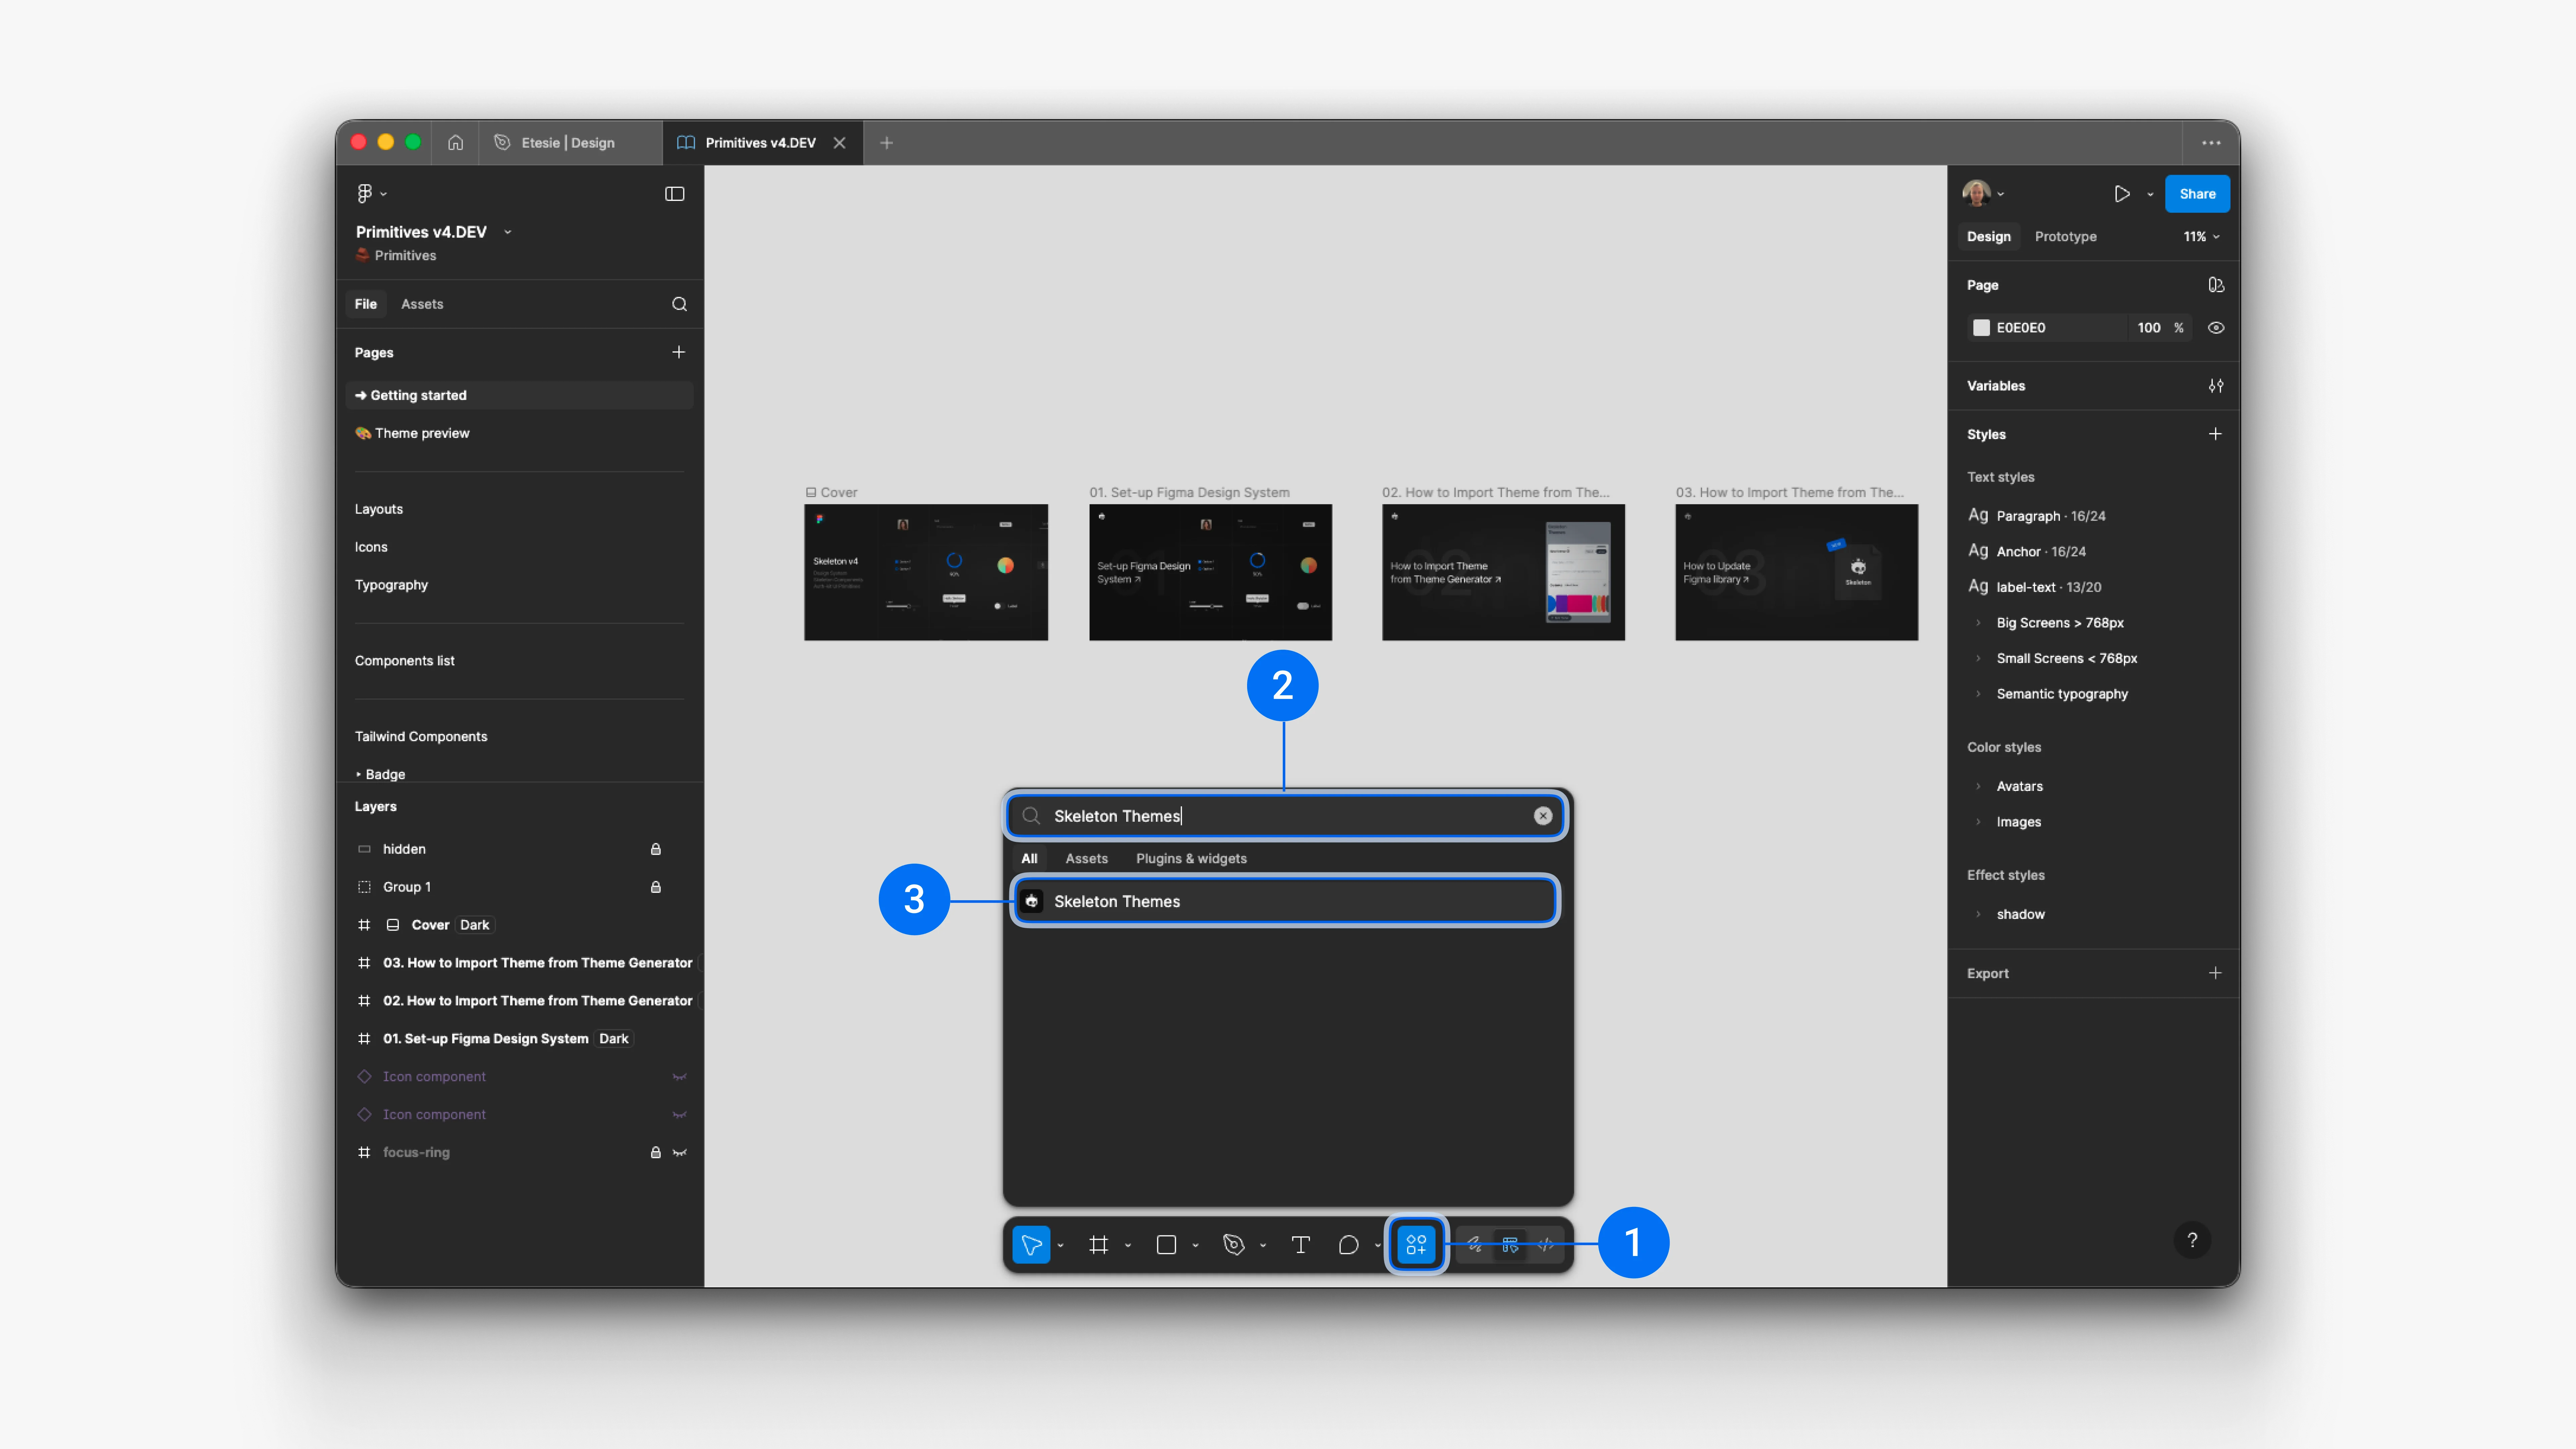
3. Sign in & load your themes
Click Sign in in the plugin. Your browser opens automatically and walks you through the login. Once confirmed, the plugin reloads and shows all themes stored in your organization.
All themes you create in the Theme Editor appear here — ready to install or update with one click.
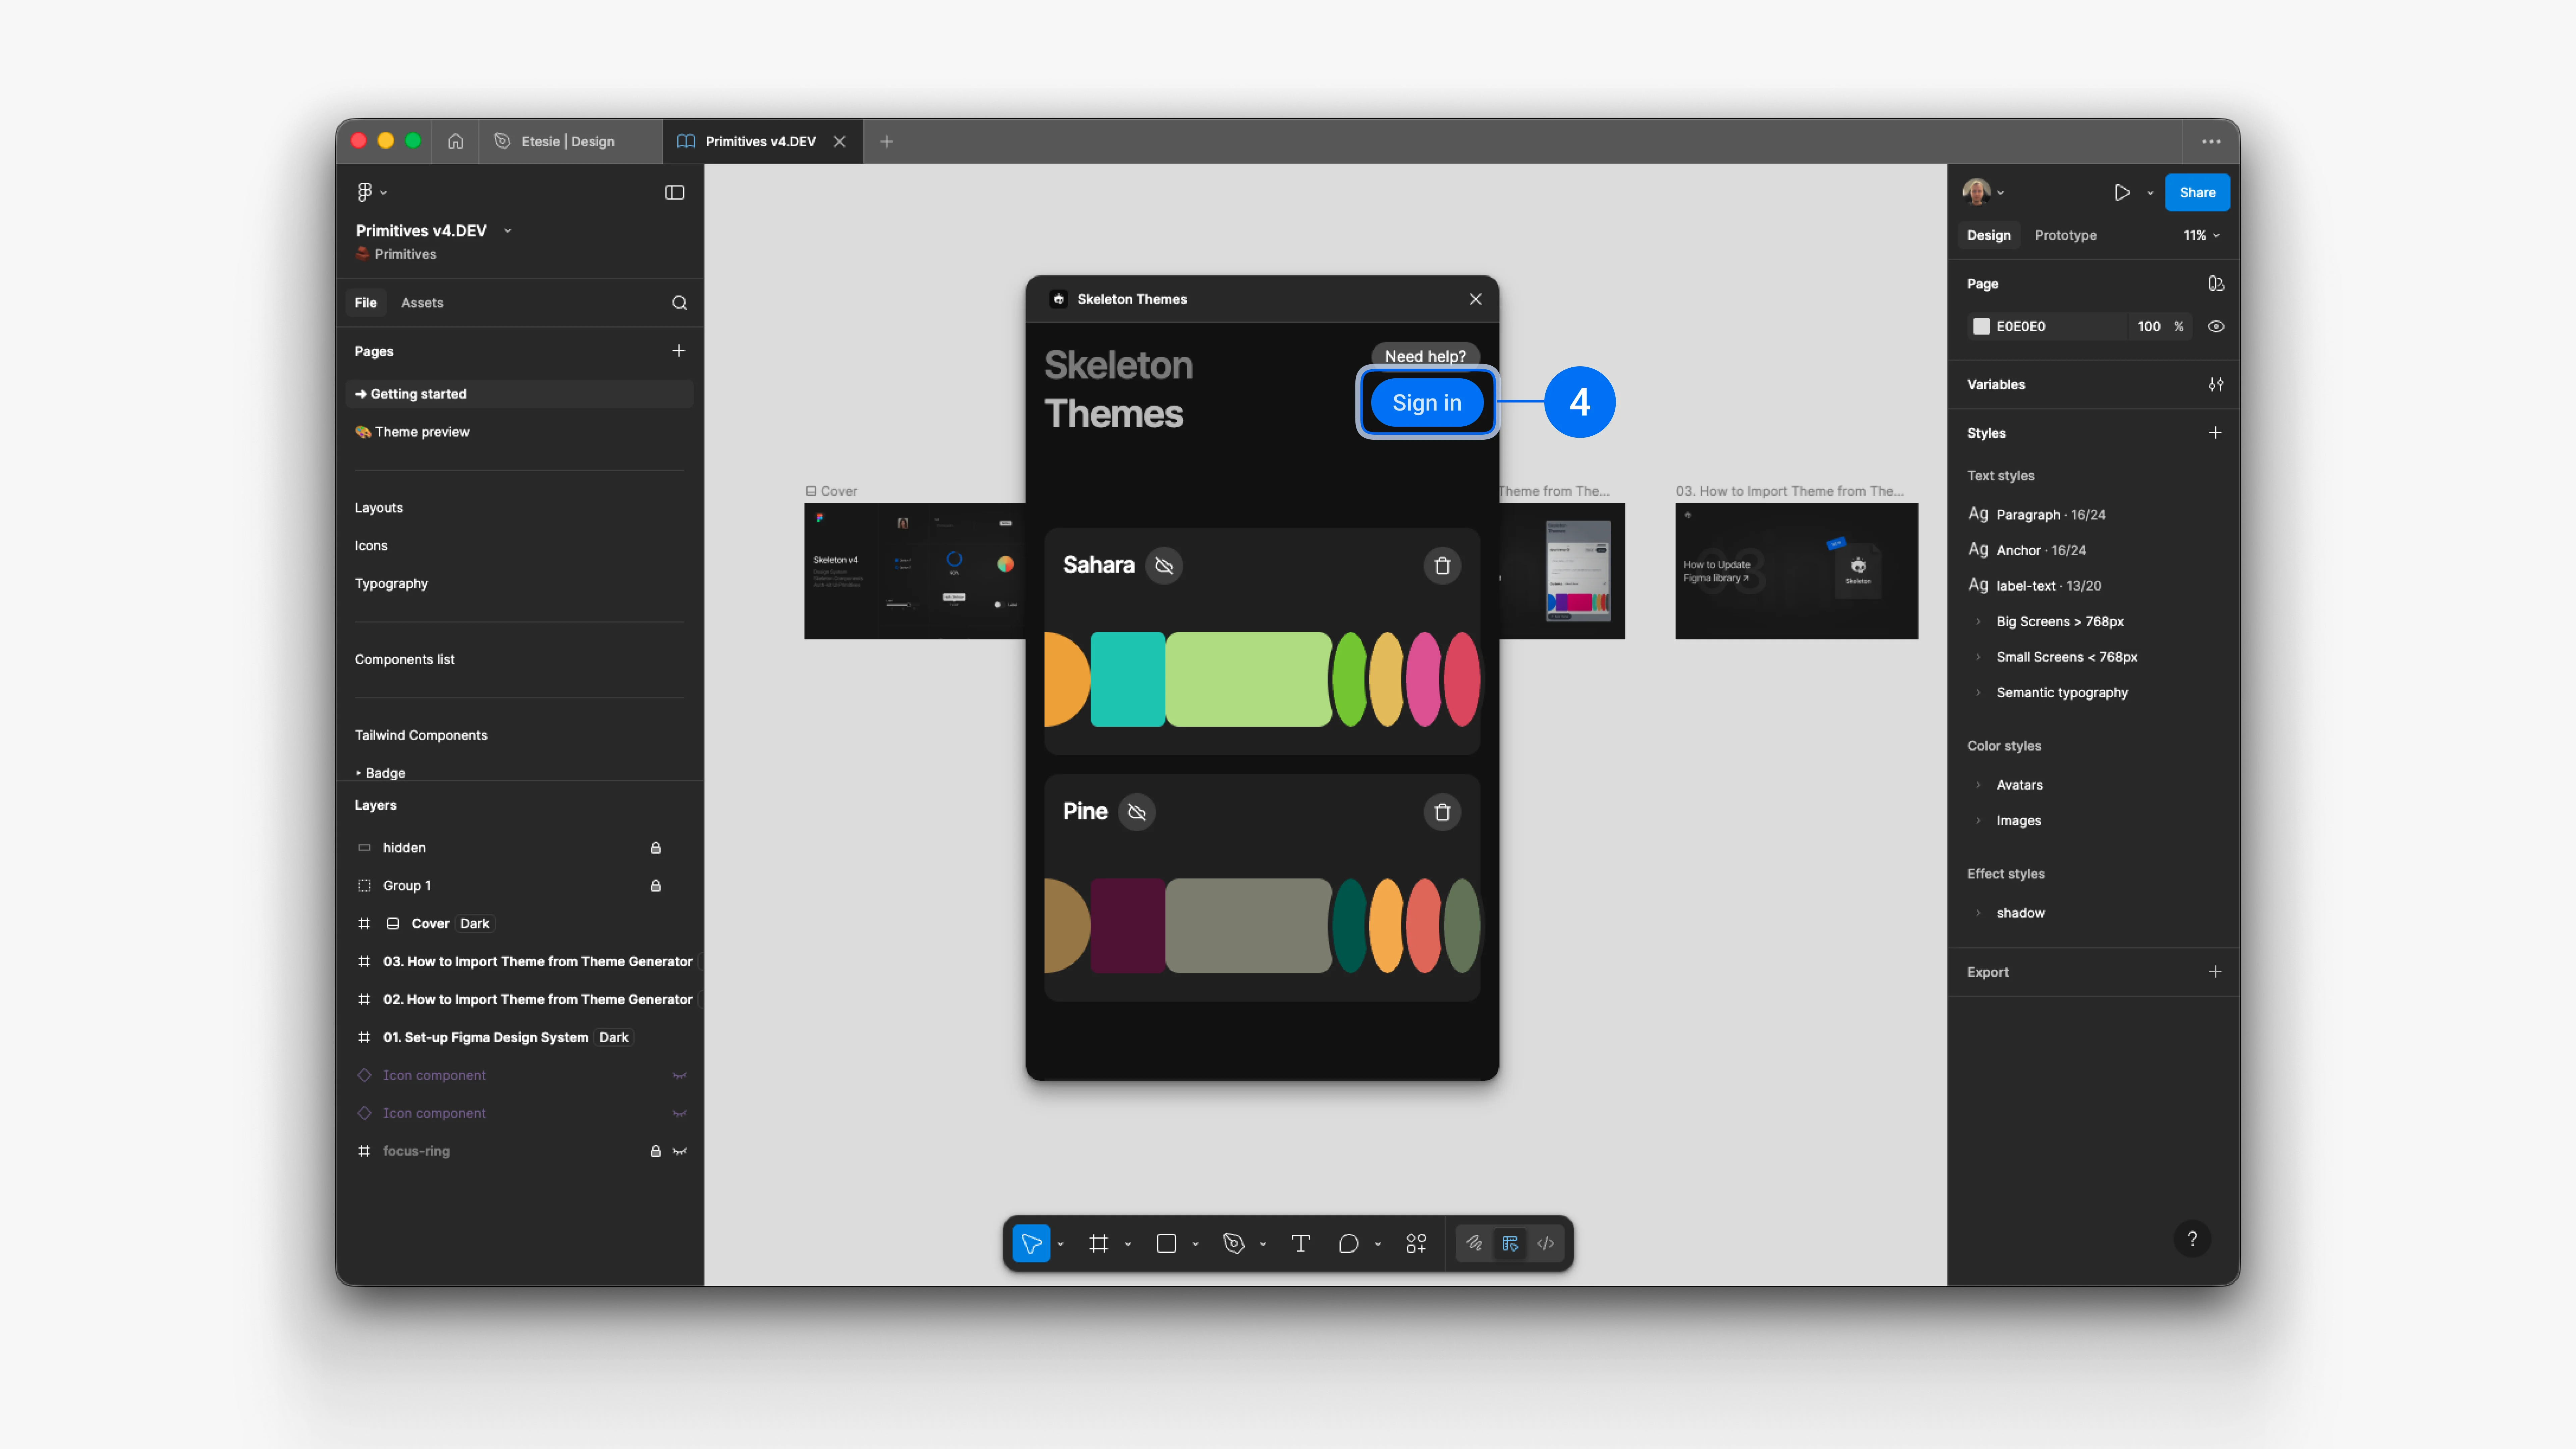
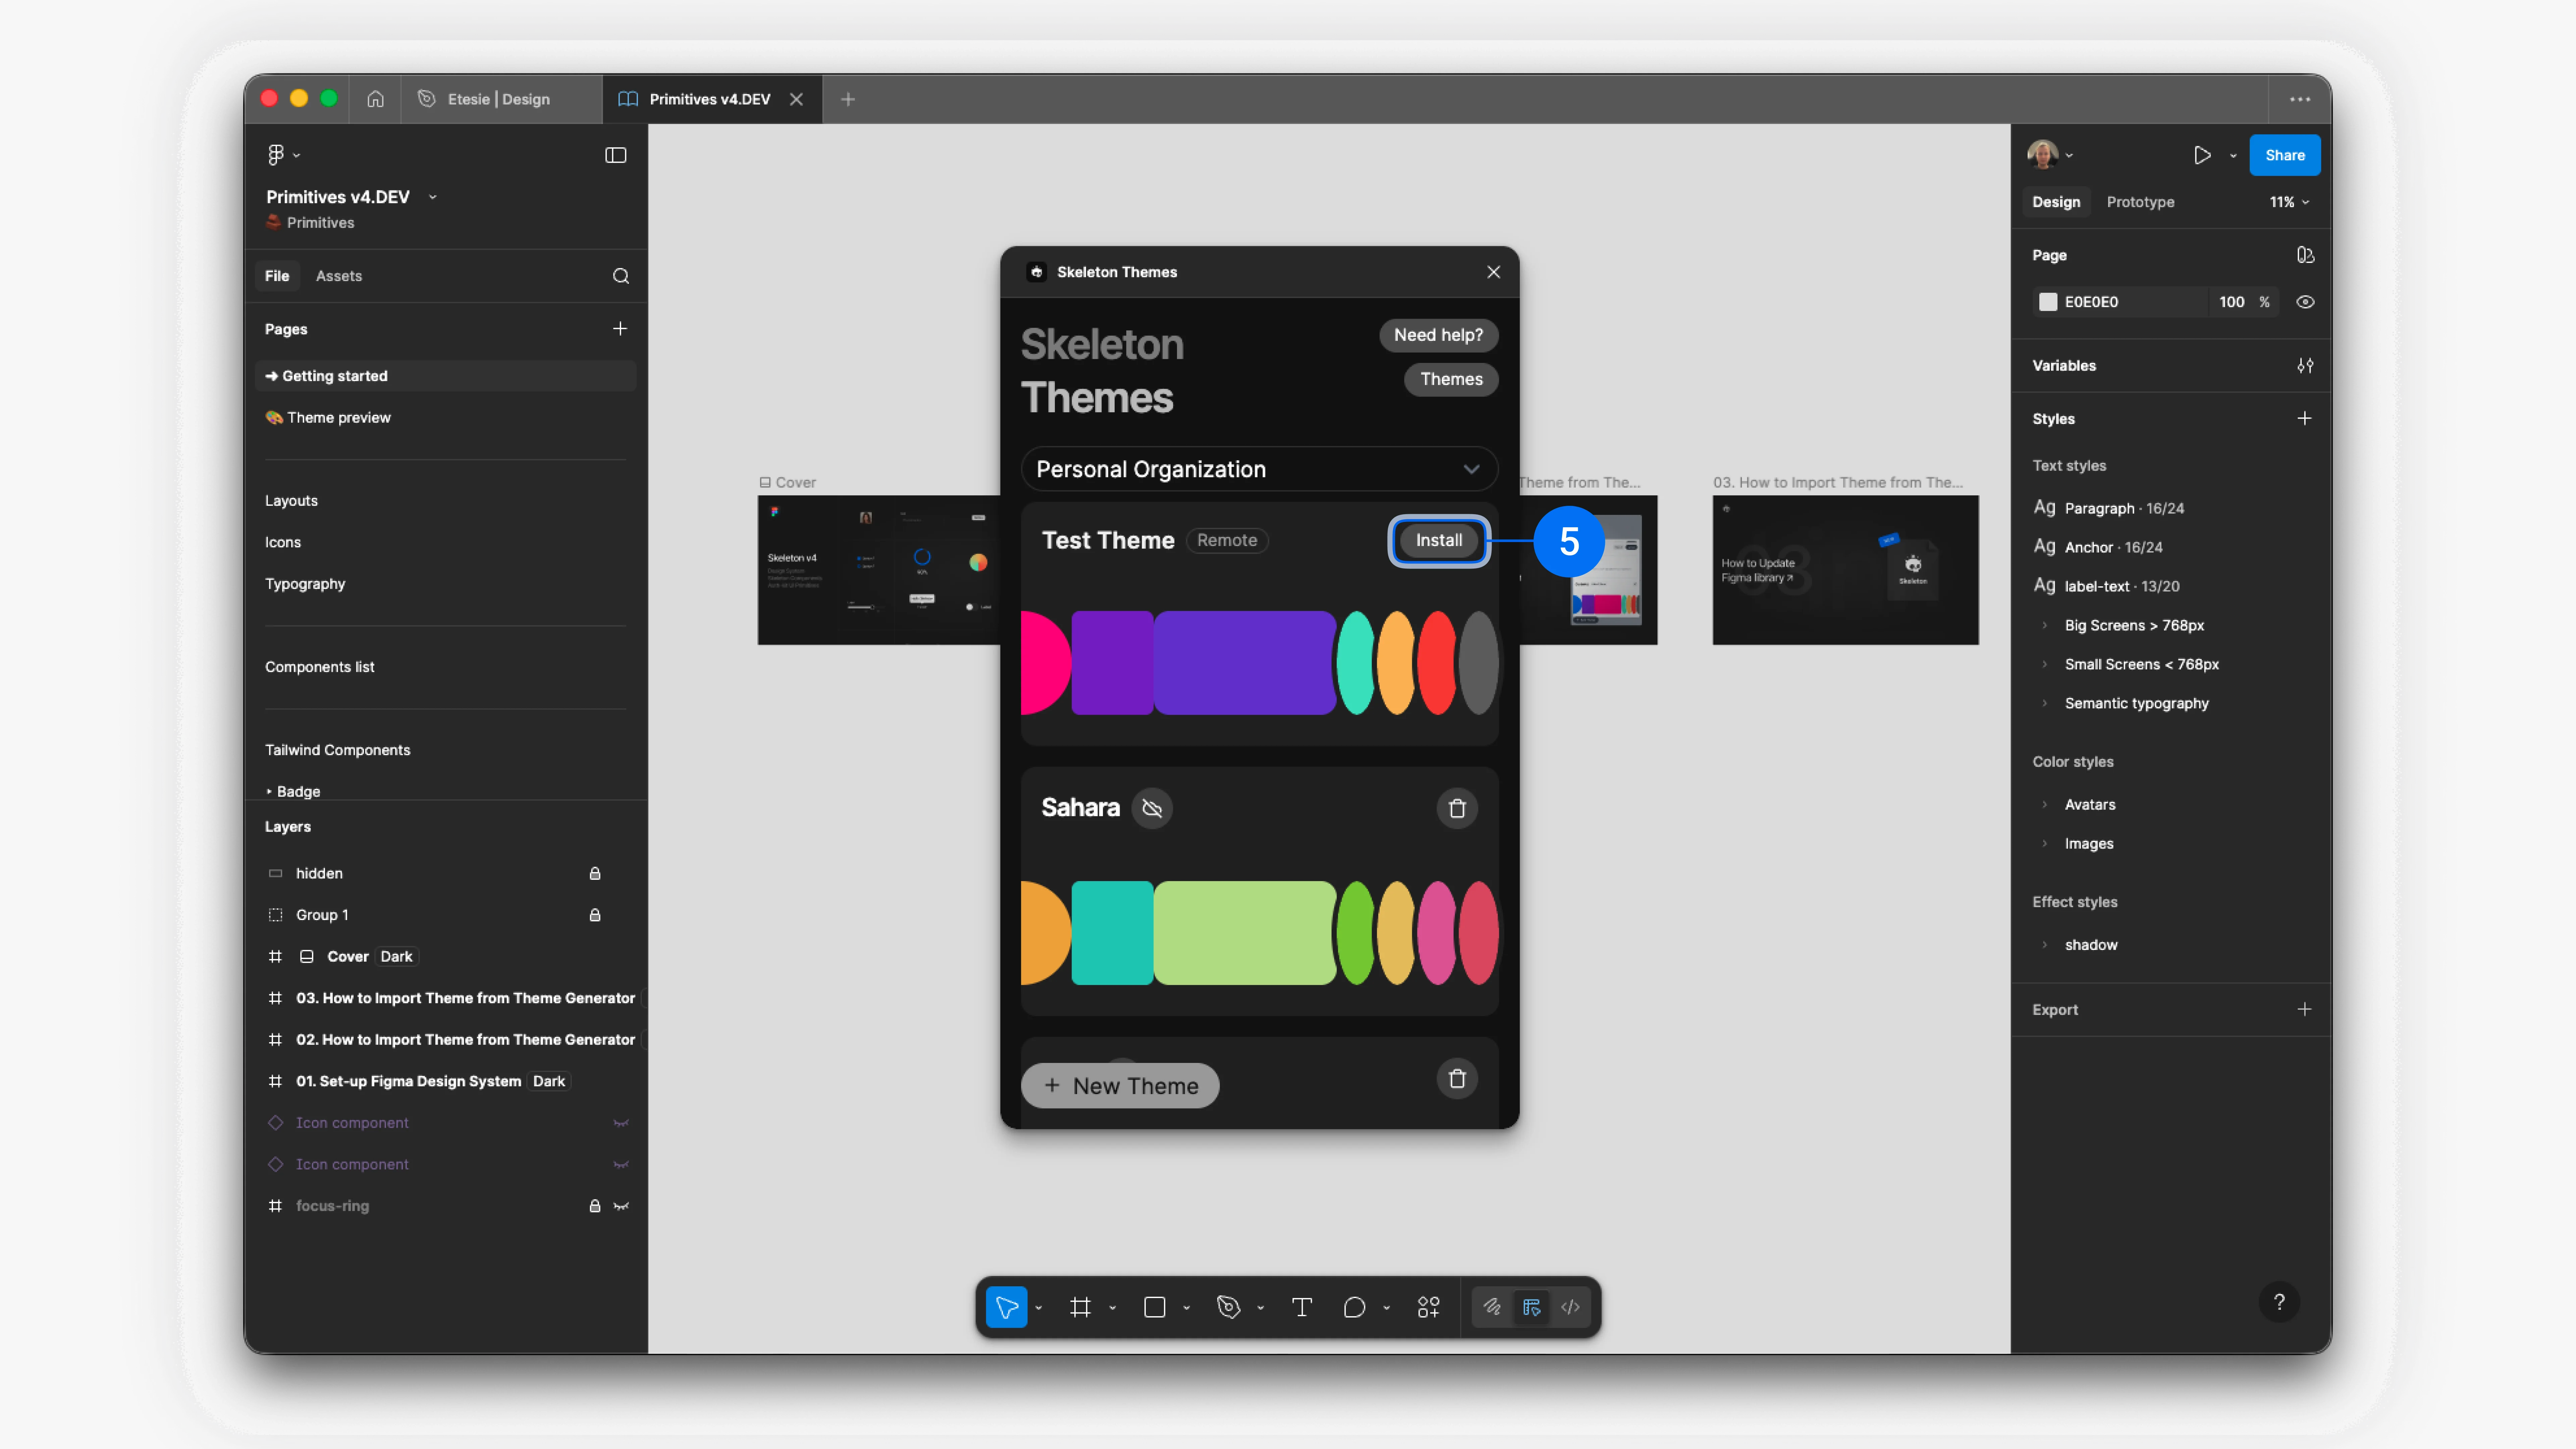
4. Choose a theme to install
From the theme list, pick the theme you want to apply (for example Brand – Default or Brand – Marketing).
The plugin shows a short summary (name, version, last updated) so you can confirm you’re using the right one.

5. Install or update the theme
Click Install⁵ theme (or Update theme if it was already applied before). The plugin writes all color, typography, and spacing variables into your current Figma file.
You don’t need to copy code or touch the variables manually – the plugin keeps the Figma variables in sync with your hosted theme definition.
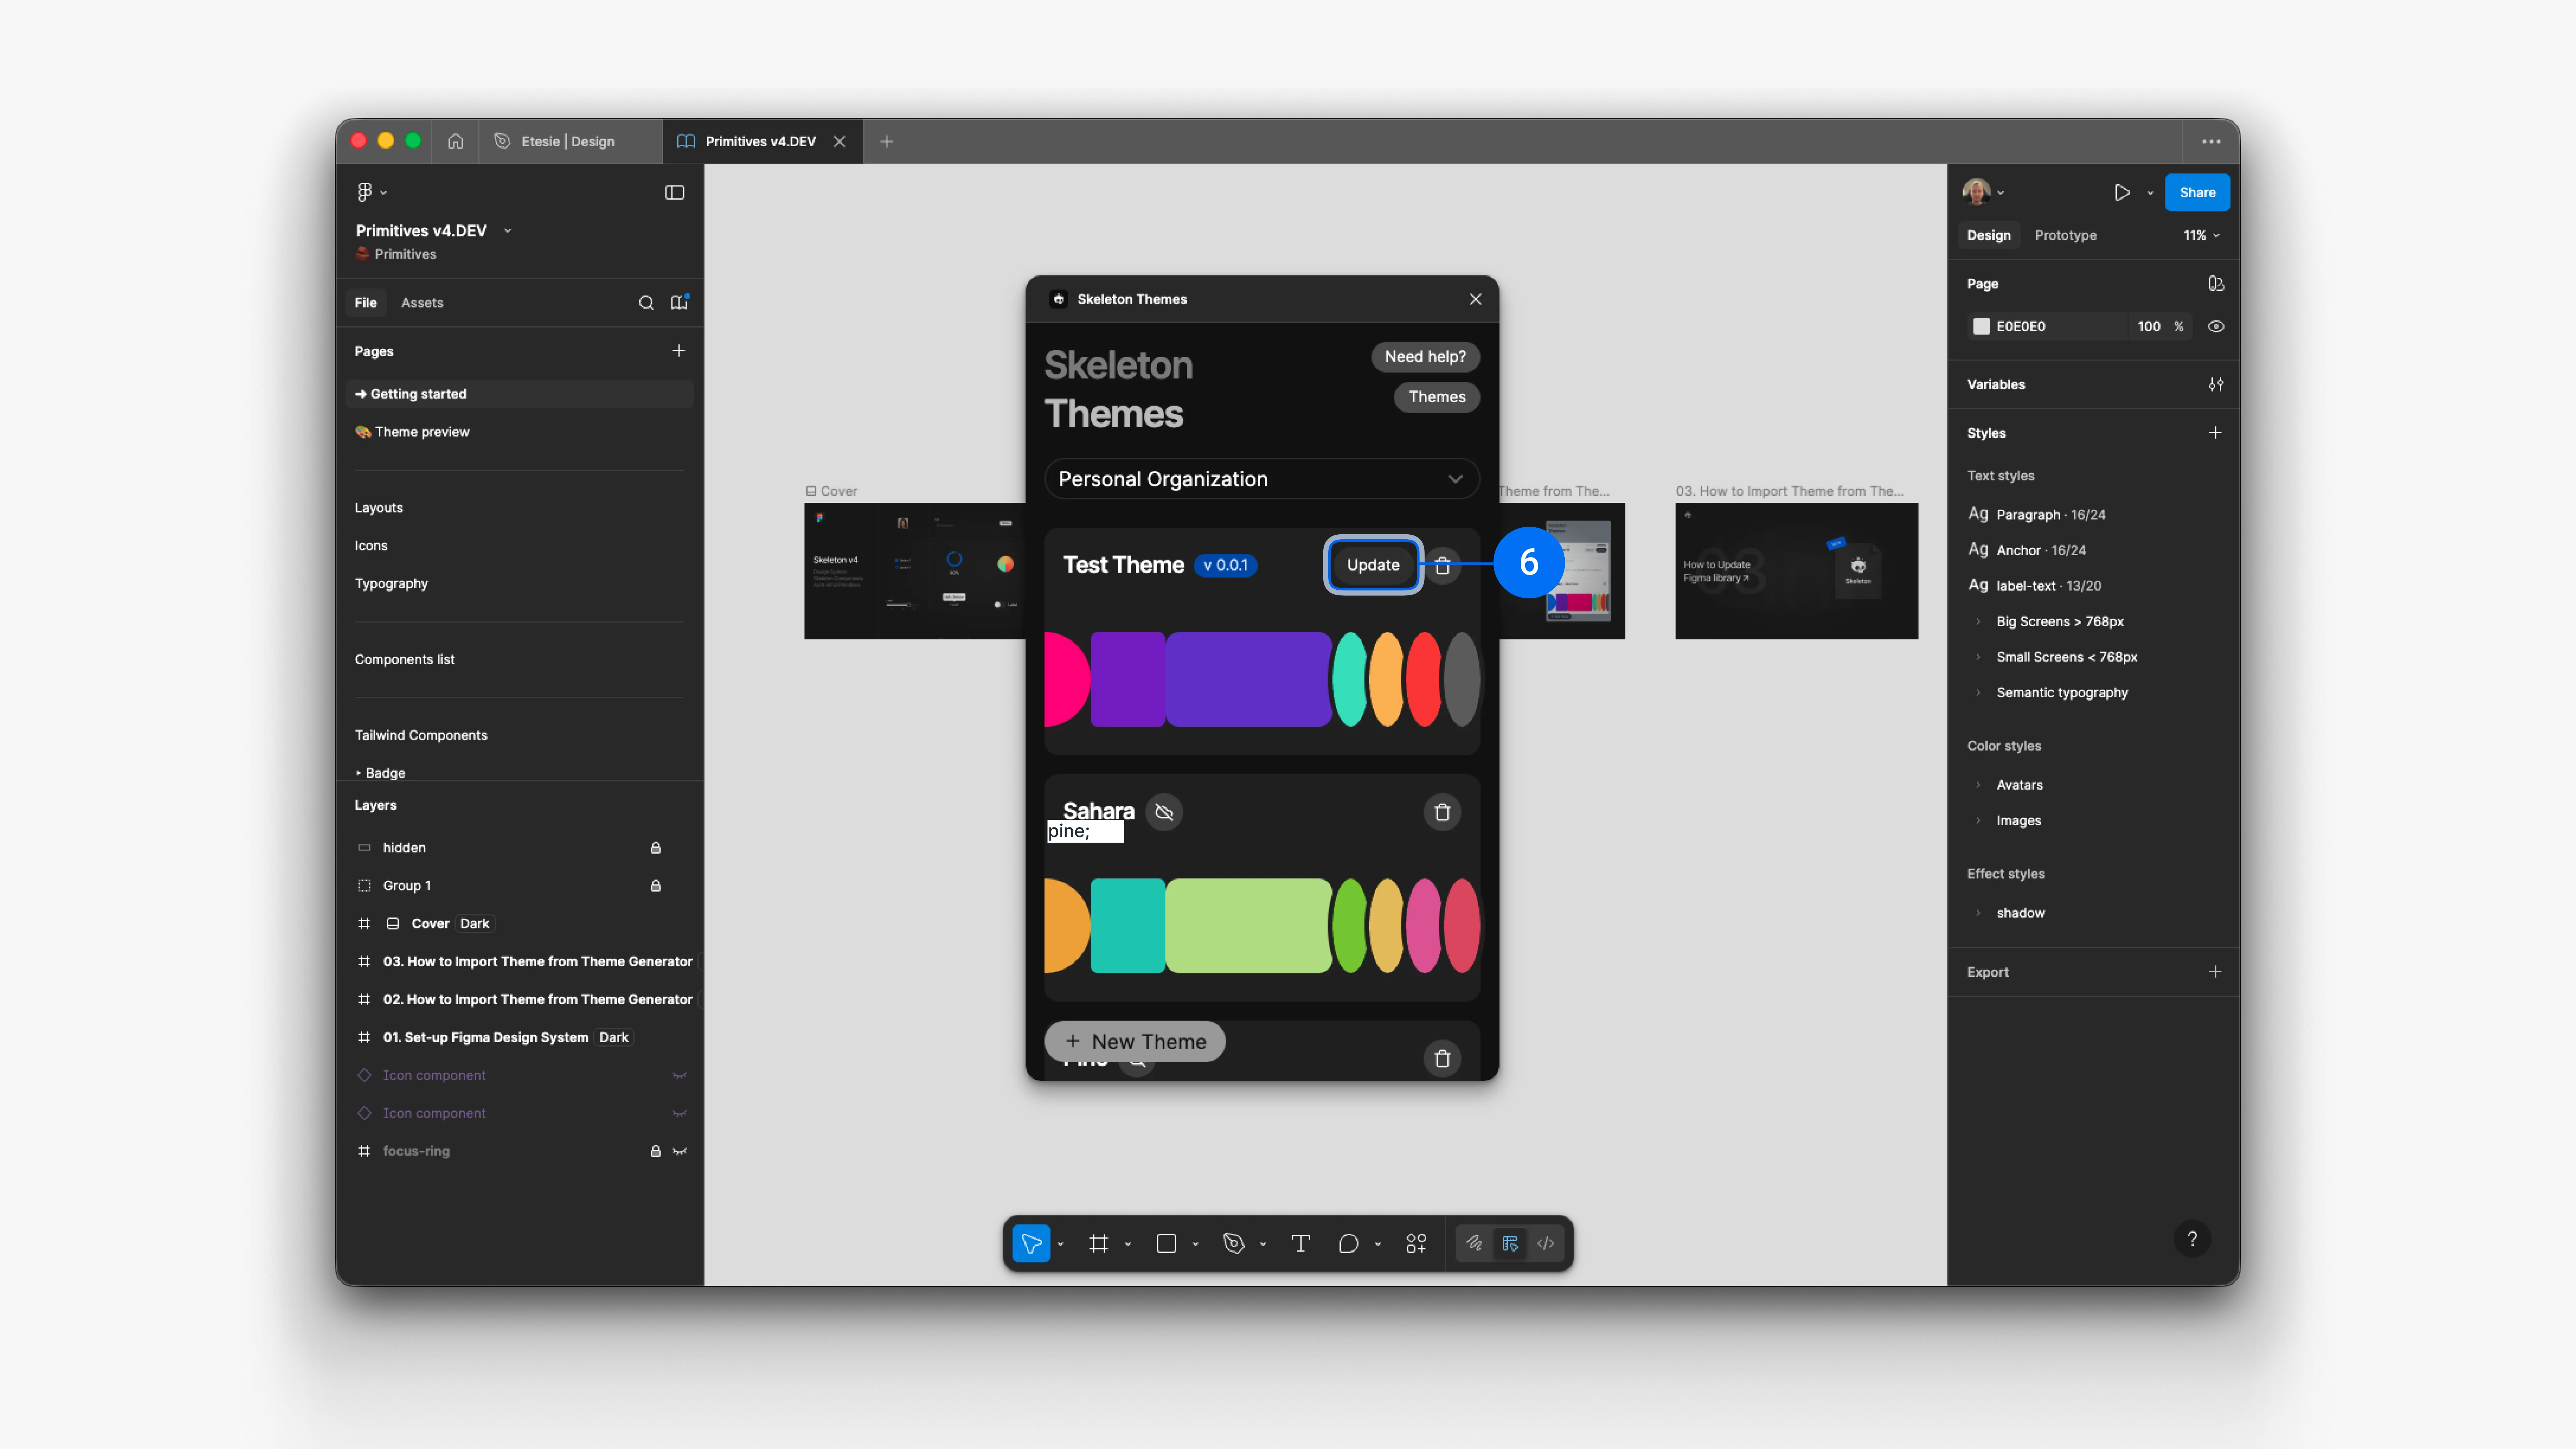
6. Re-run install when the theme changes
Whenever you update a theme in the Theme Editor, simply re-open the plugin and click Update⁶ for that theme. Your Primitives / Skeleton file is refreshed to the latest version.
This keeps design, code, and Auth aligned without manual exports or copy & paste.
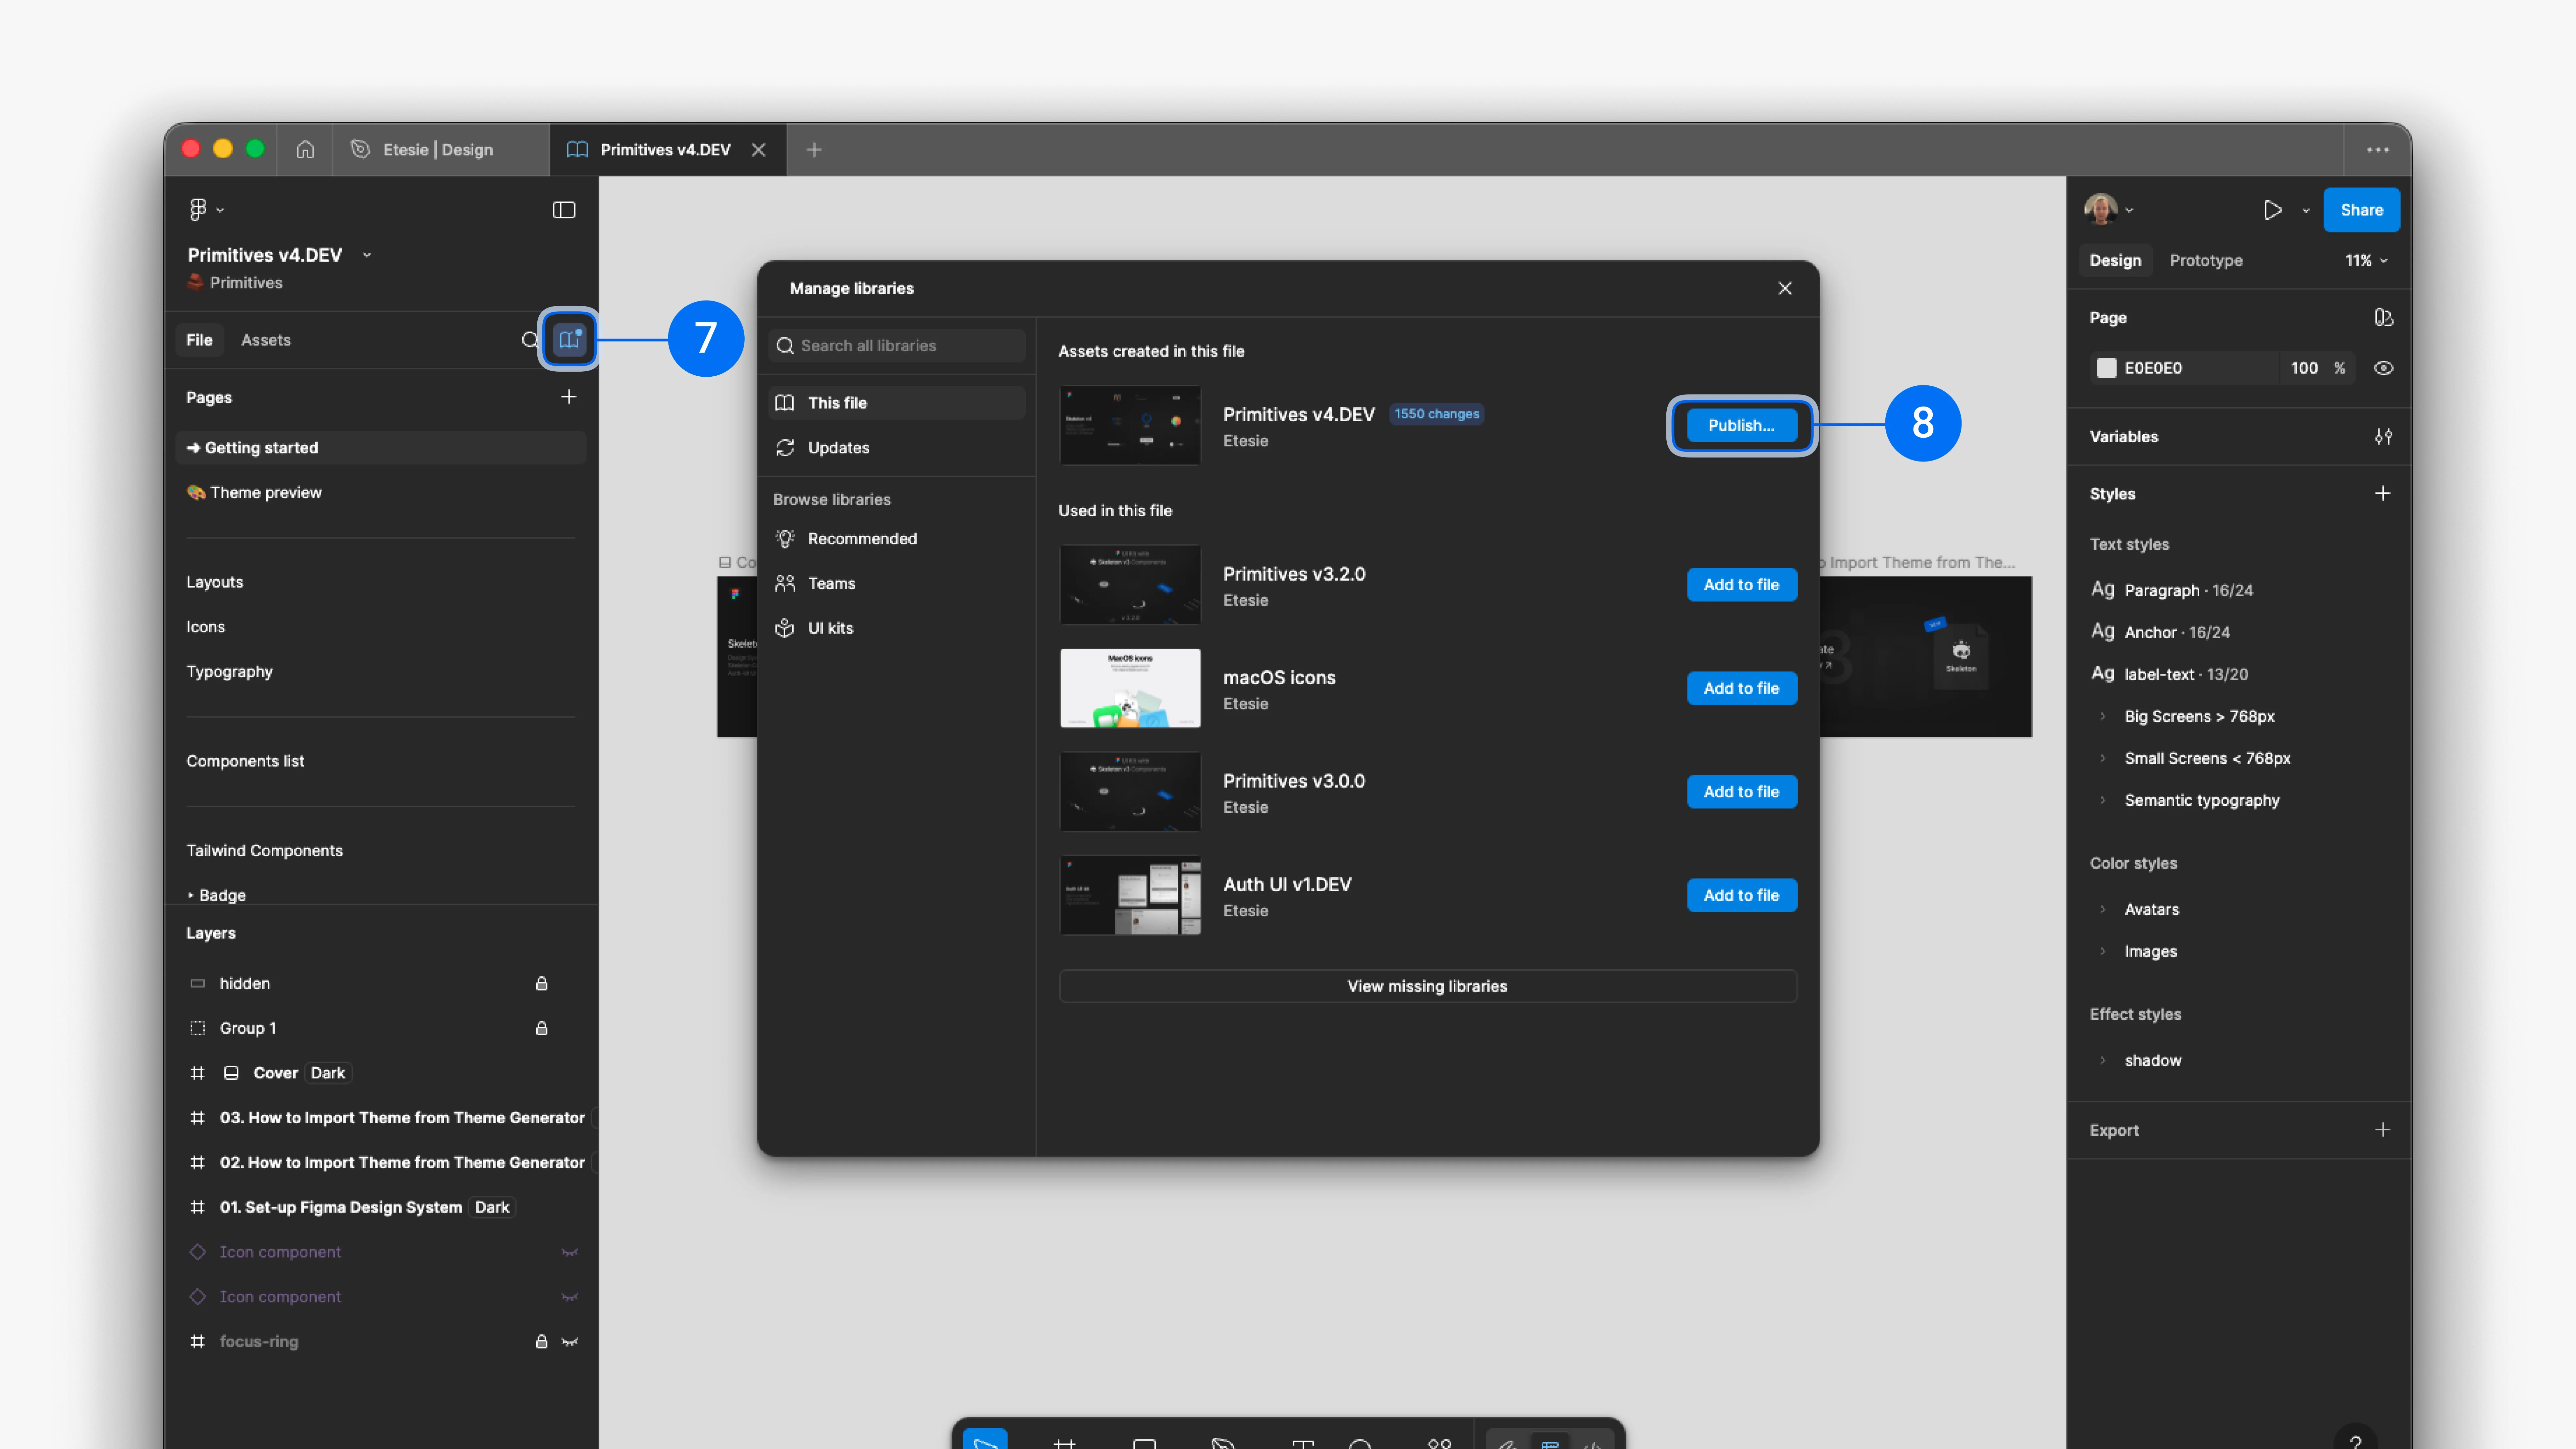
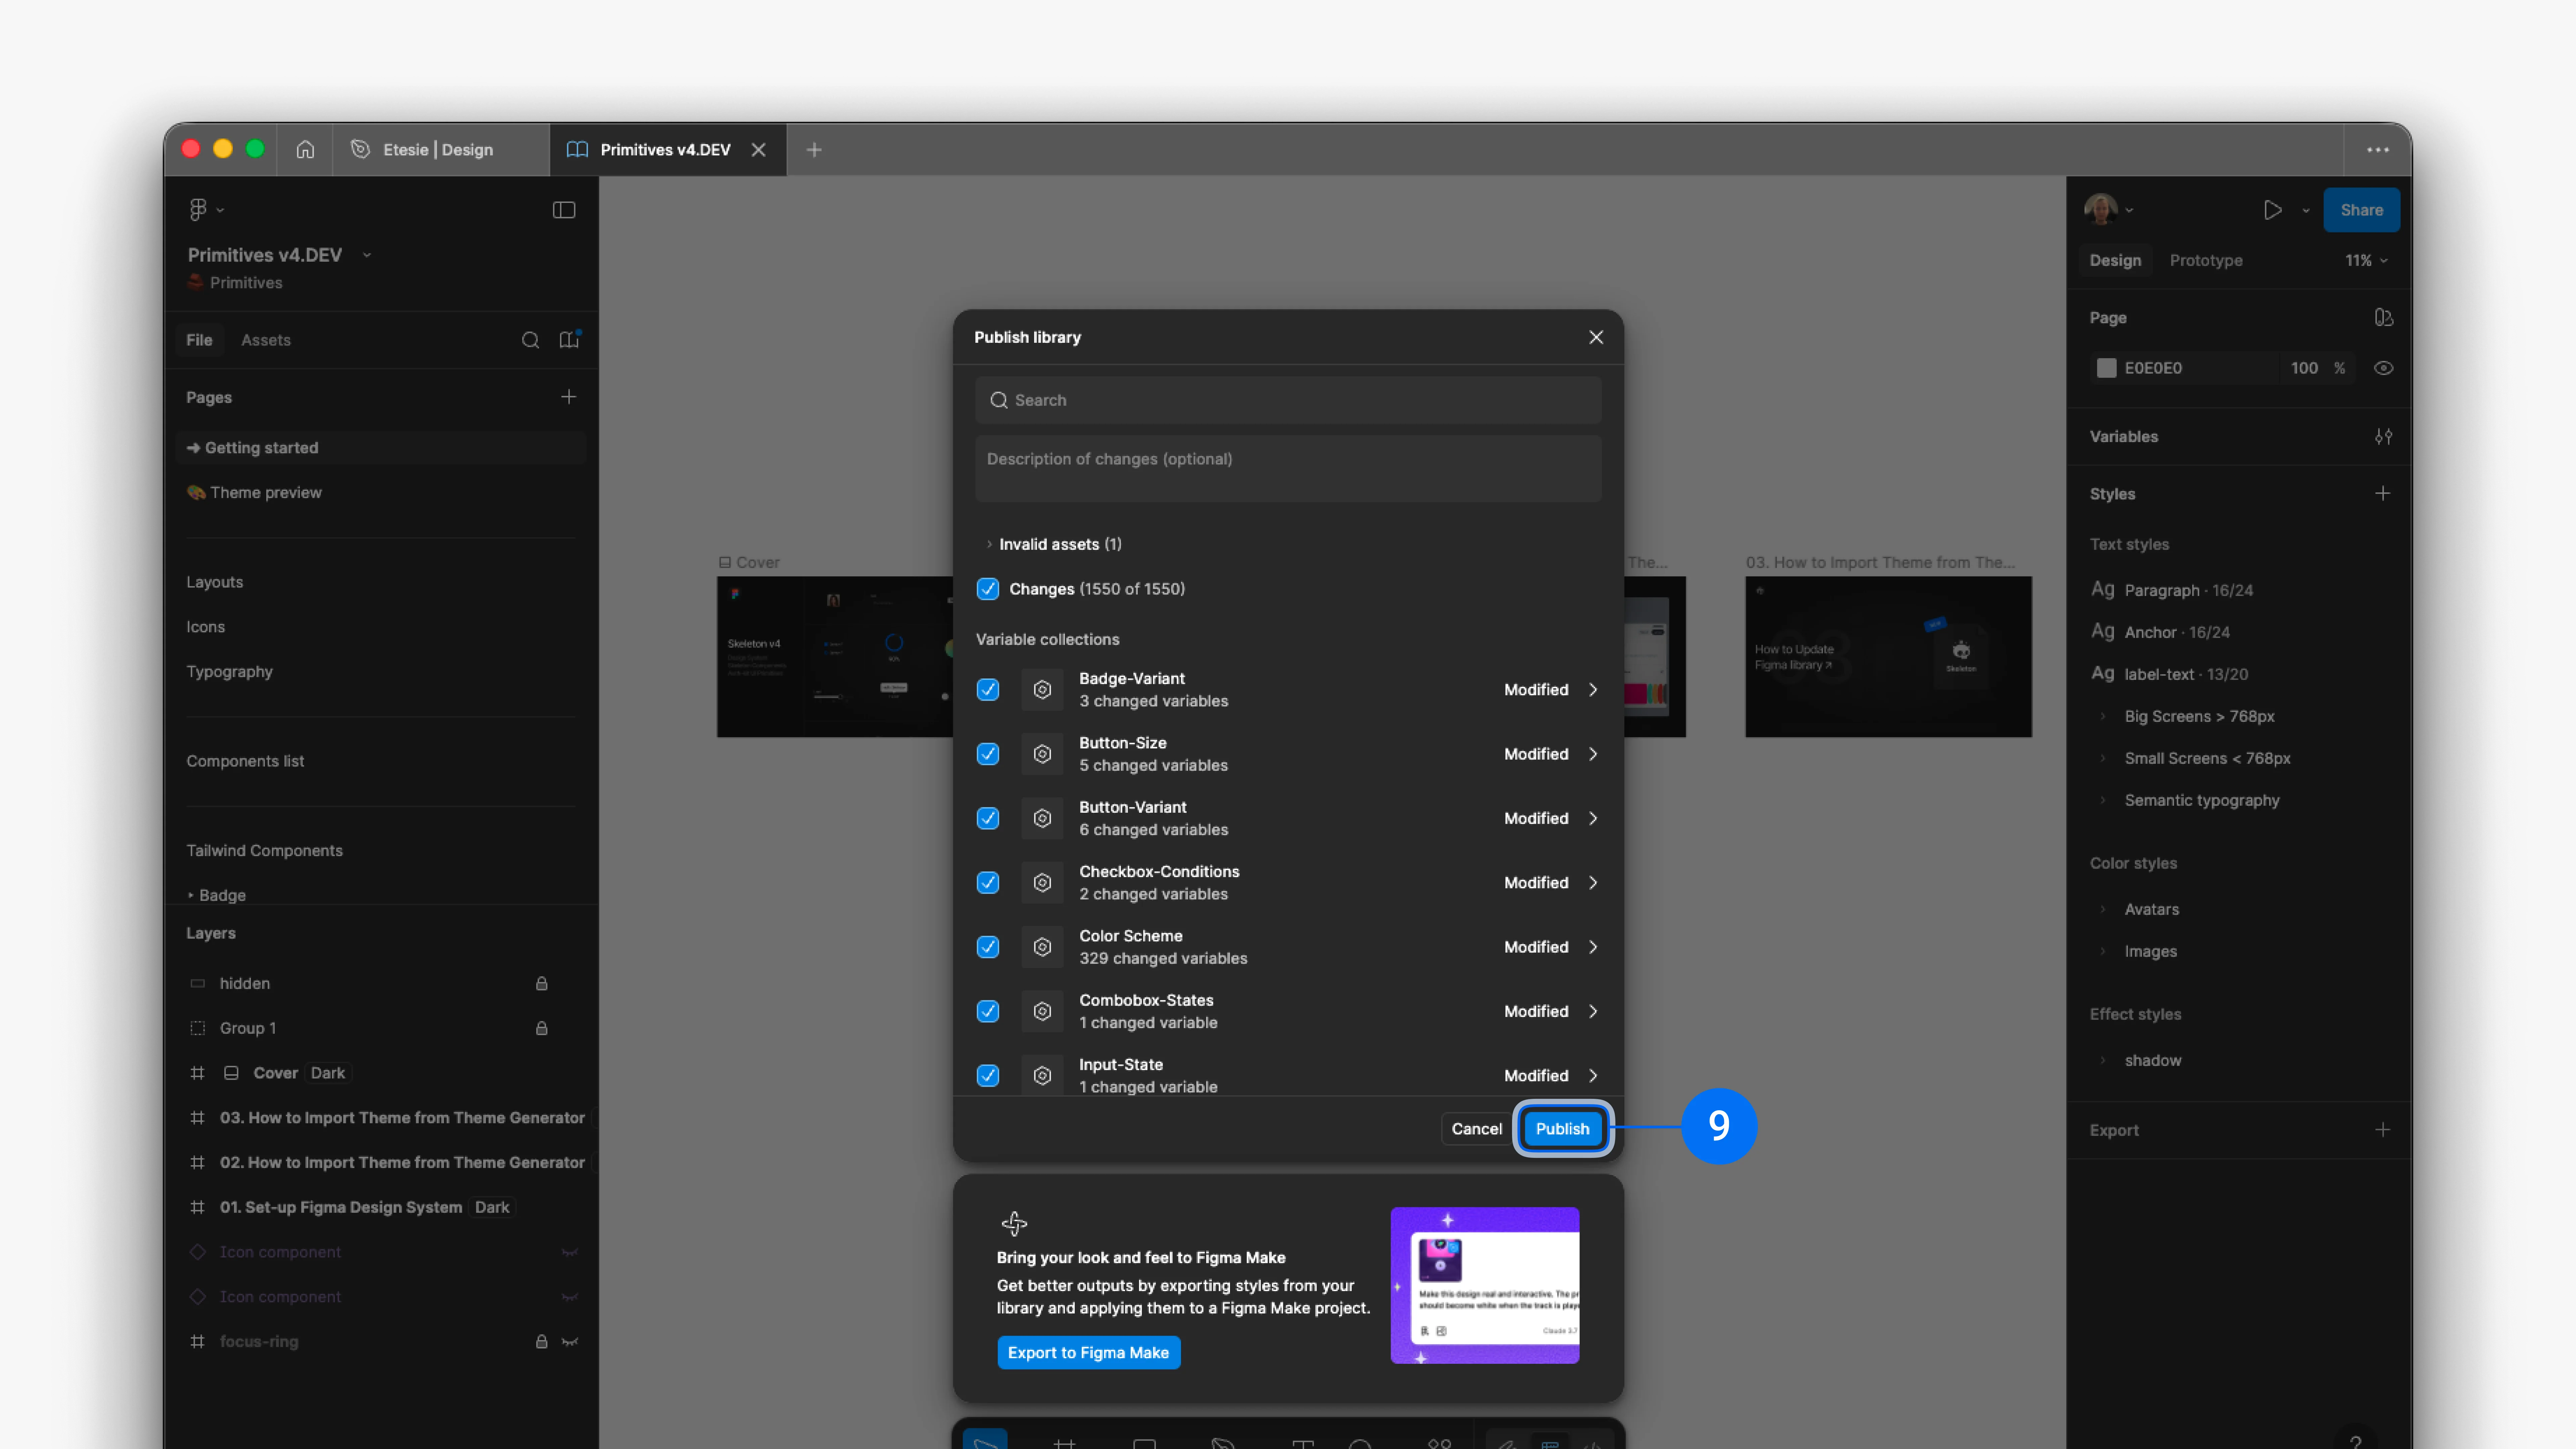
7. Publish updates
To make the updated theme available in other Figma files, publish your library: click the book icon⁷ → Publish…⁸ → Publish⁹.
Publishing may take a few minutes.
Apply Custom Theme in Project
Prerequisites
Completed: Chapter 1: Setup & Usage
Completed: Chapter 2: Import Custom Theme
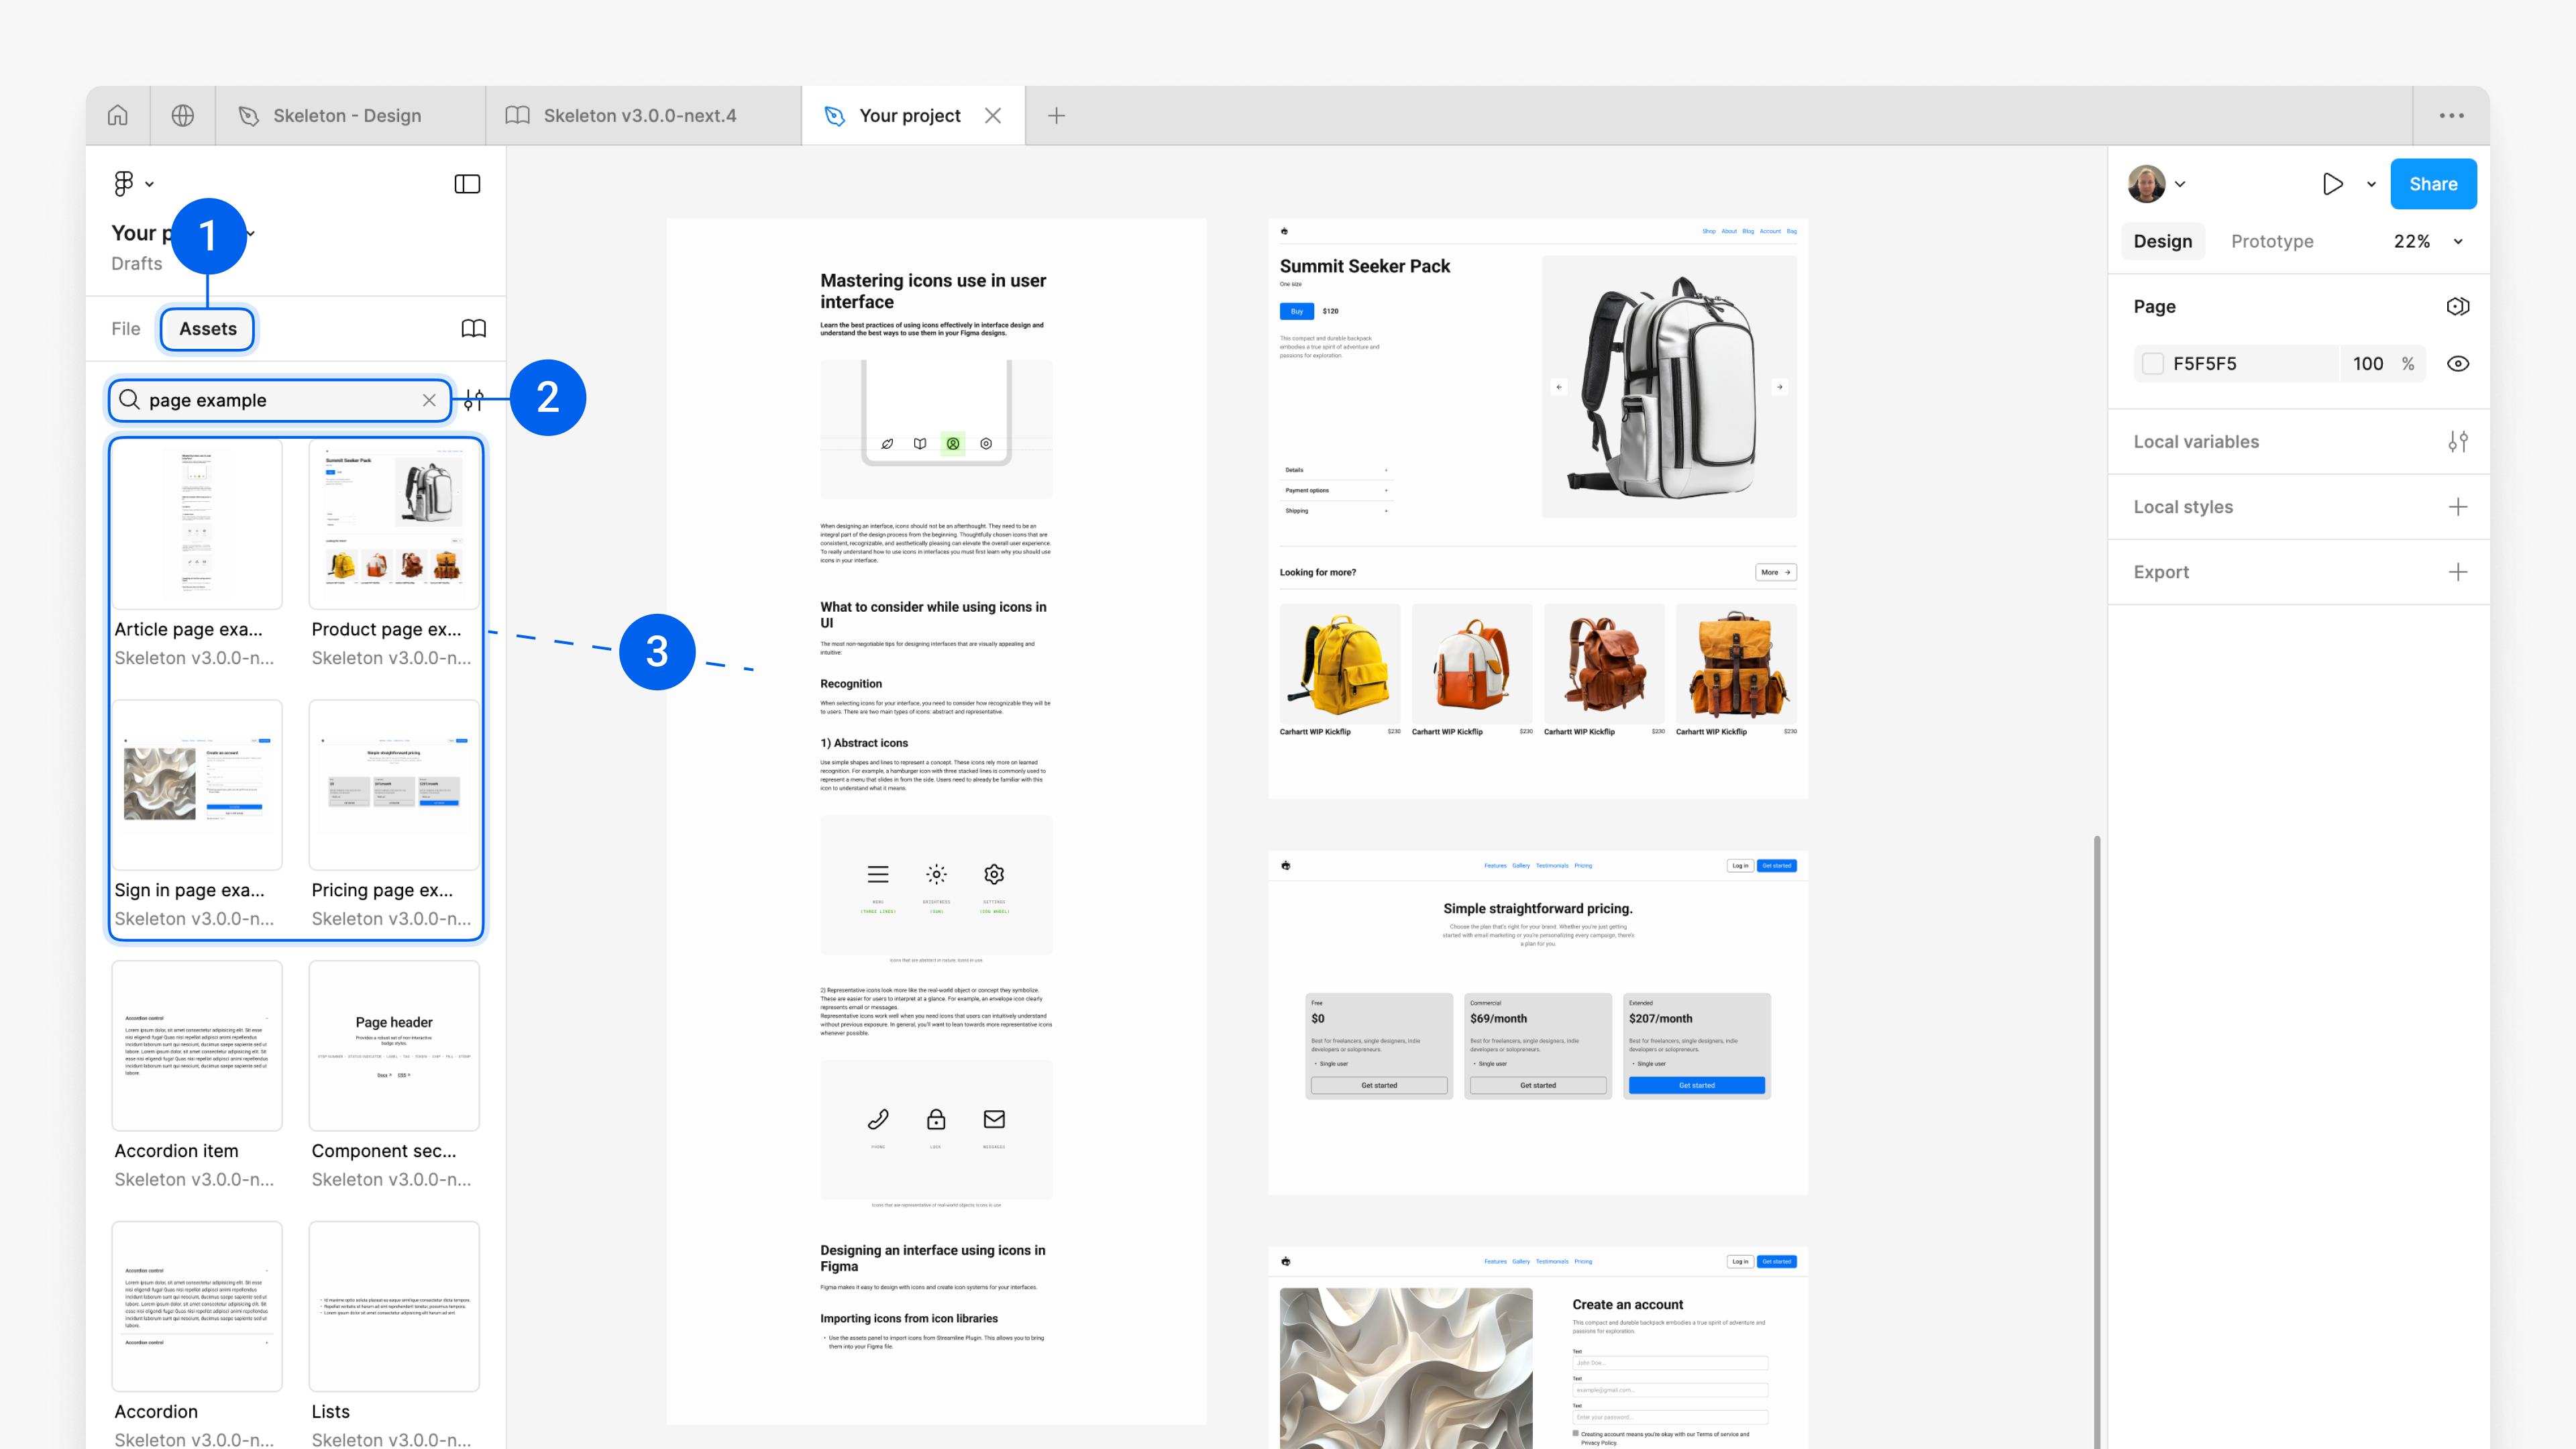
1. Open your project
Open any project where your themed library (Skeleton v3 or Primitives v4) is enabled.
2. Set the stage
Add example components or page layouts to the canvas to preview your theme. In the Primitives Kit, these examples mirror how a real app would look.
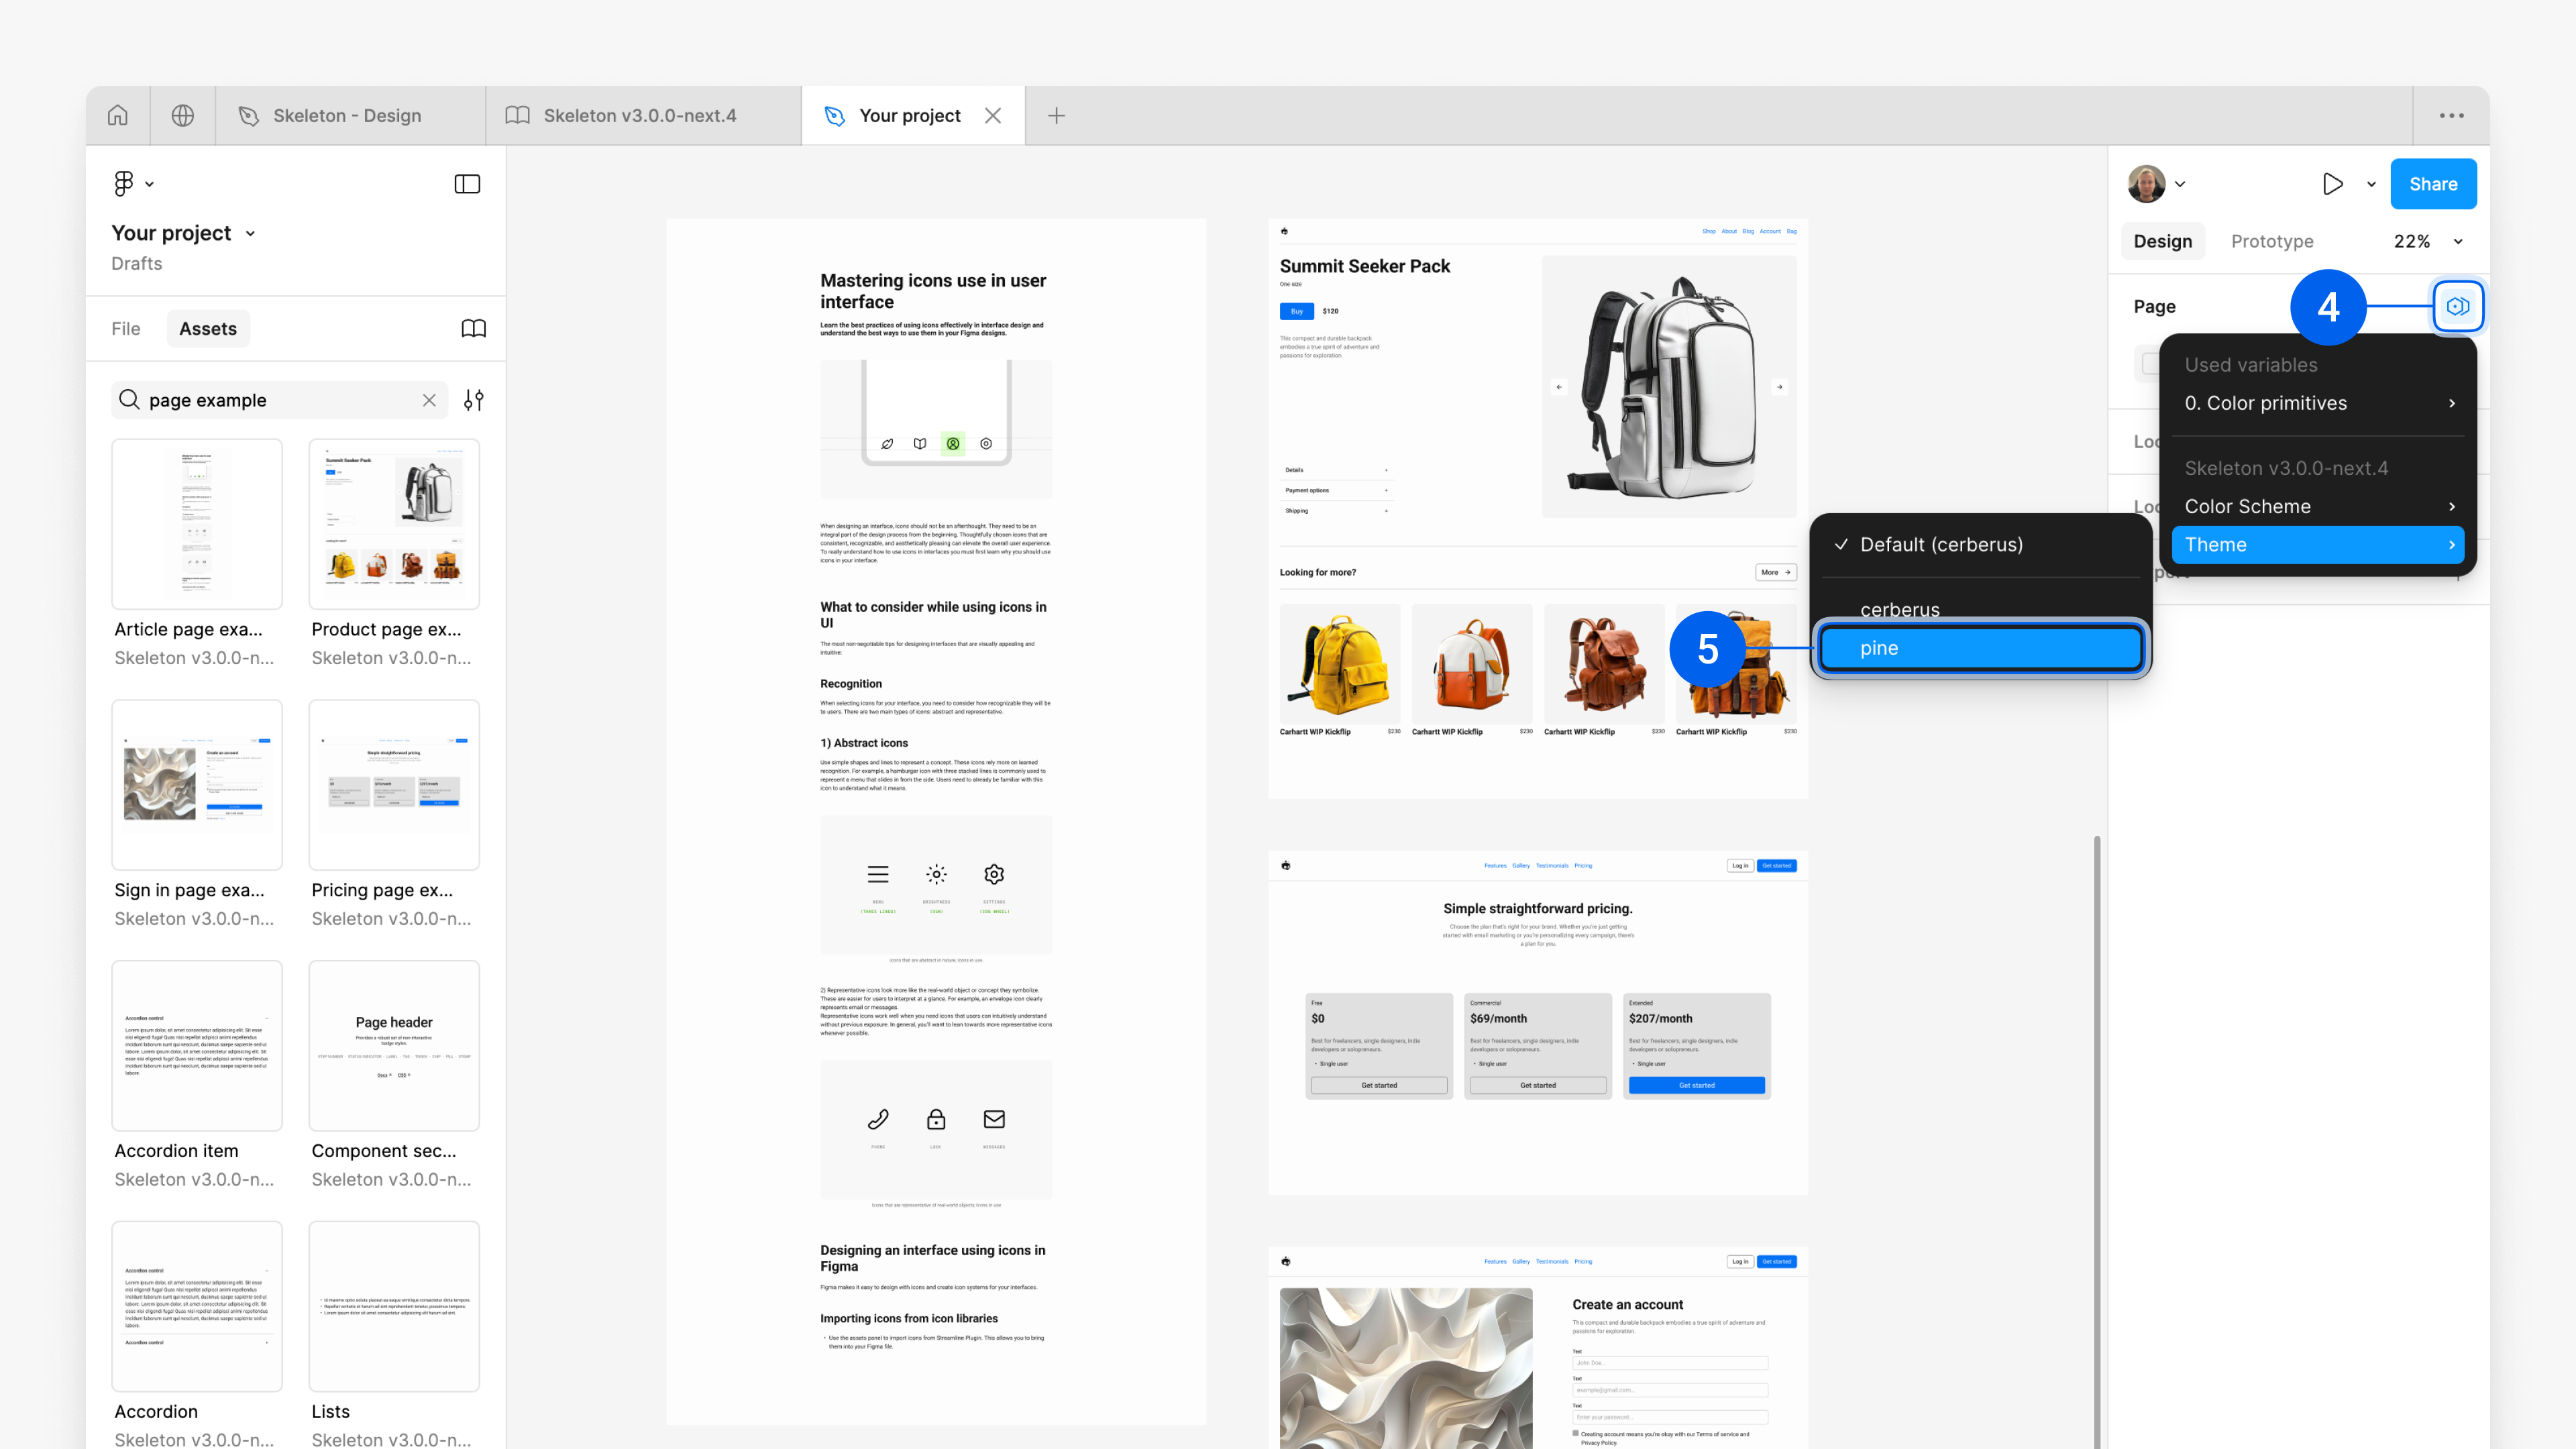
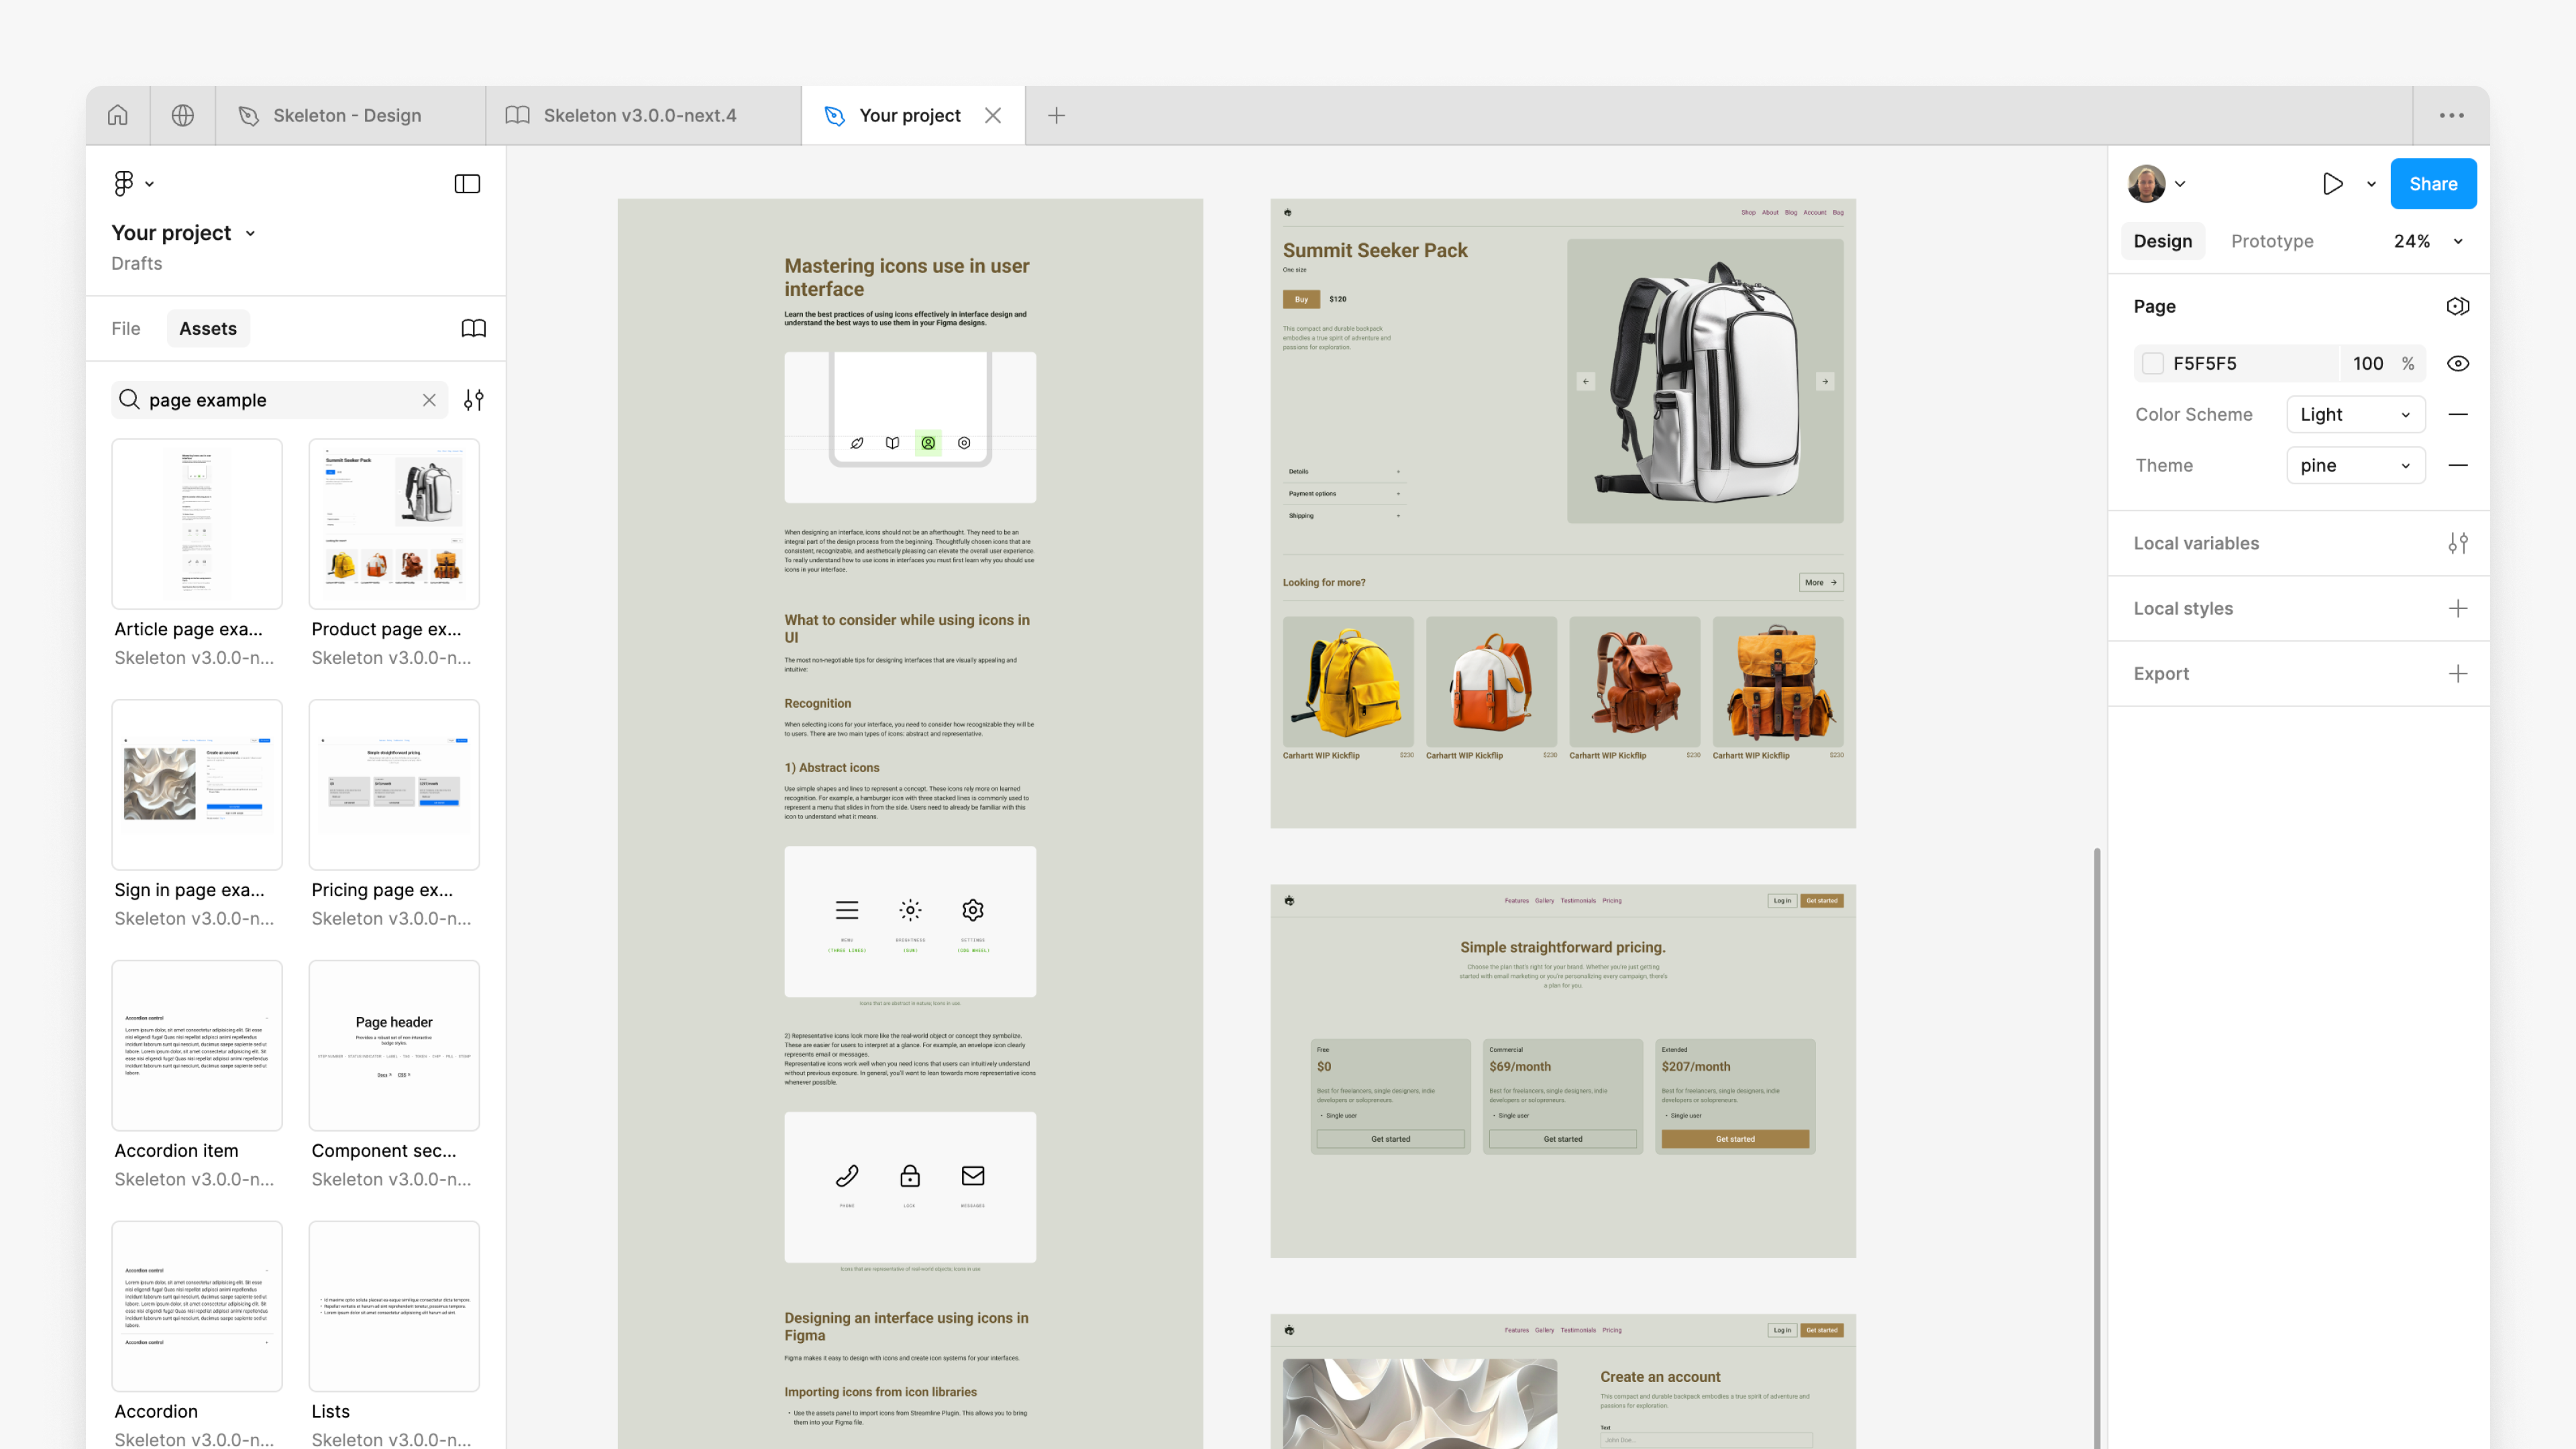
3. Switch theme
In the right panel, use Apply variable mode, hover over Theme, and select the theme you installed⁵.
Your design now updates instantly to your custom theme.
Once your Auth Kit is connected to the Primitives variables, it inherits the same theme automatically – no separate setup needed.
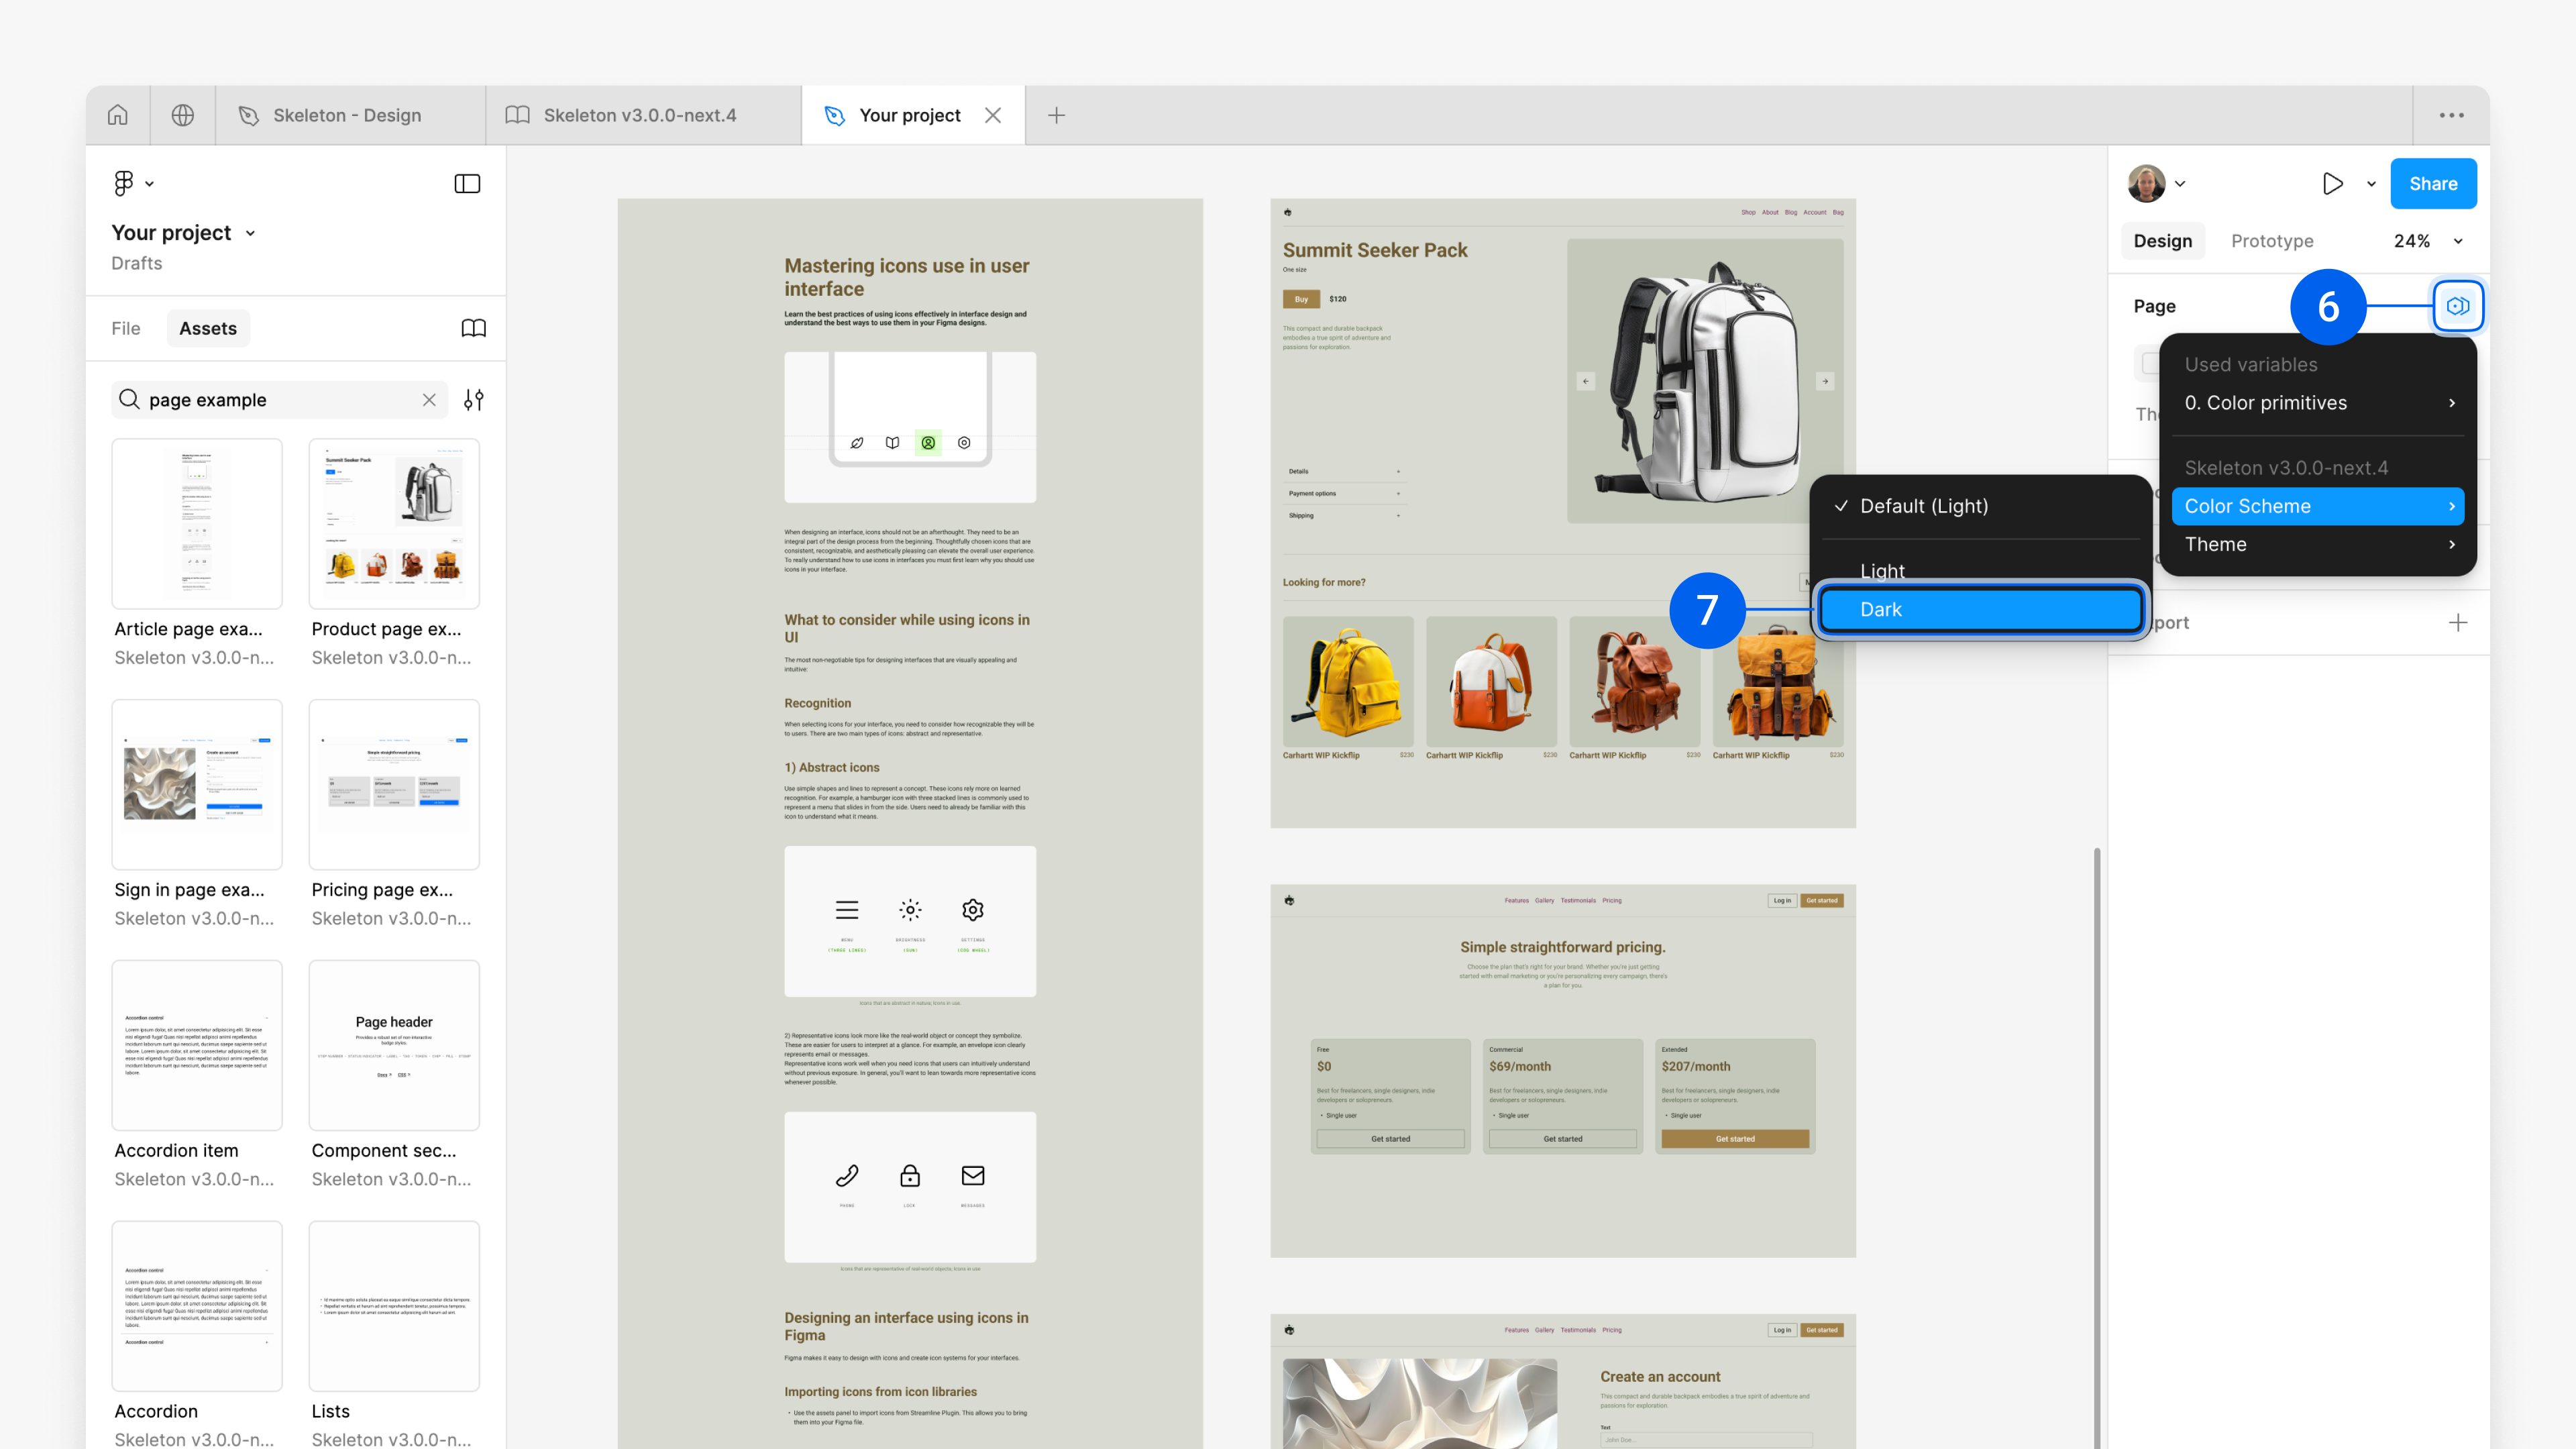
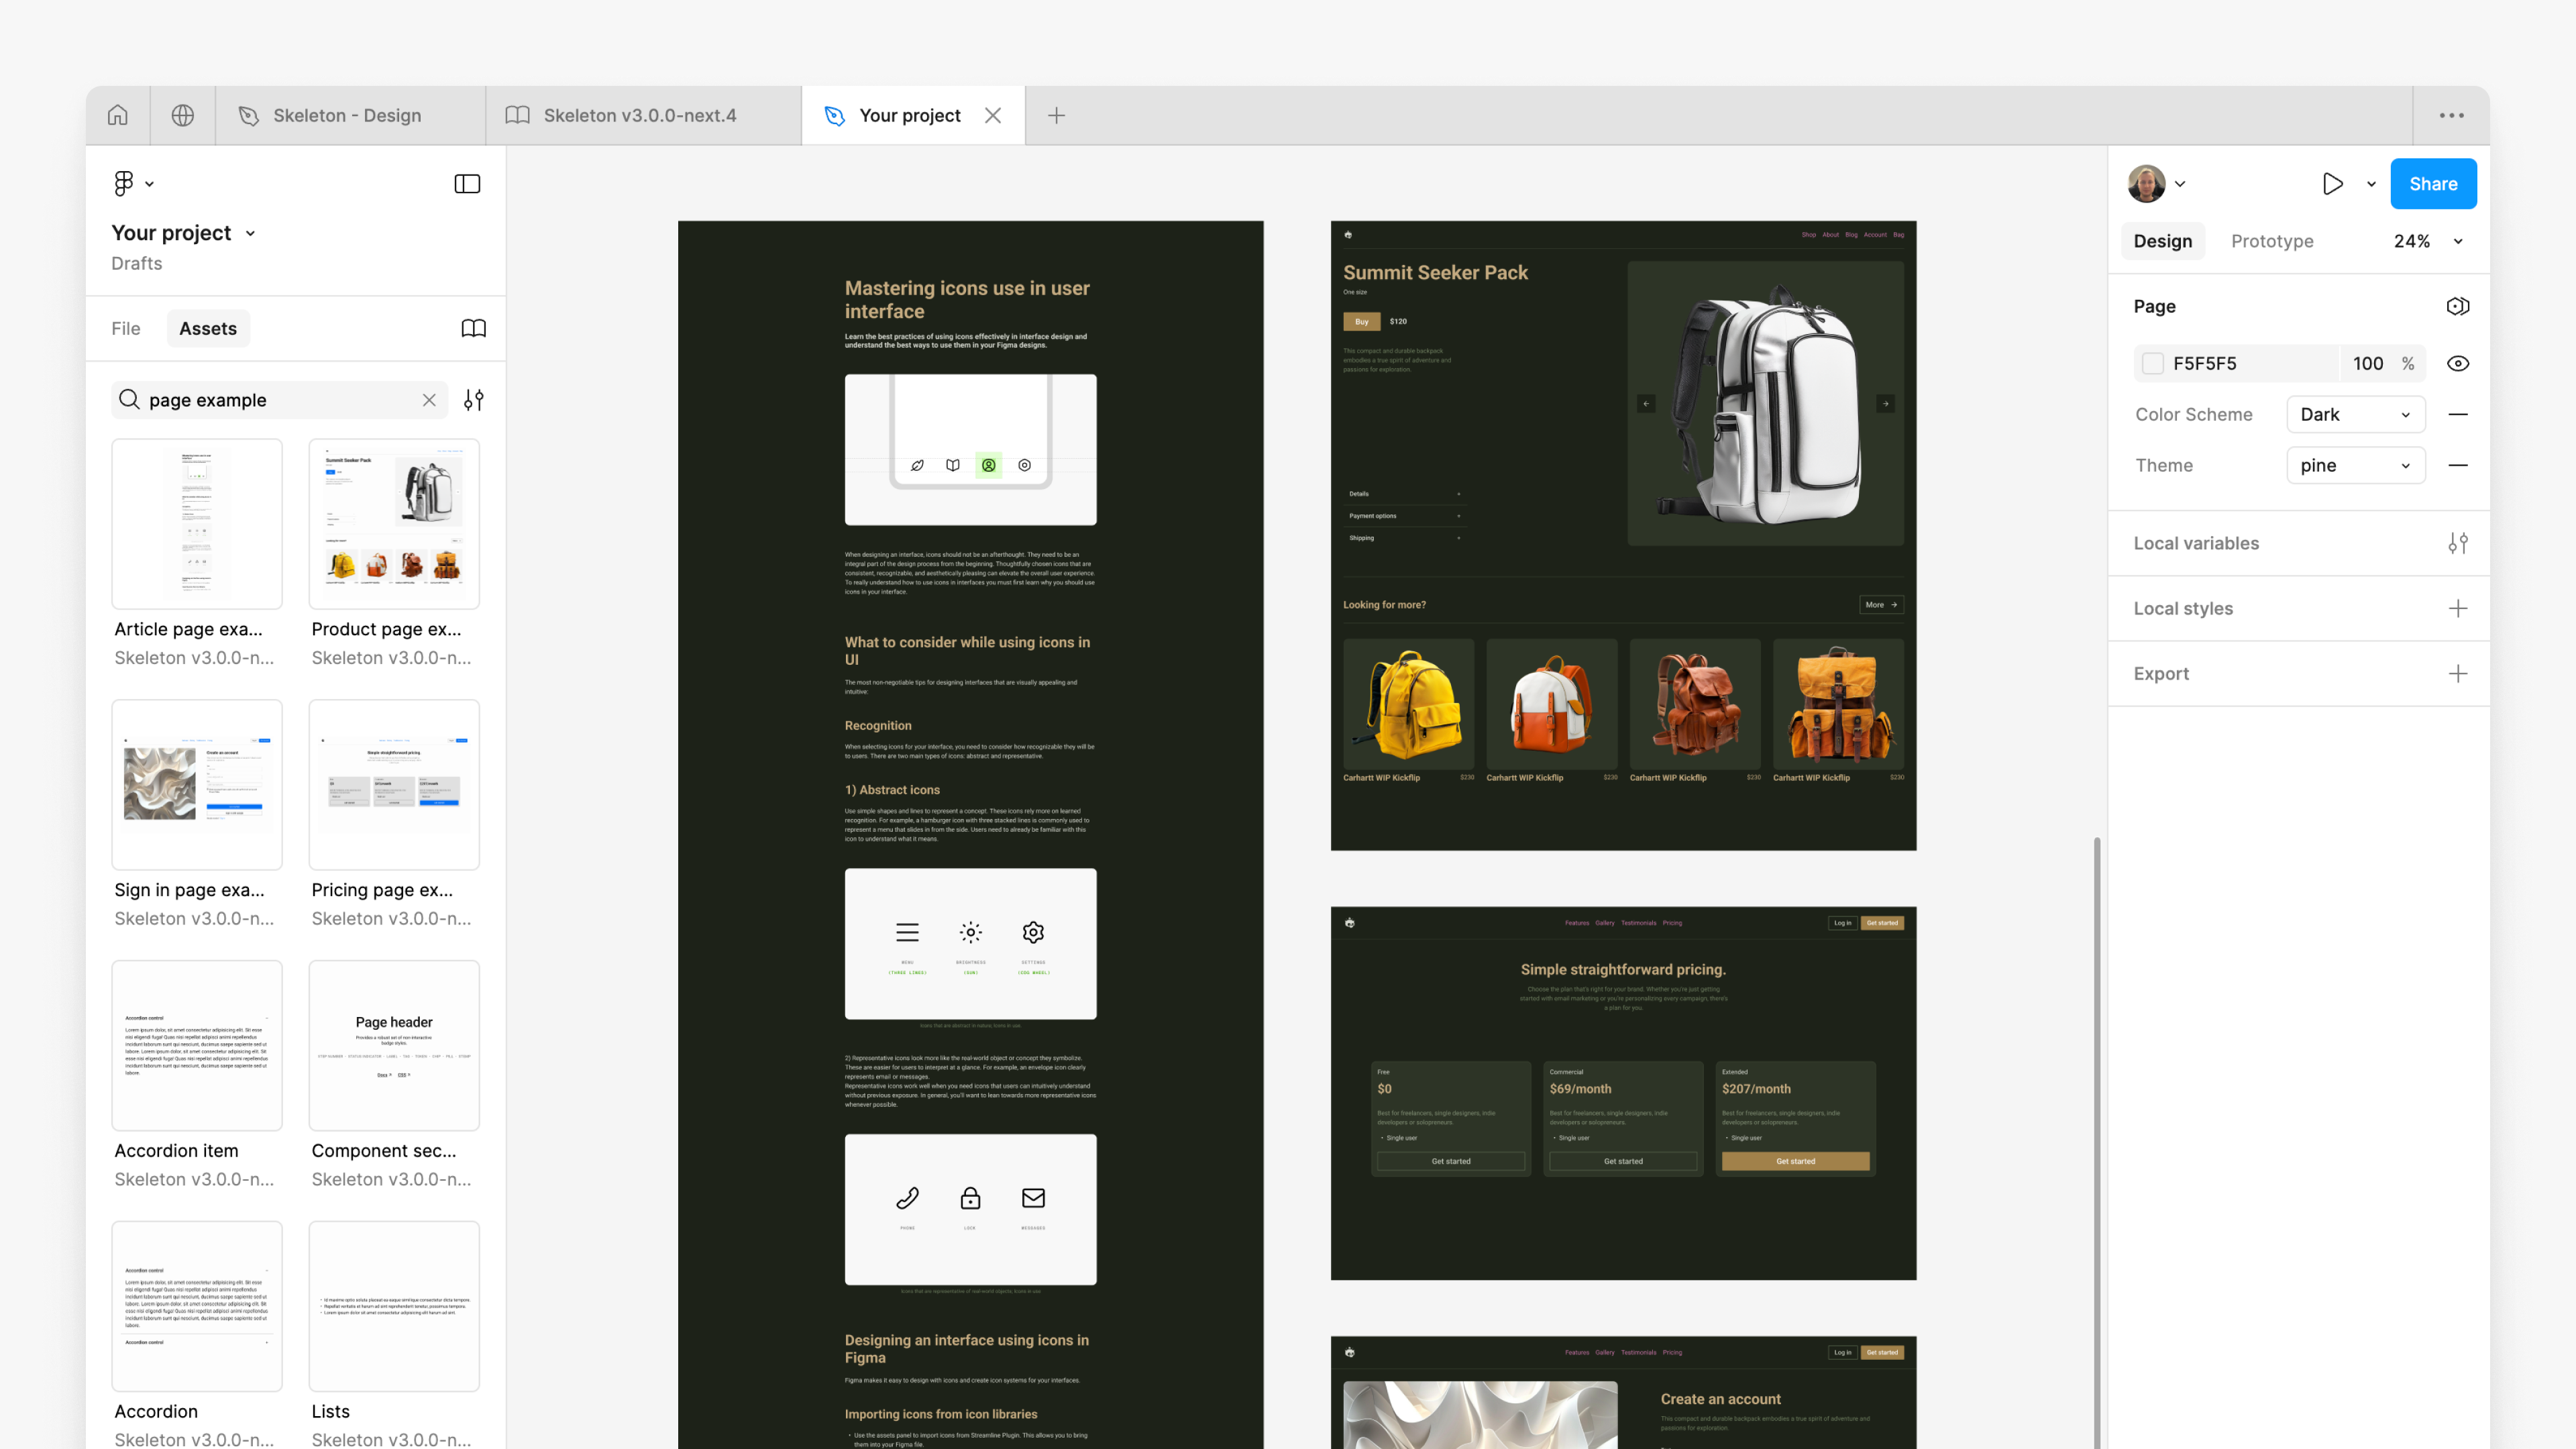
4. Switch modes
In the same panel, use Apply variable mode, hover over Color Scheme, and choose Light or Dark.
Your components update instantly.
Auth Kit screens follow the same color scheme when linked to the Primitives Kit, so your entire product – marketing pages, app UI, and auth flows – stays visually consistent.