Create Wireframes
Learn how to create wireframes.

Before, you should complete:
Chapter 1: Setup & UsageThere’s no single correct way to create wireframes. The goal is to give form to your concepts, test them, and gather feedback or collaborate with others.
Using tools like Figma, wireframes let you visualize strengths and weaknesses, making it easy to refine your design. At this stage, the only real constraint is screen size. In this guide you will learn how to create a wireframe based on a 'Profile section' example.
1. Open or create new project
Add Skeleton Figma library to your project to use Skeleton components in your wireframes
2. Create 'Screen container'
The best practice is to start from a mobile screen because it will be much easier to adapt the UI to a bigger screen later than vice versa. Mobile devices lead global web traffic at around 58%, so it makes sense to consider mobile devices' experience first.
In our case, it will be the 'Desktop screen' because we can best demonstrate the concept of creating wireframes there.
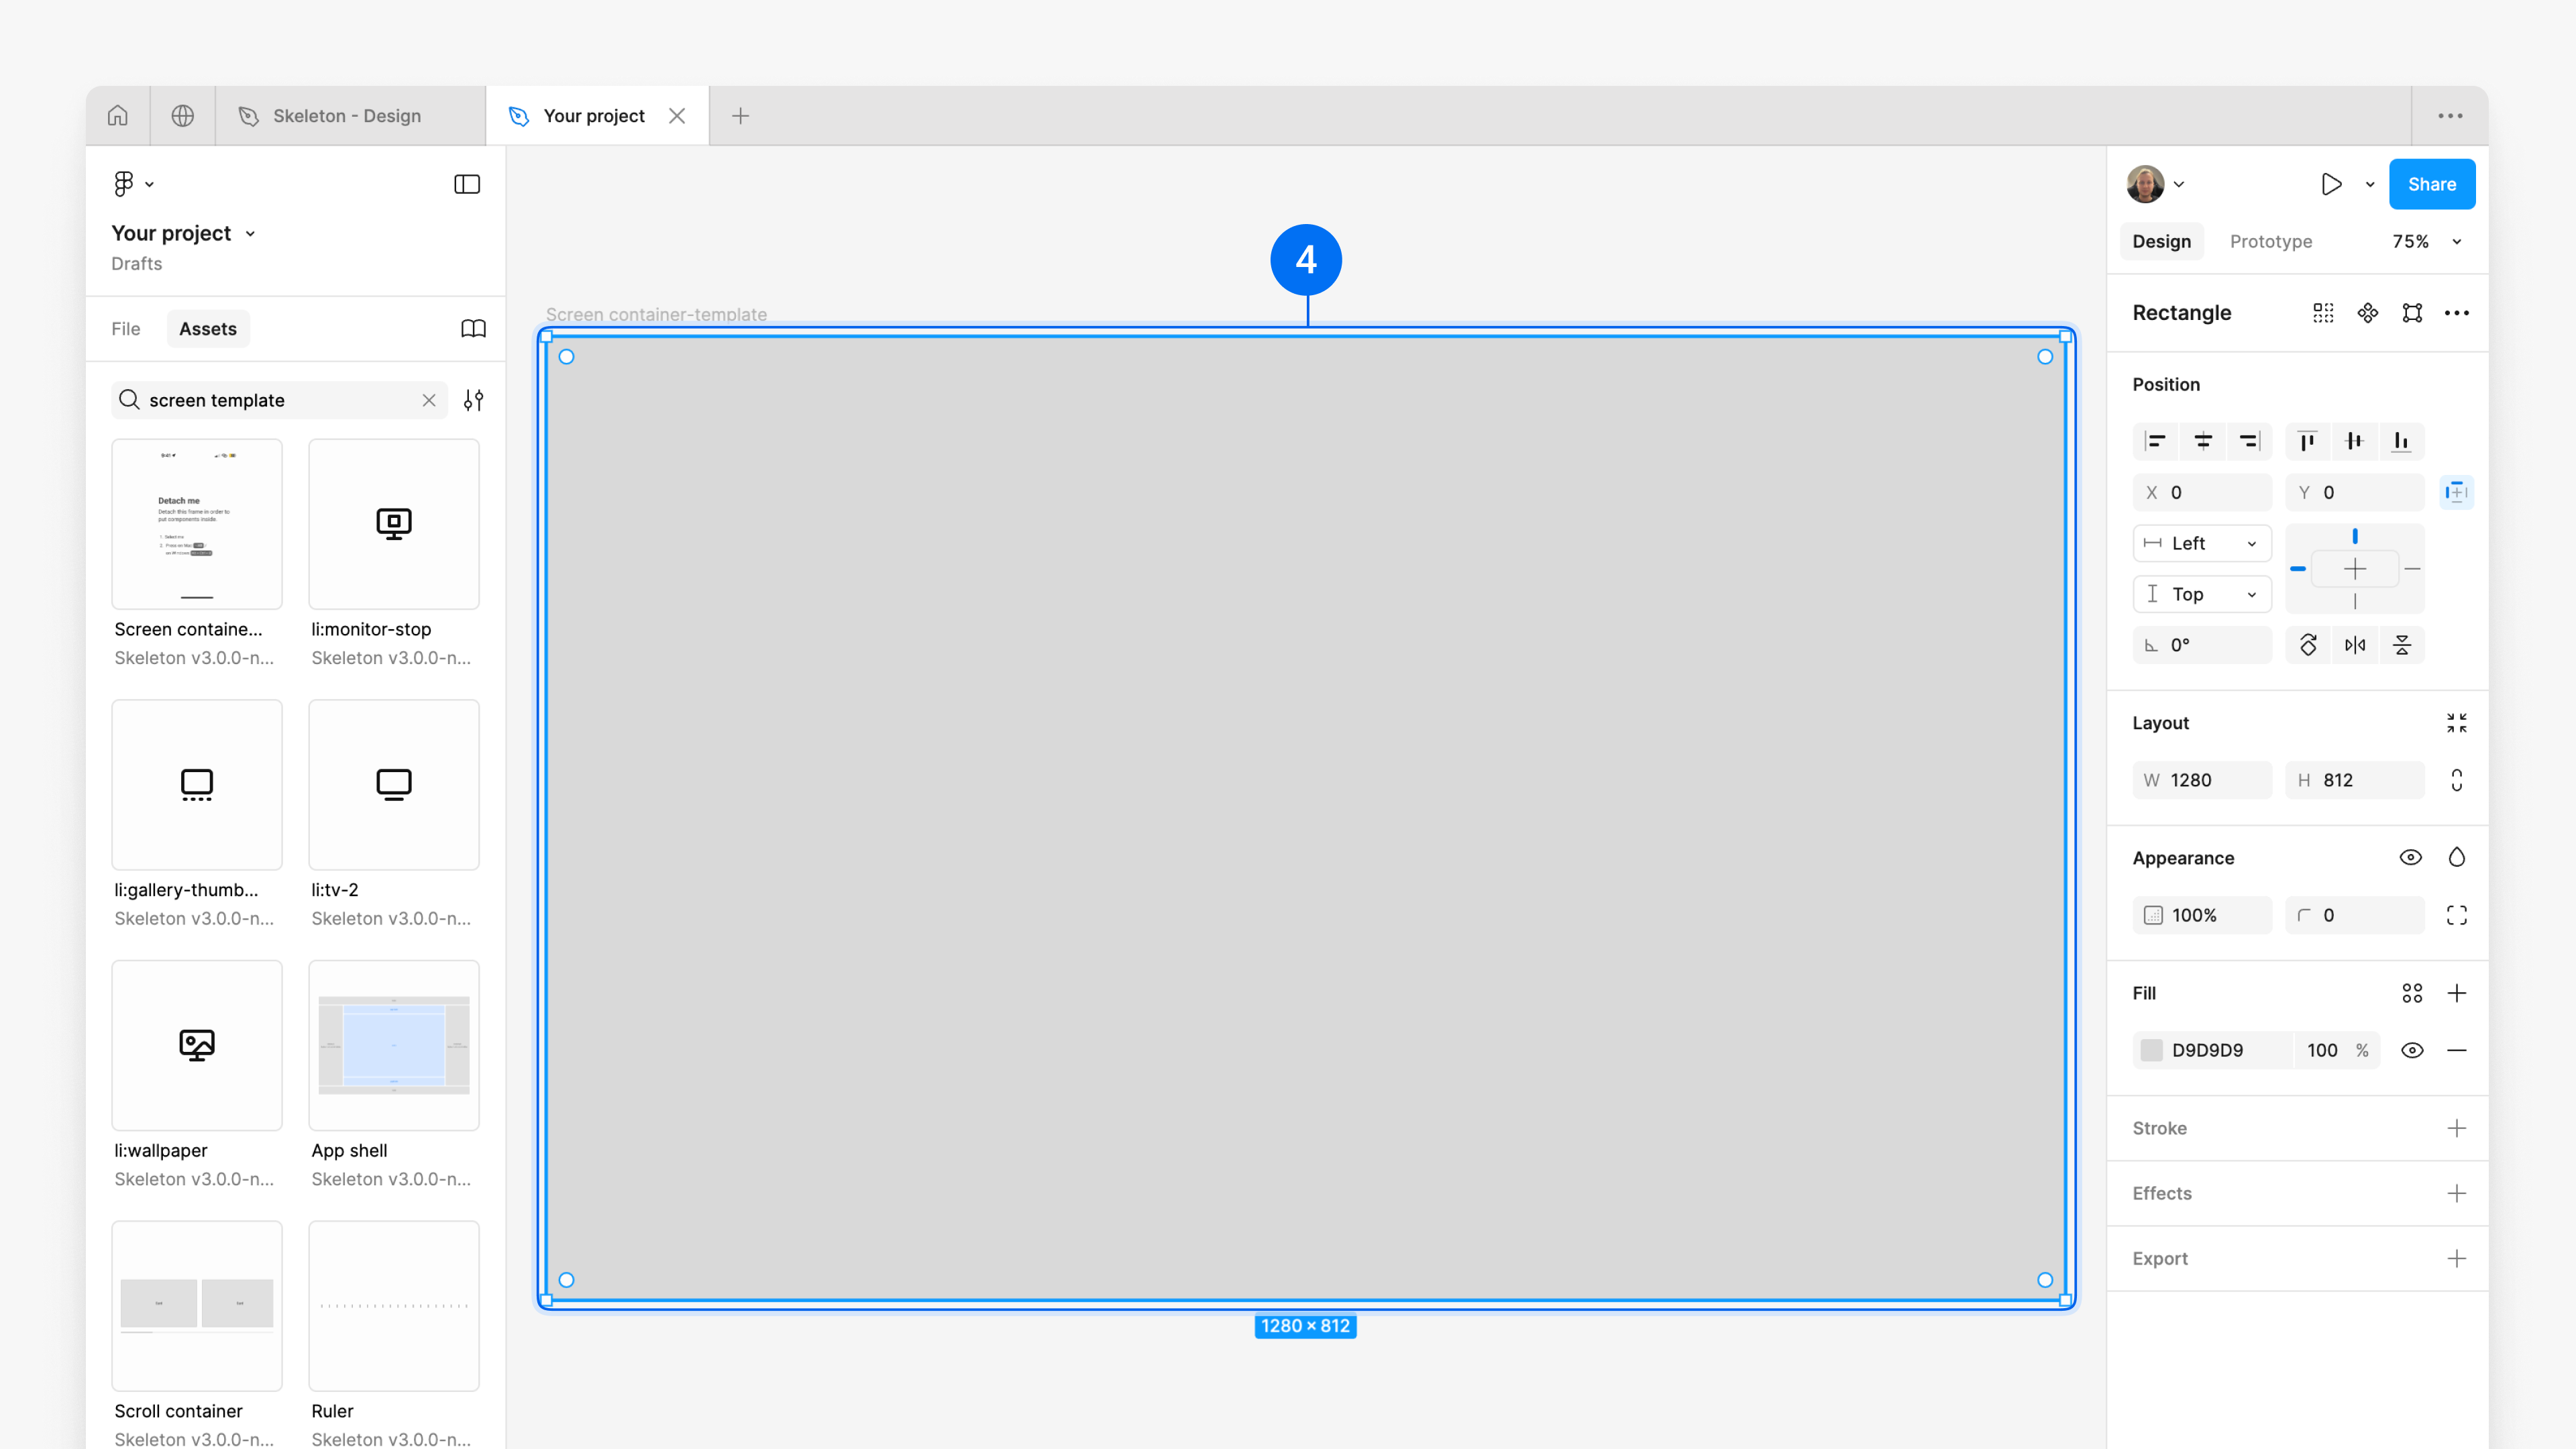
the 'Screen template' component into the canvas.
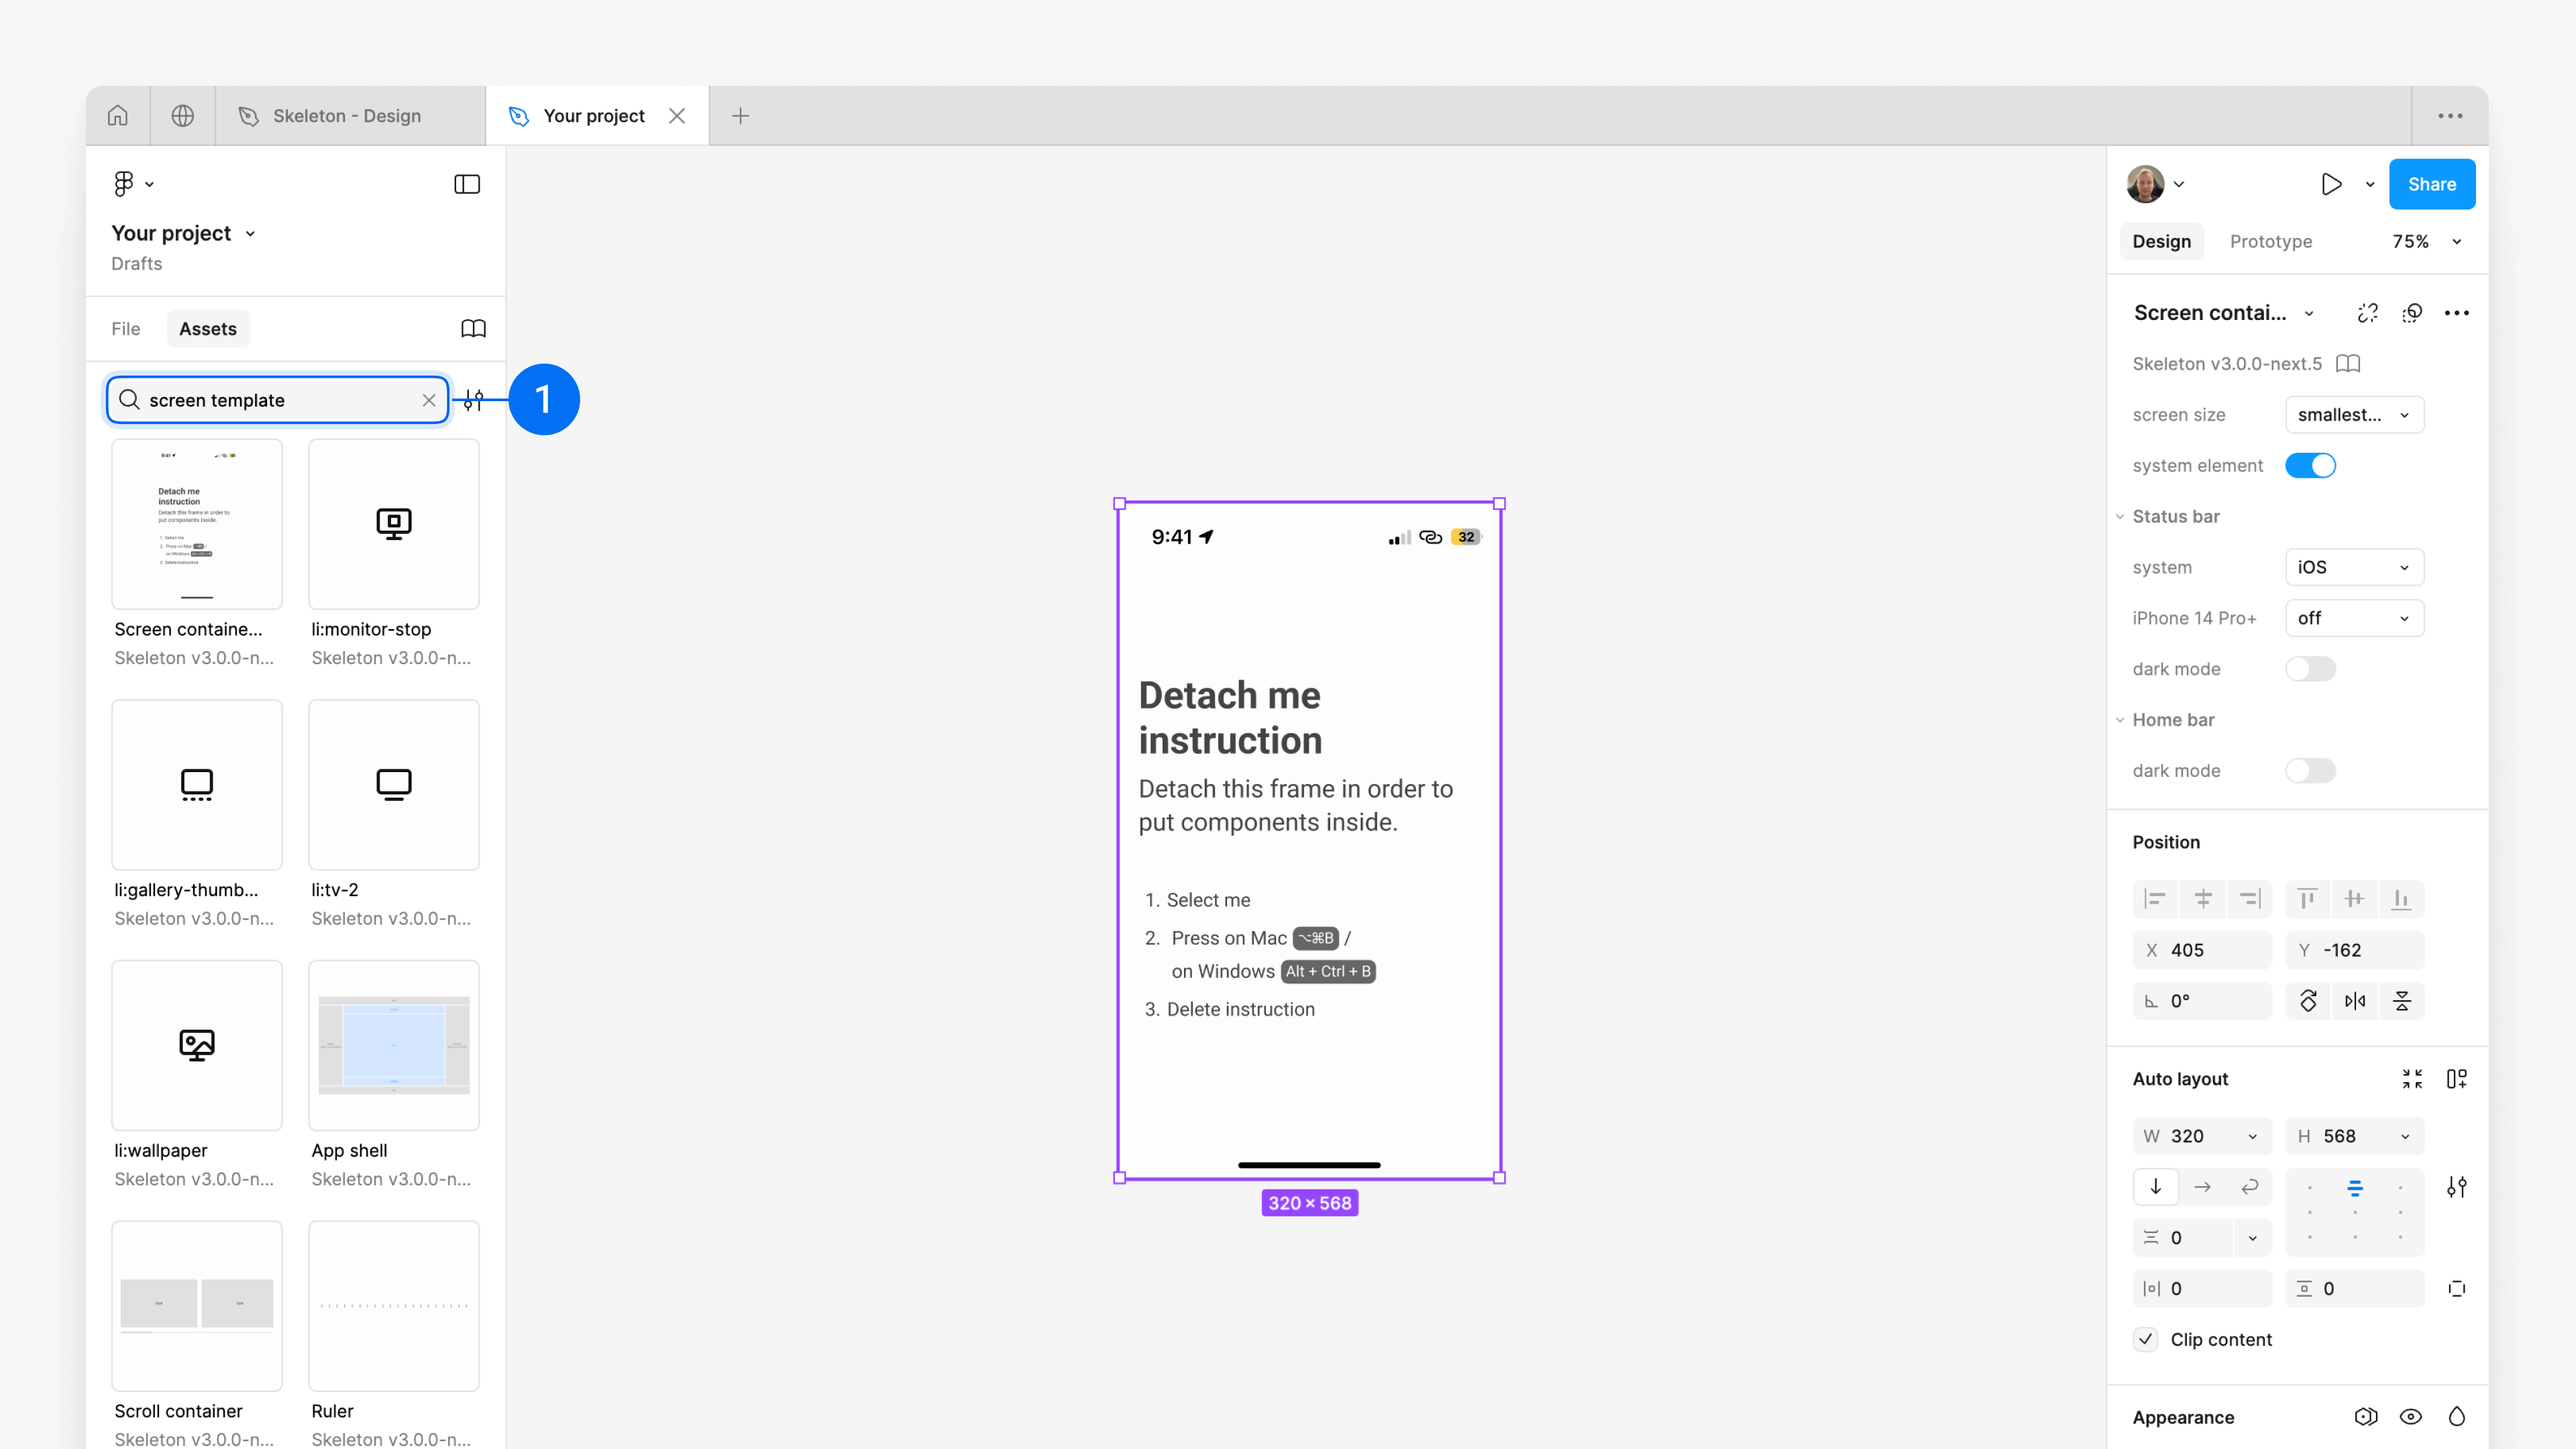
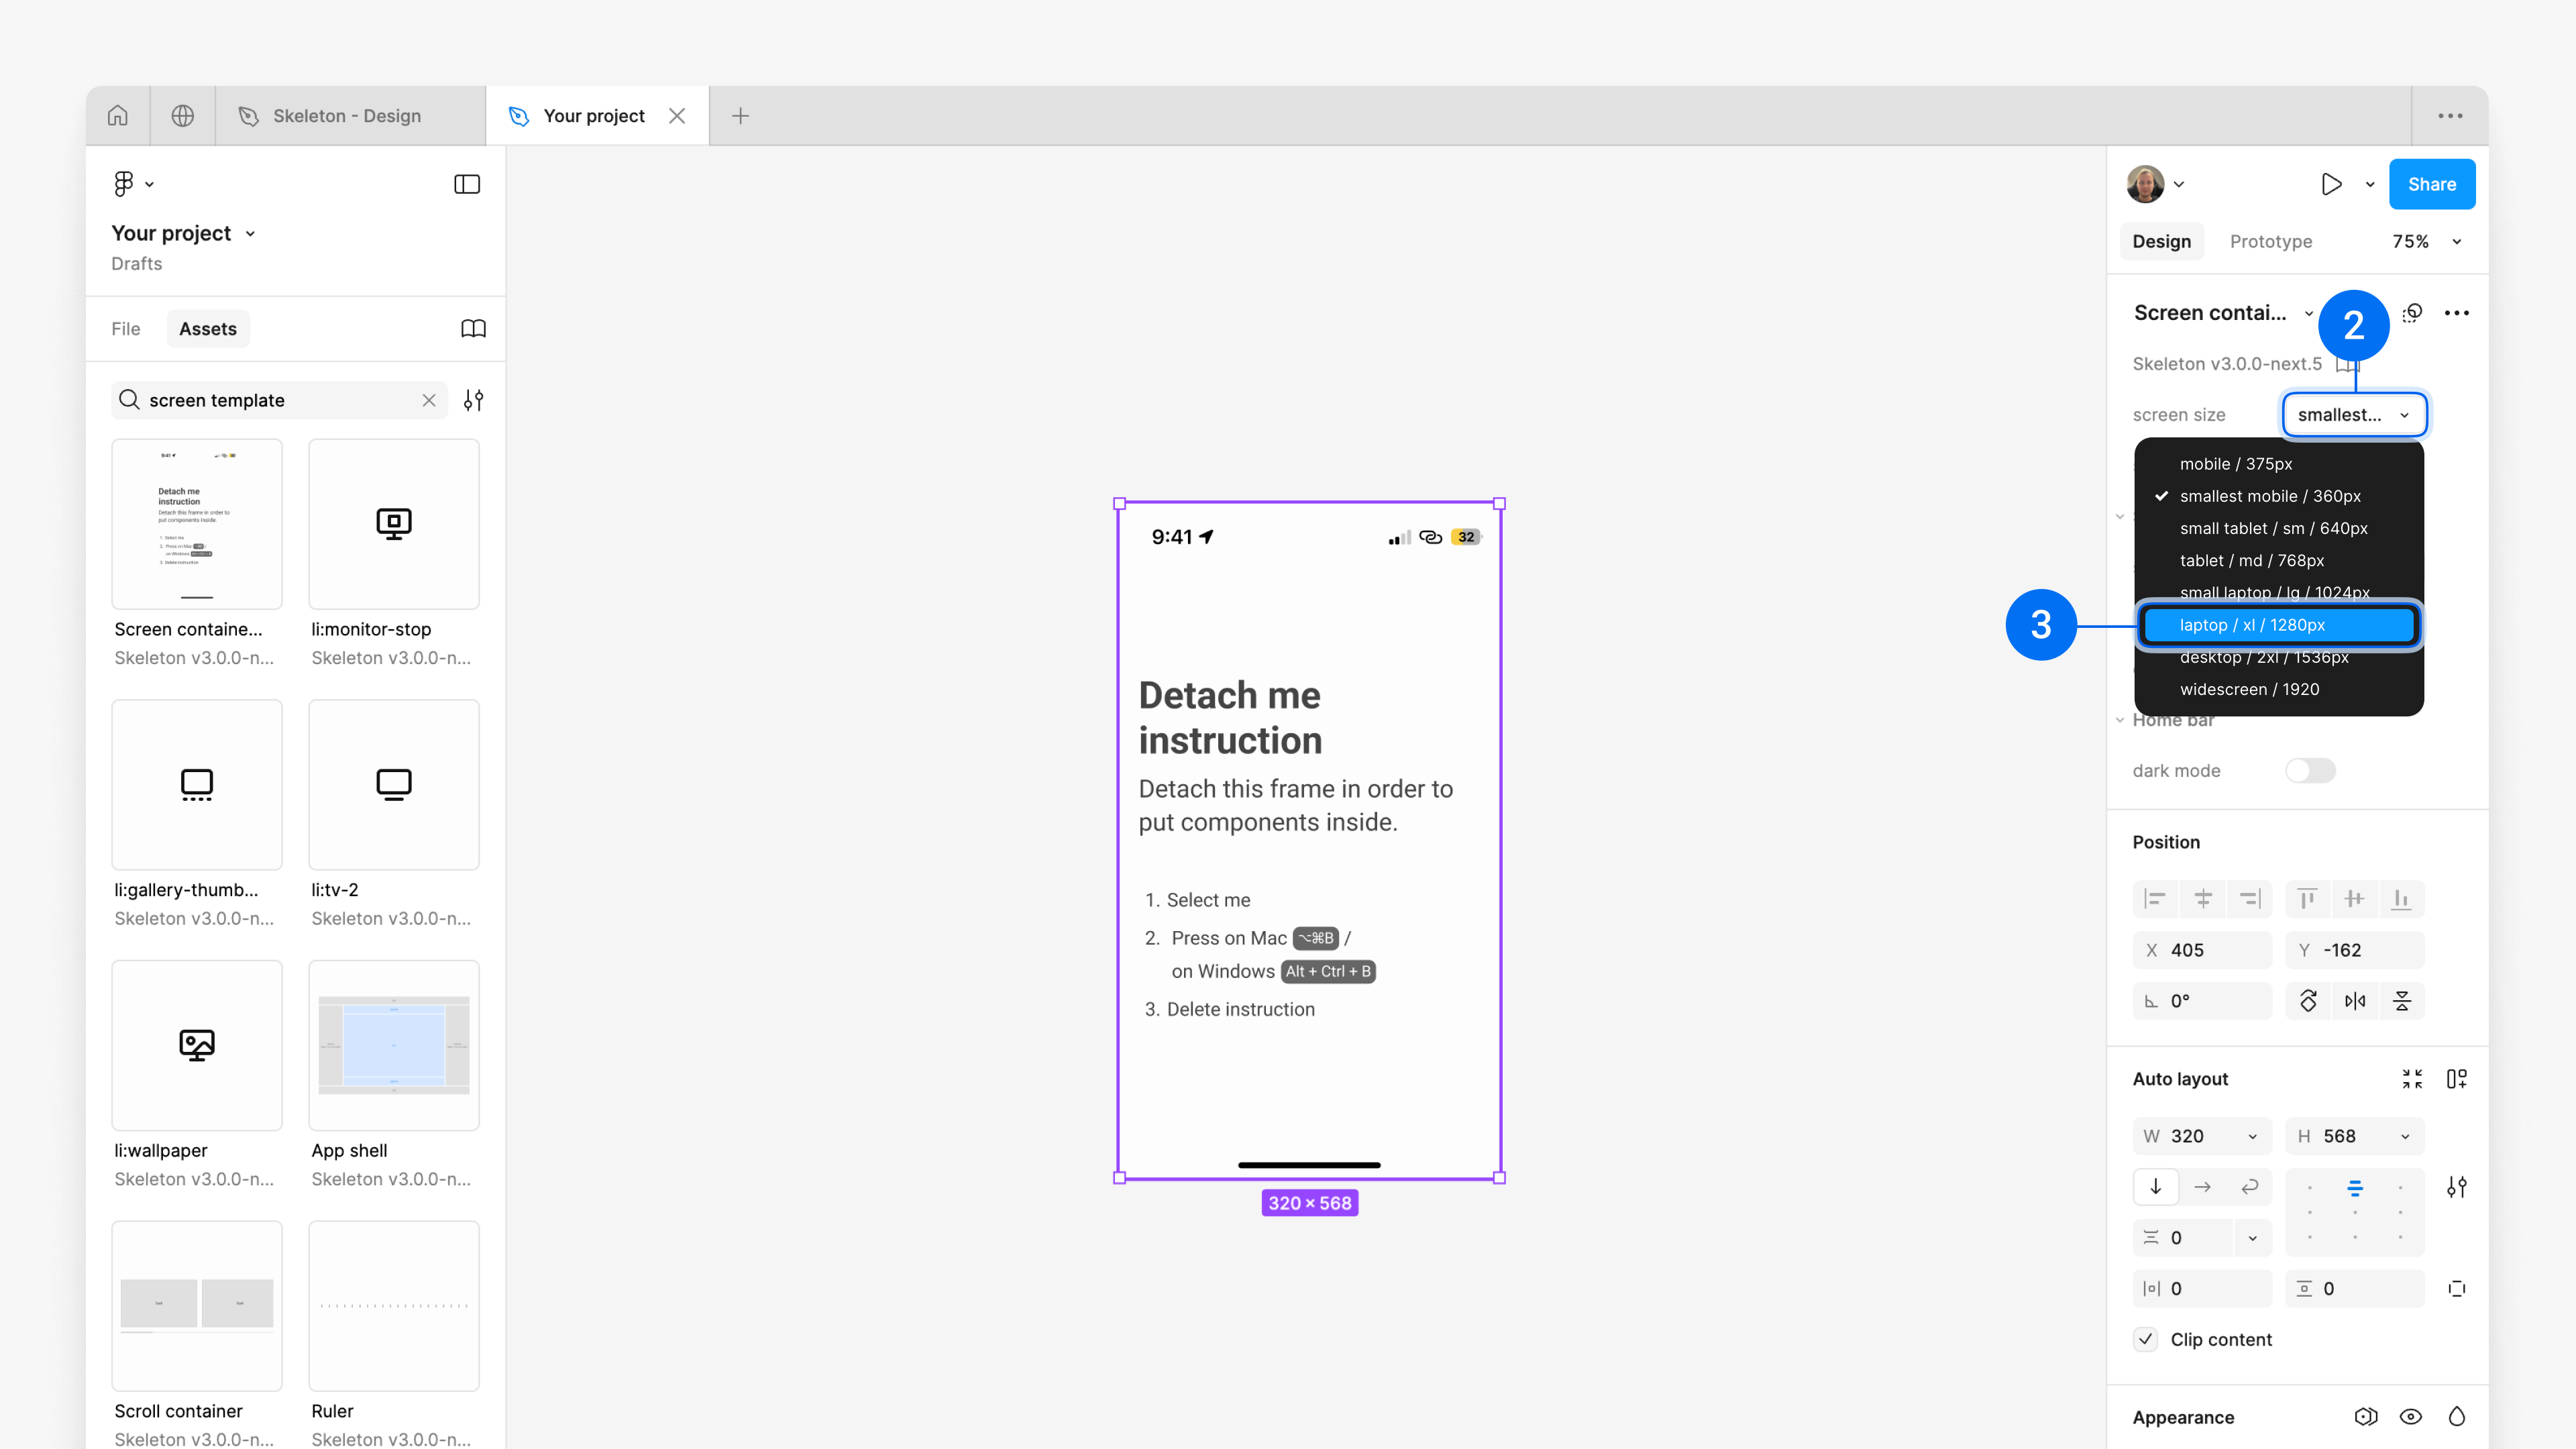
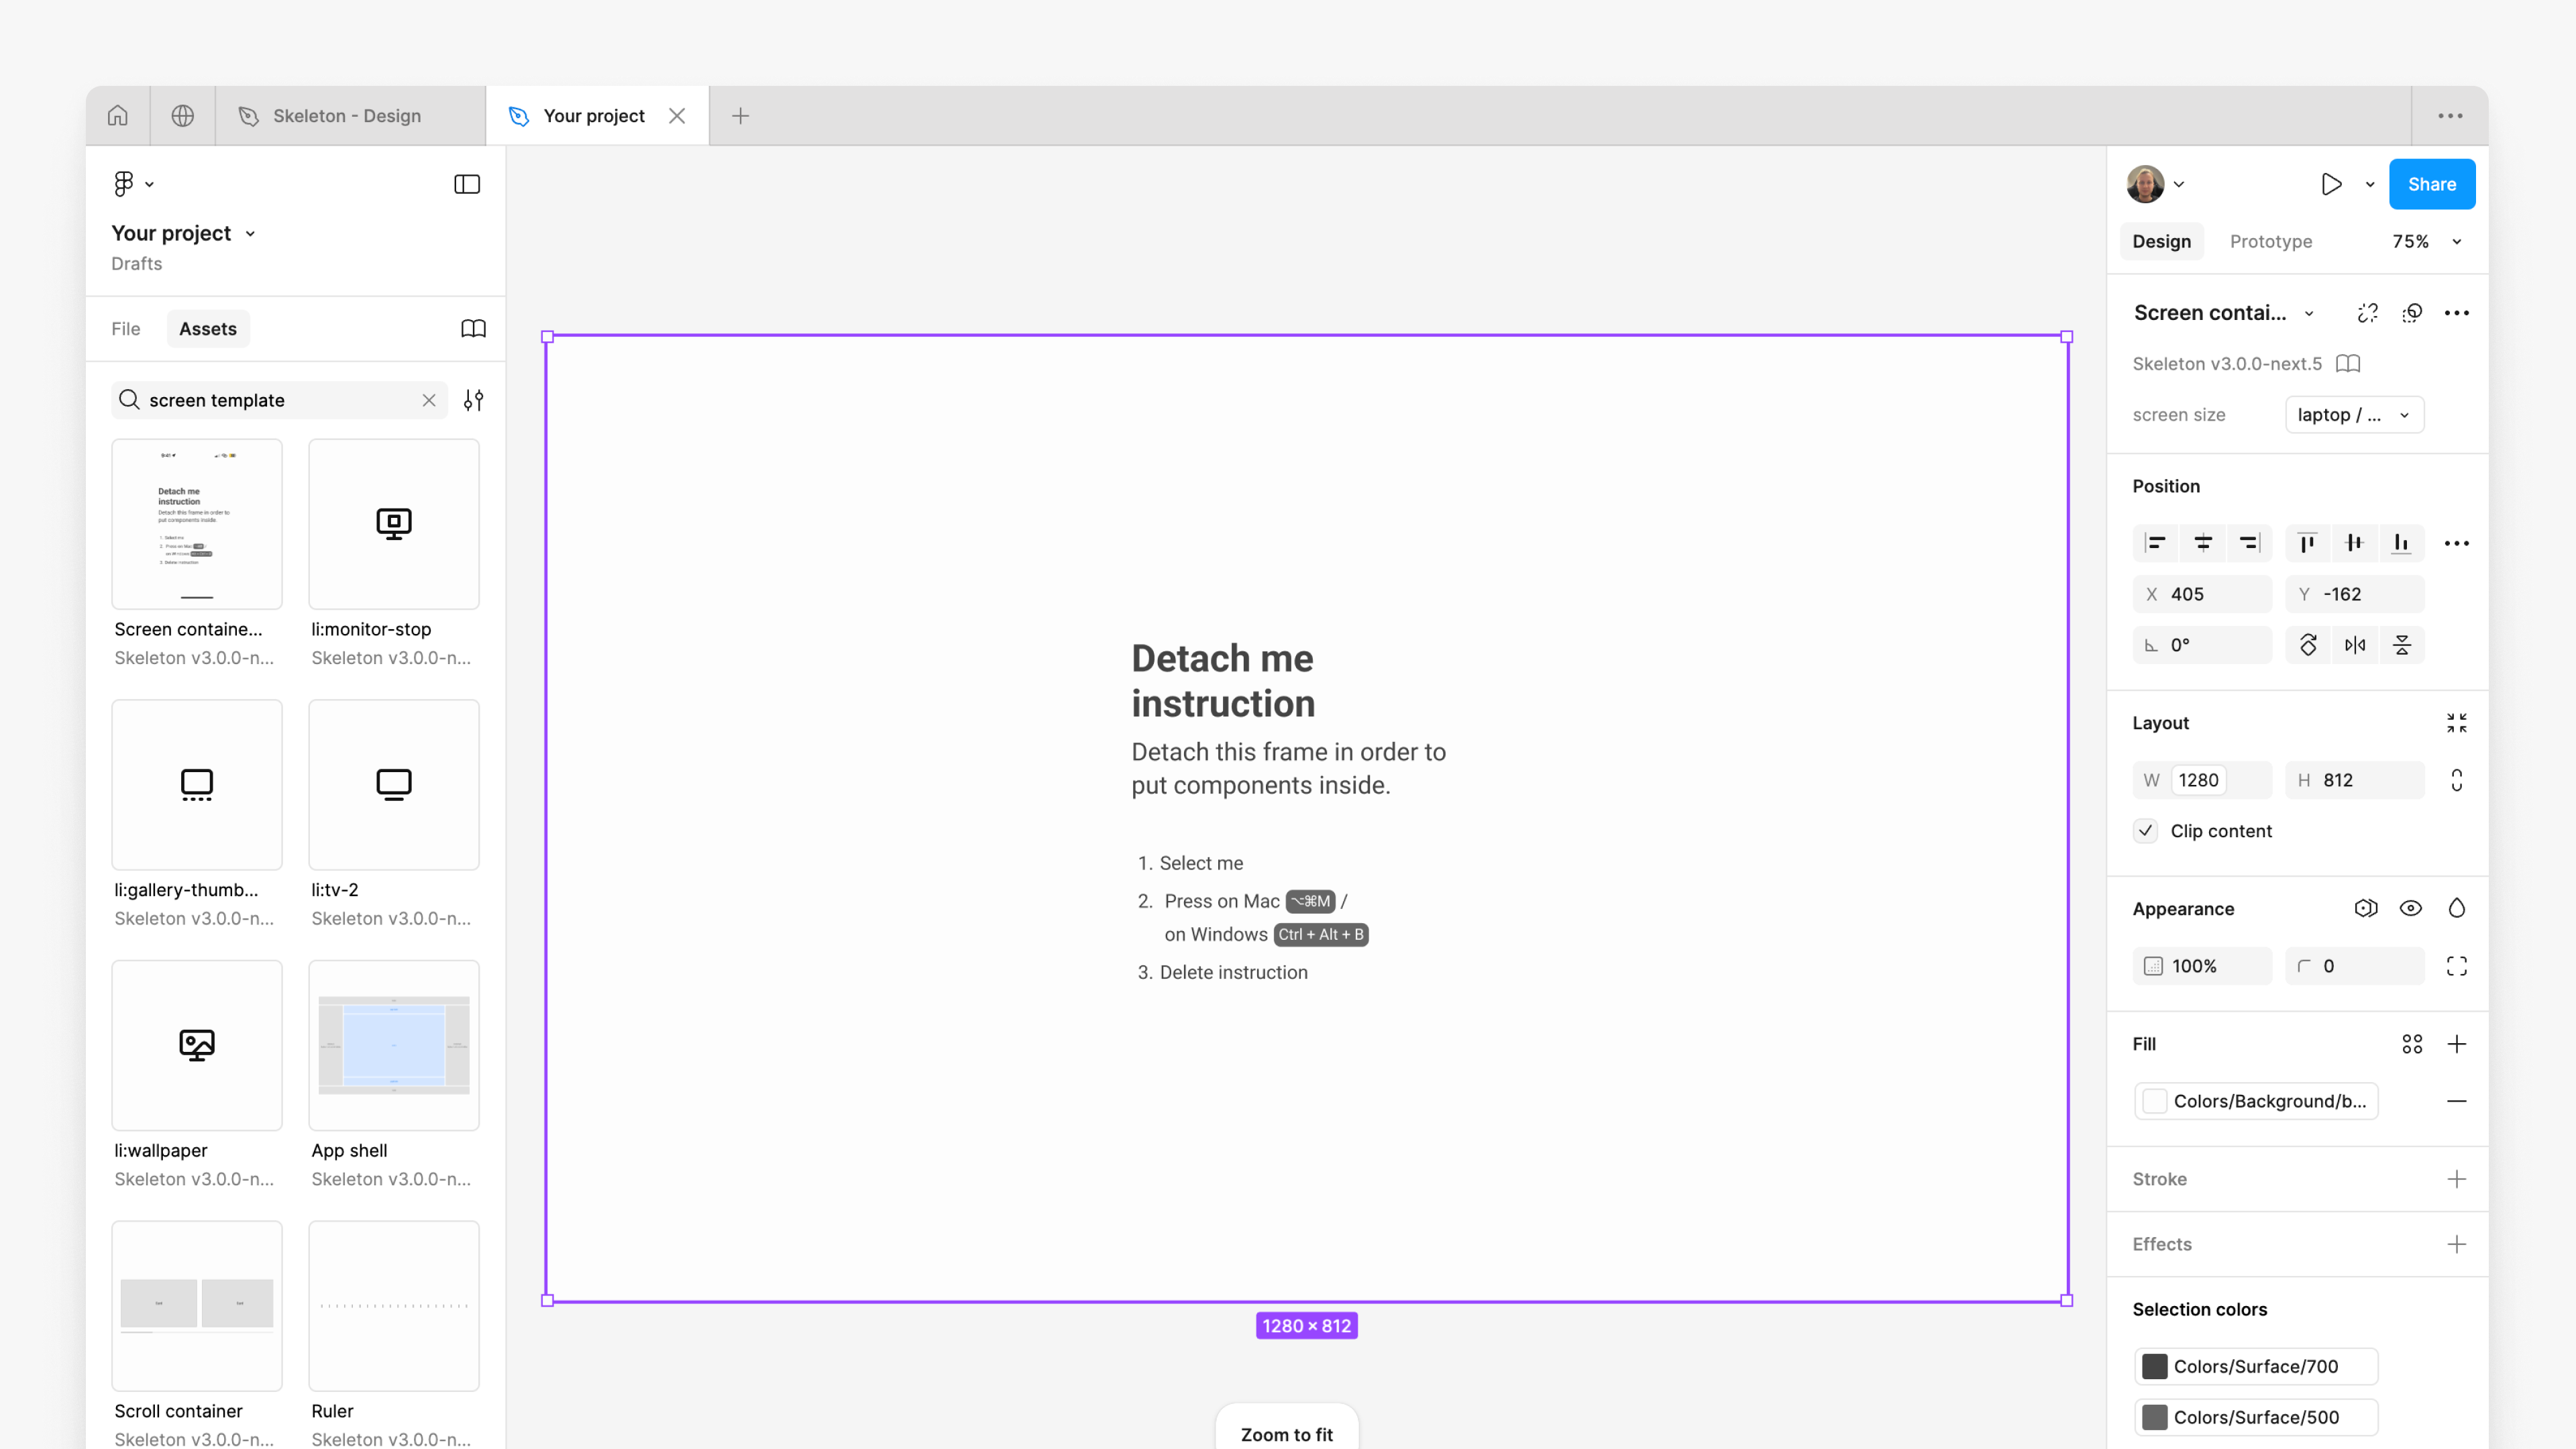
On the right side panel, change the 'screen size' property. For our case, we will change it to 'laptop / xl / 1280'.
Follow the 'Detach me instructions' to be able to place elements inside of the screen template.
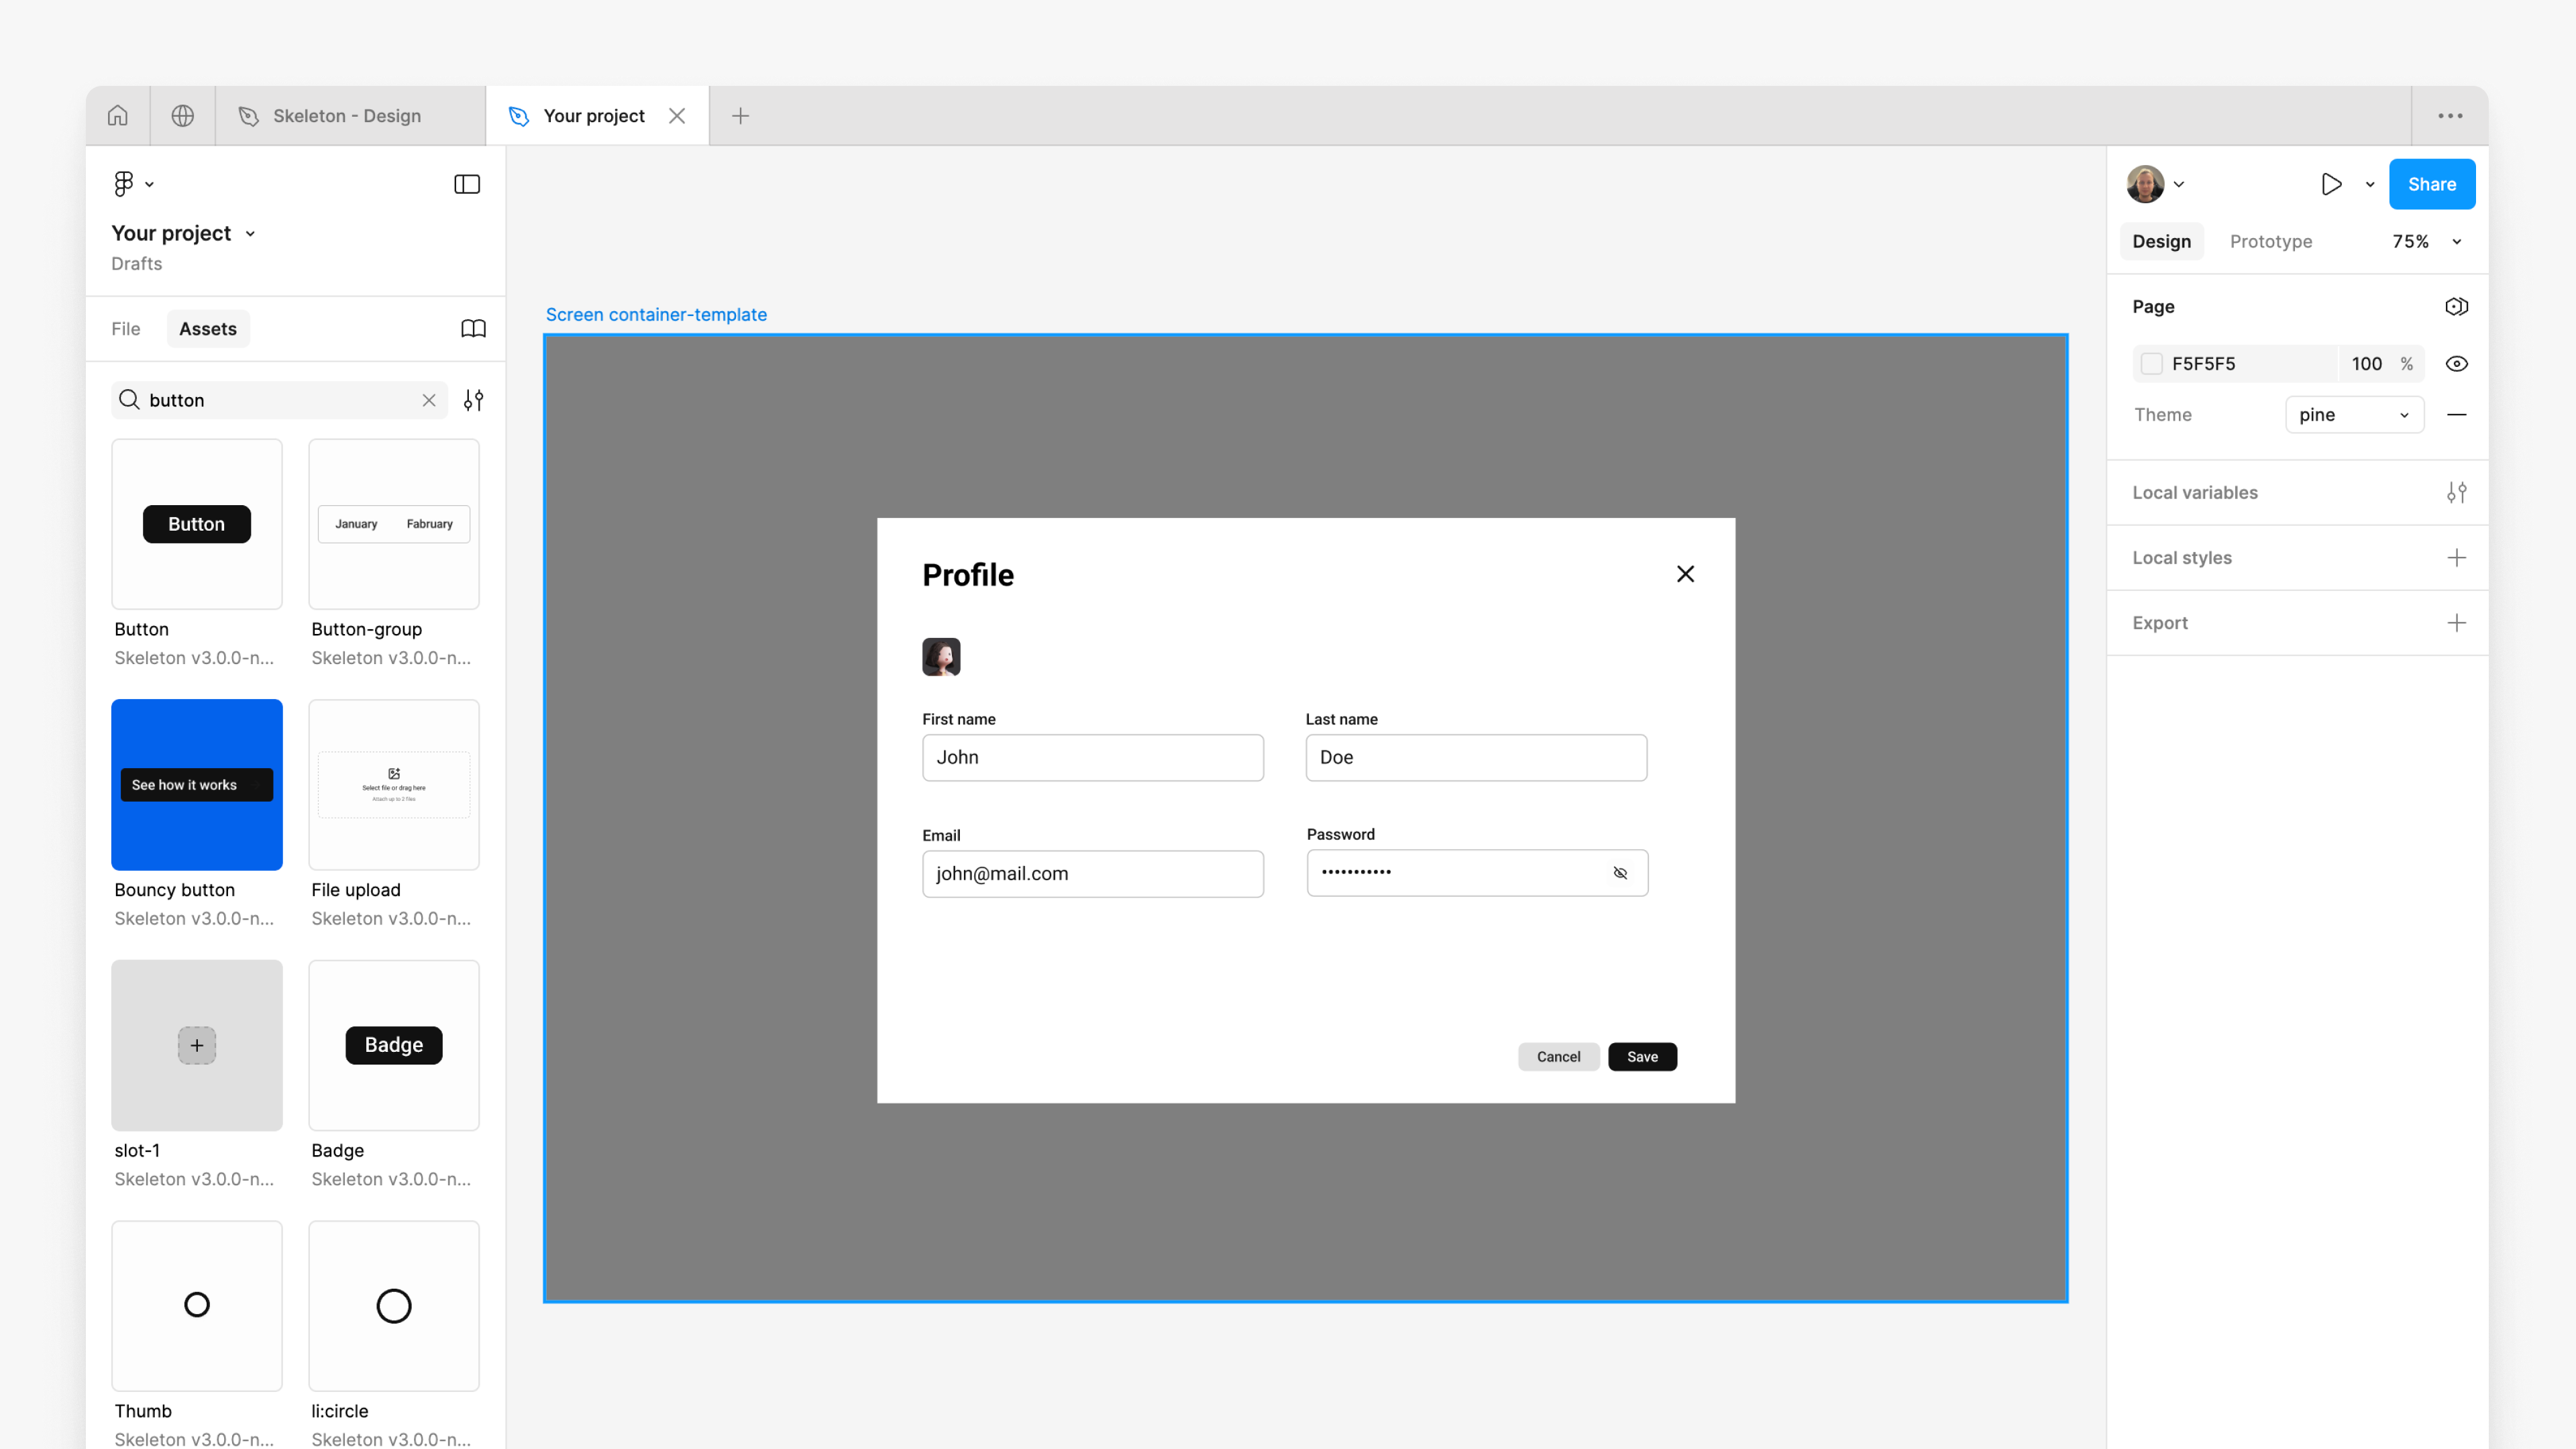
3. Create Modal
In this instance, we incorporate the 'Profile section' into a modal for a clearer demonstration. But you could also do it without a modal depending on your use case.
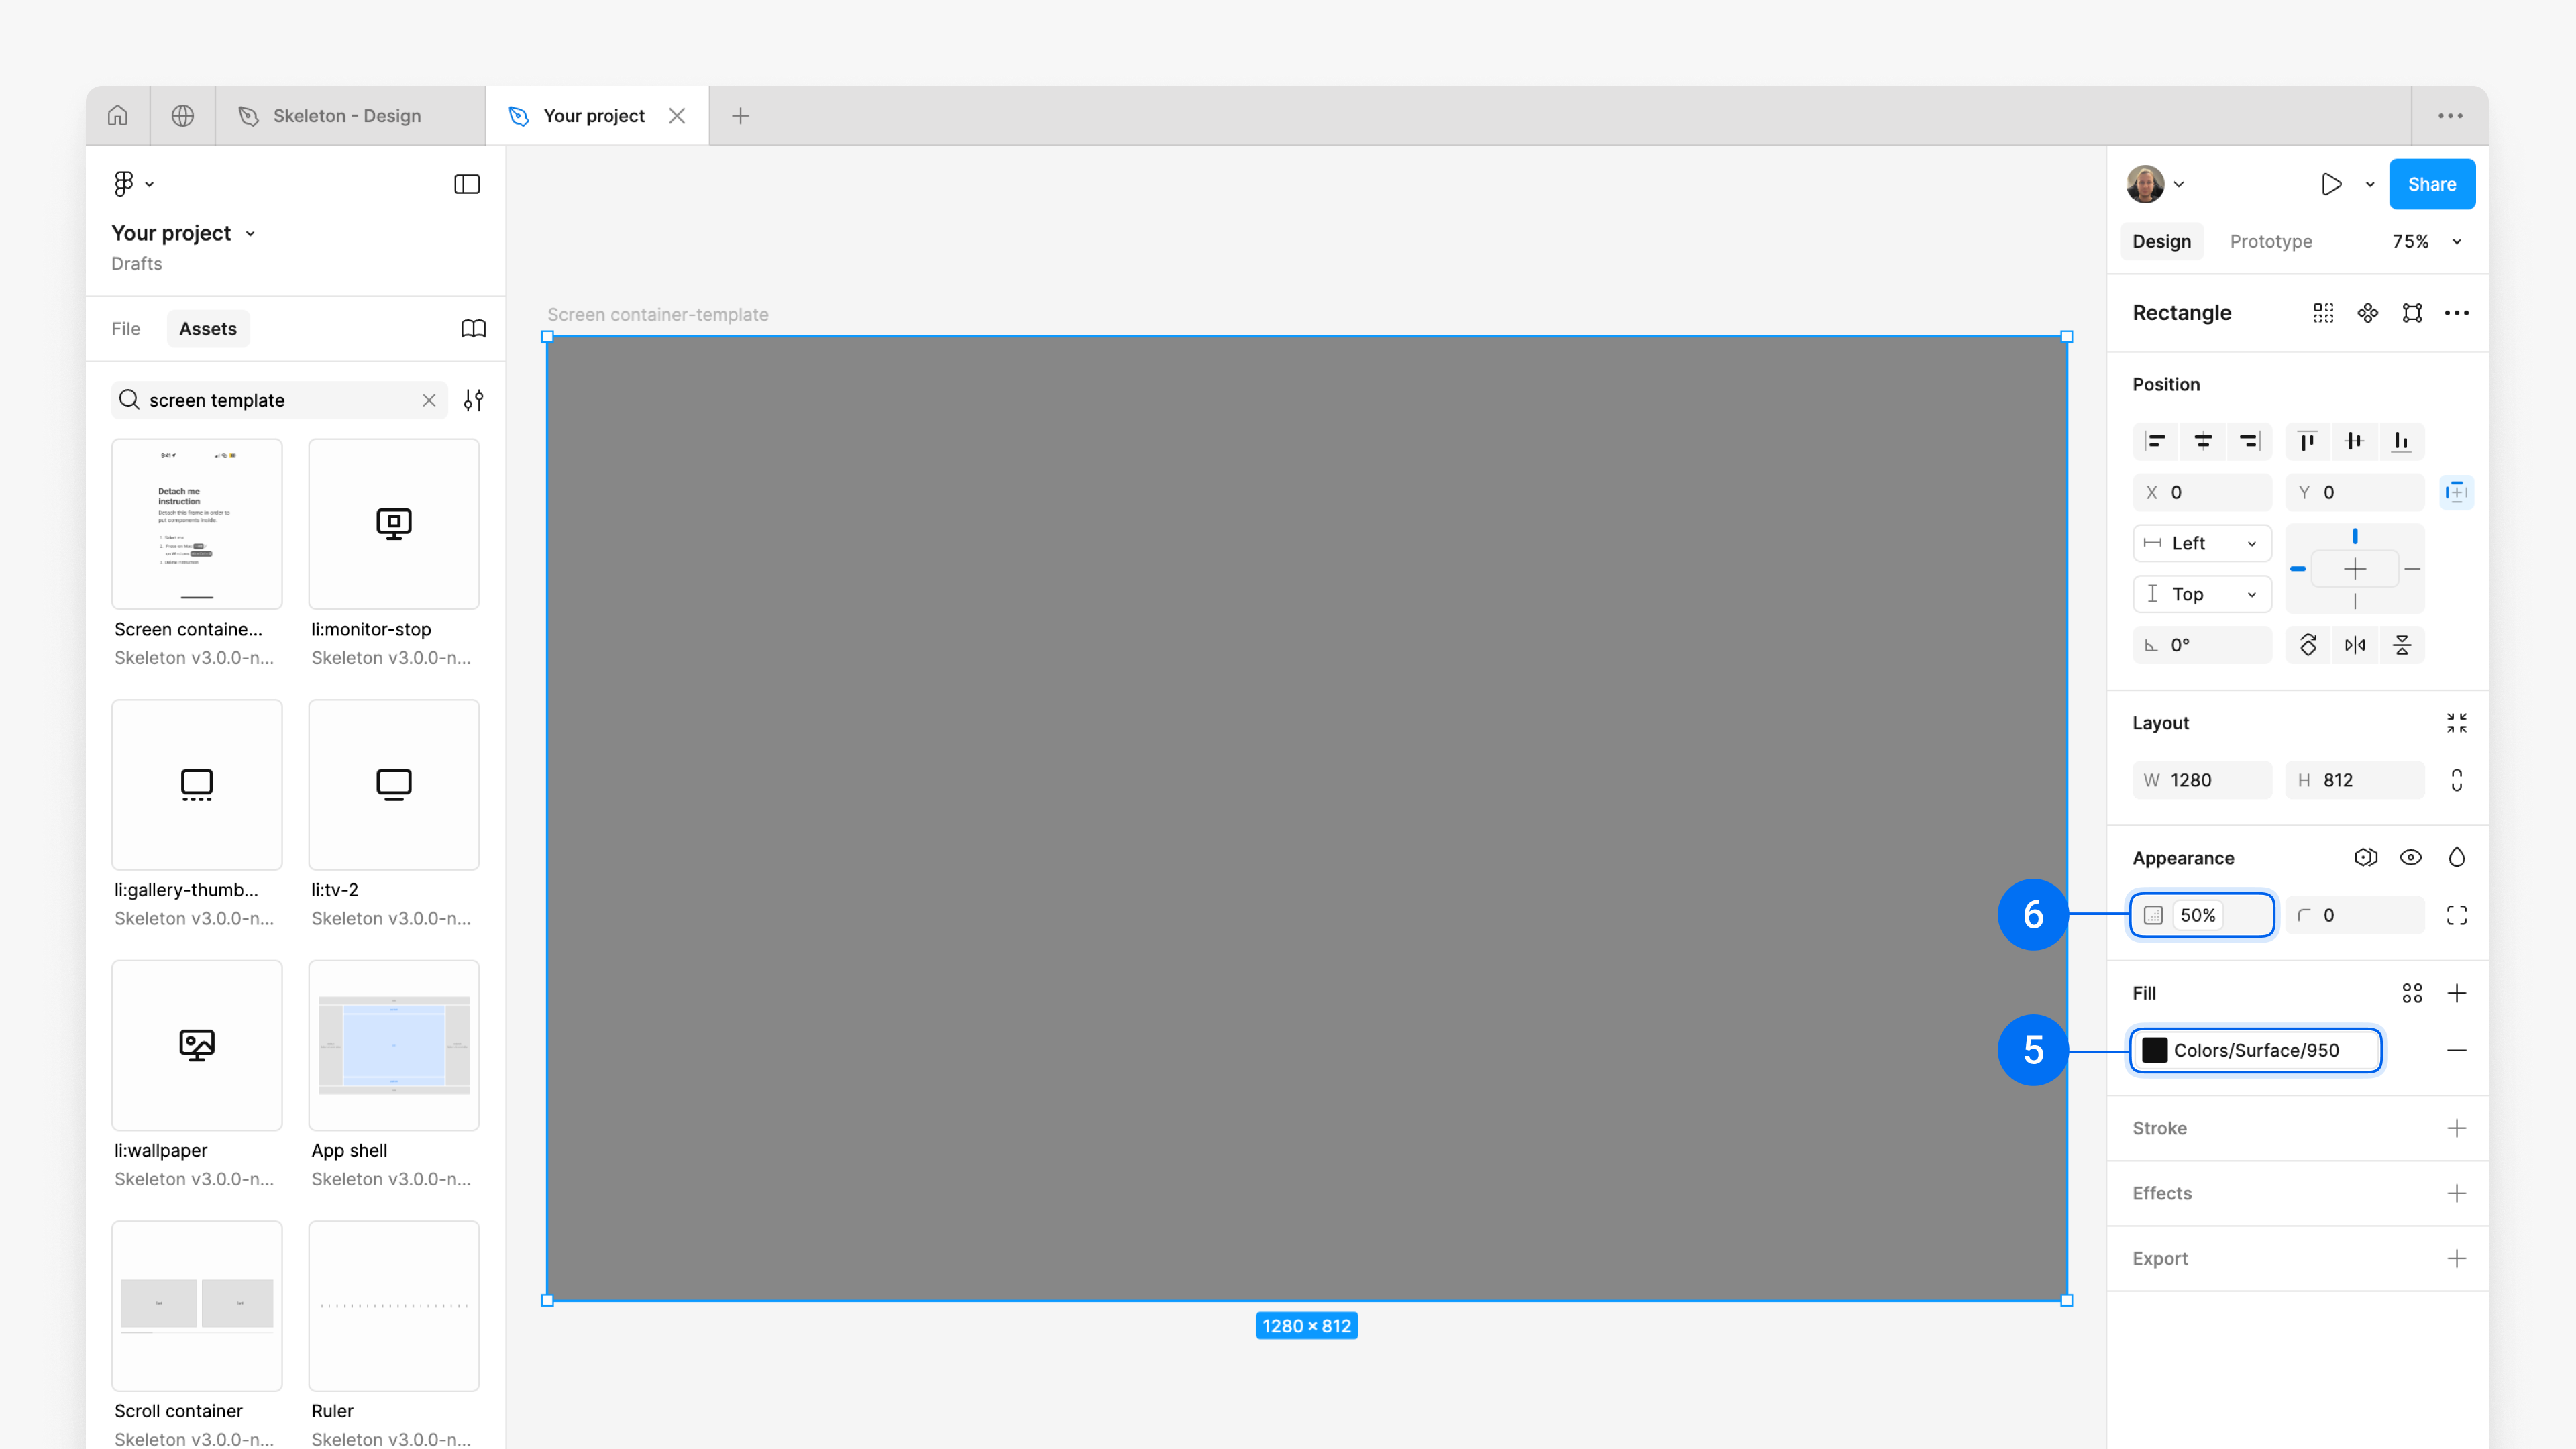
As a first step we create the 'modal overlay' which acts as a transparent background while the modal is open.
For that, and fit it into the container at its full width (1280) and height (812).
and to 'modal overlay'
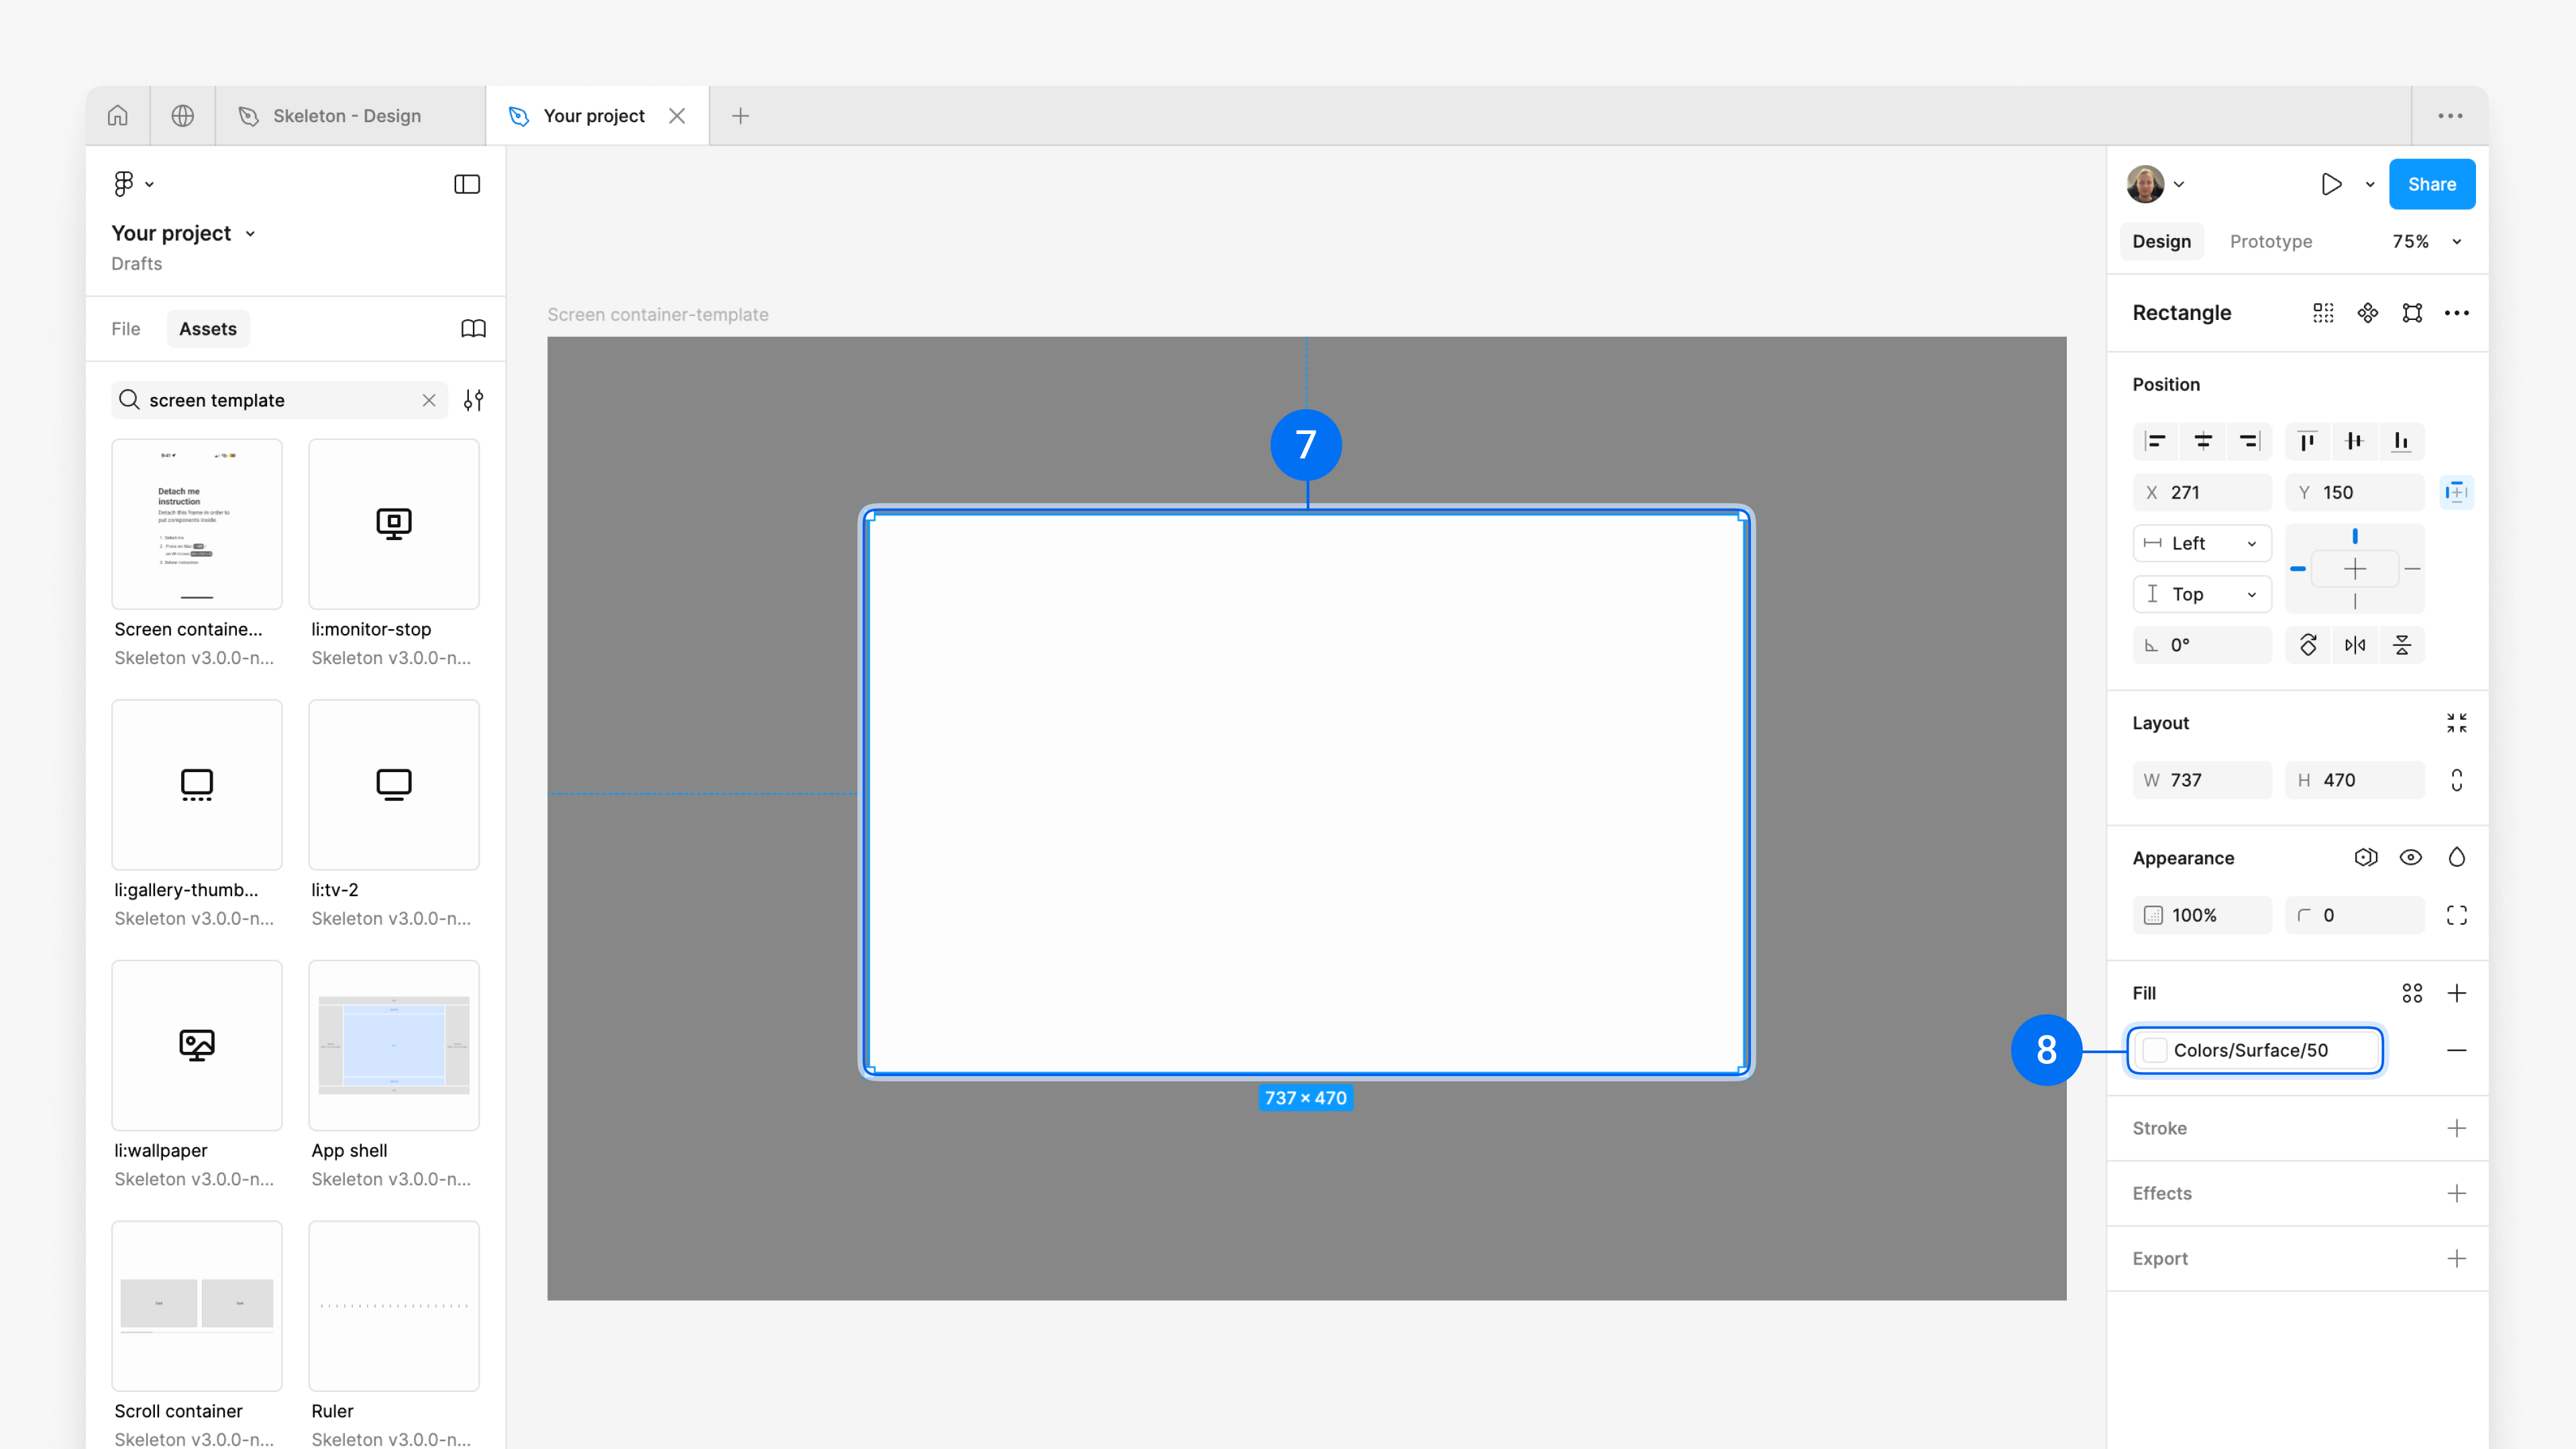
Now we create the 'modal' on top of the modal overlay. For that, and
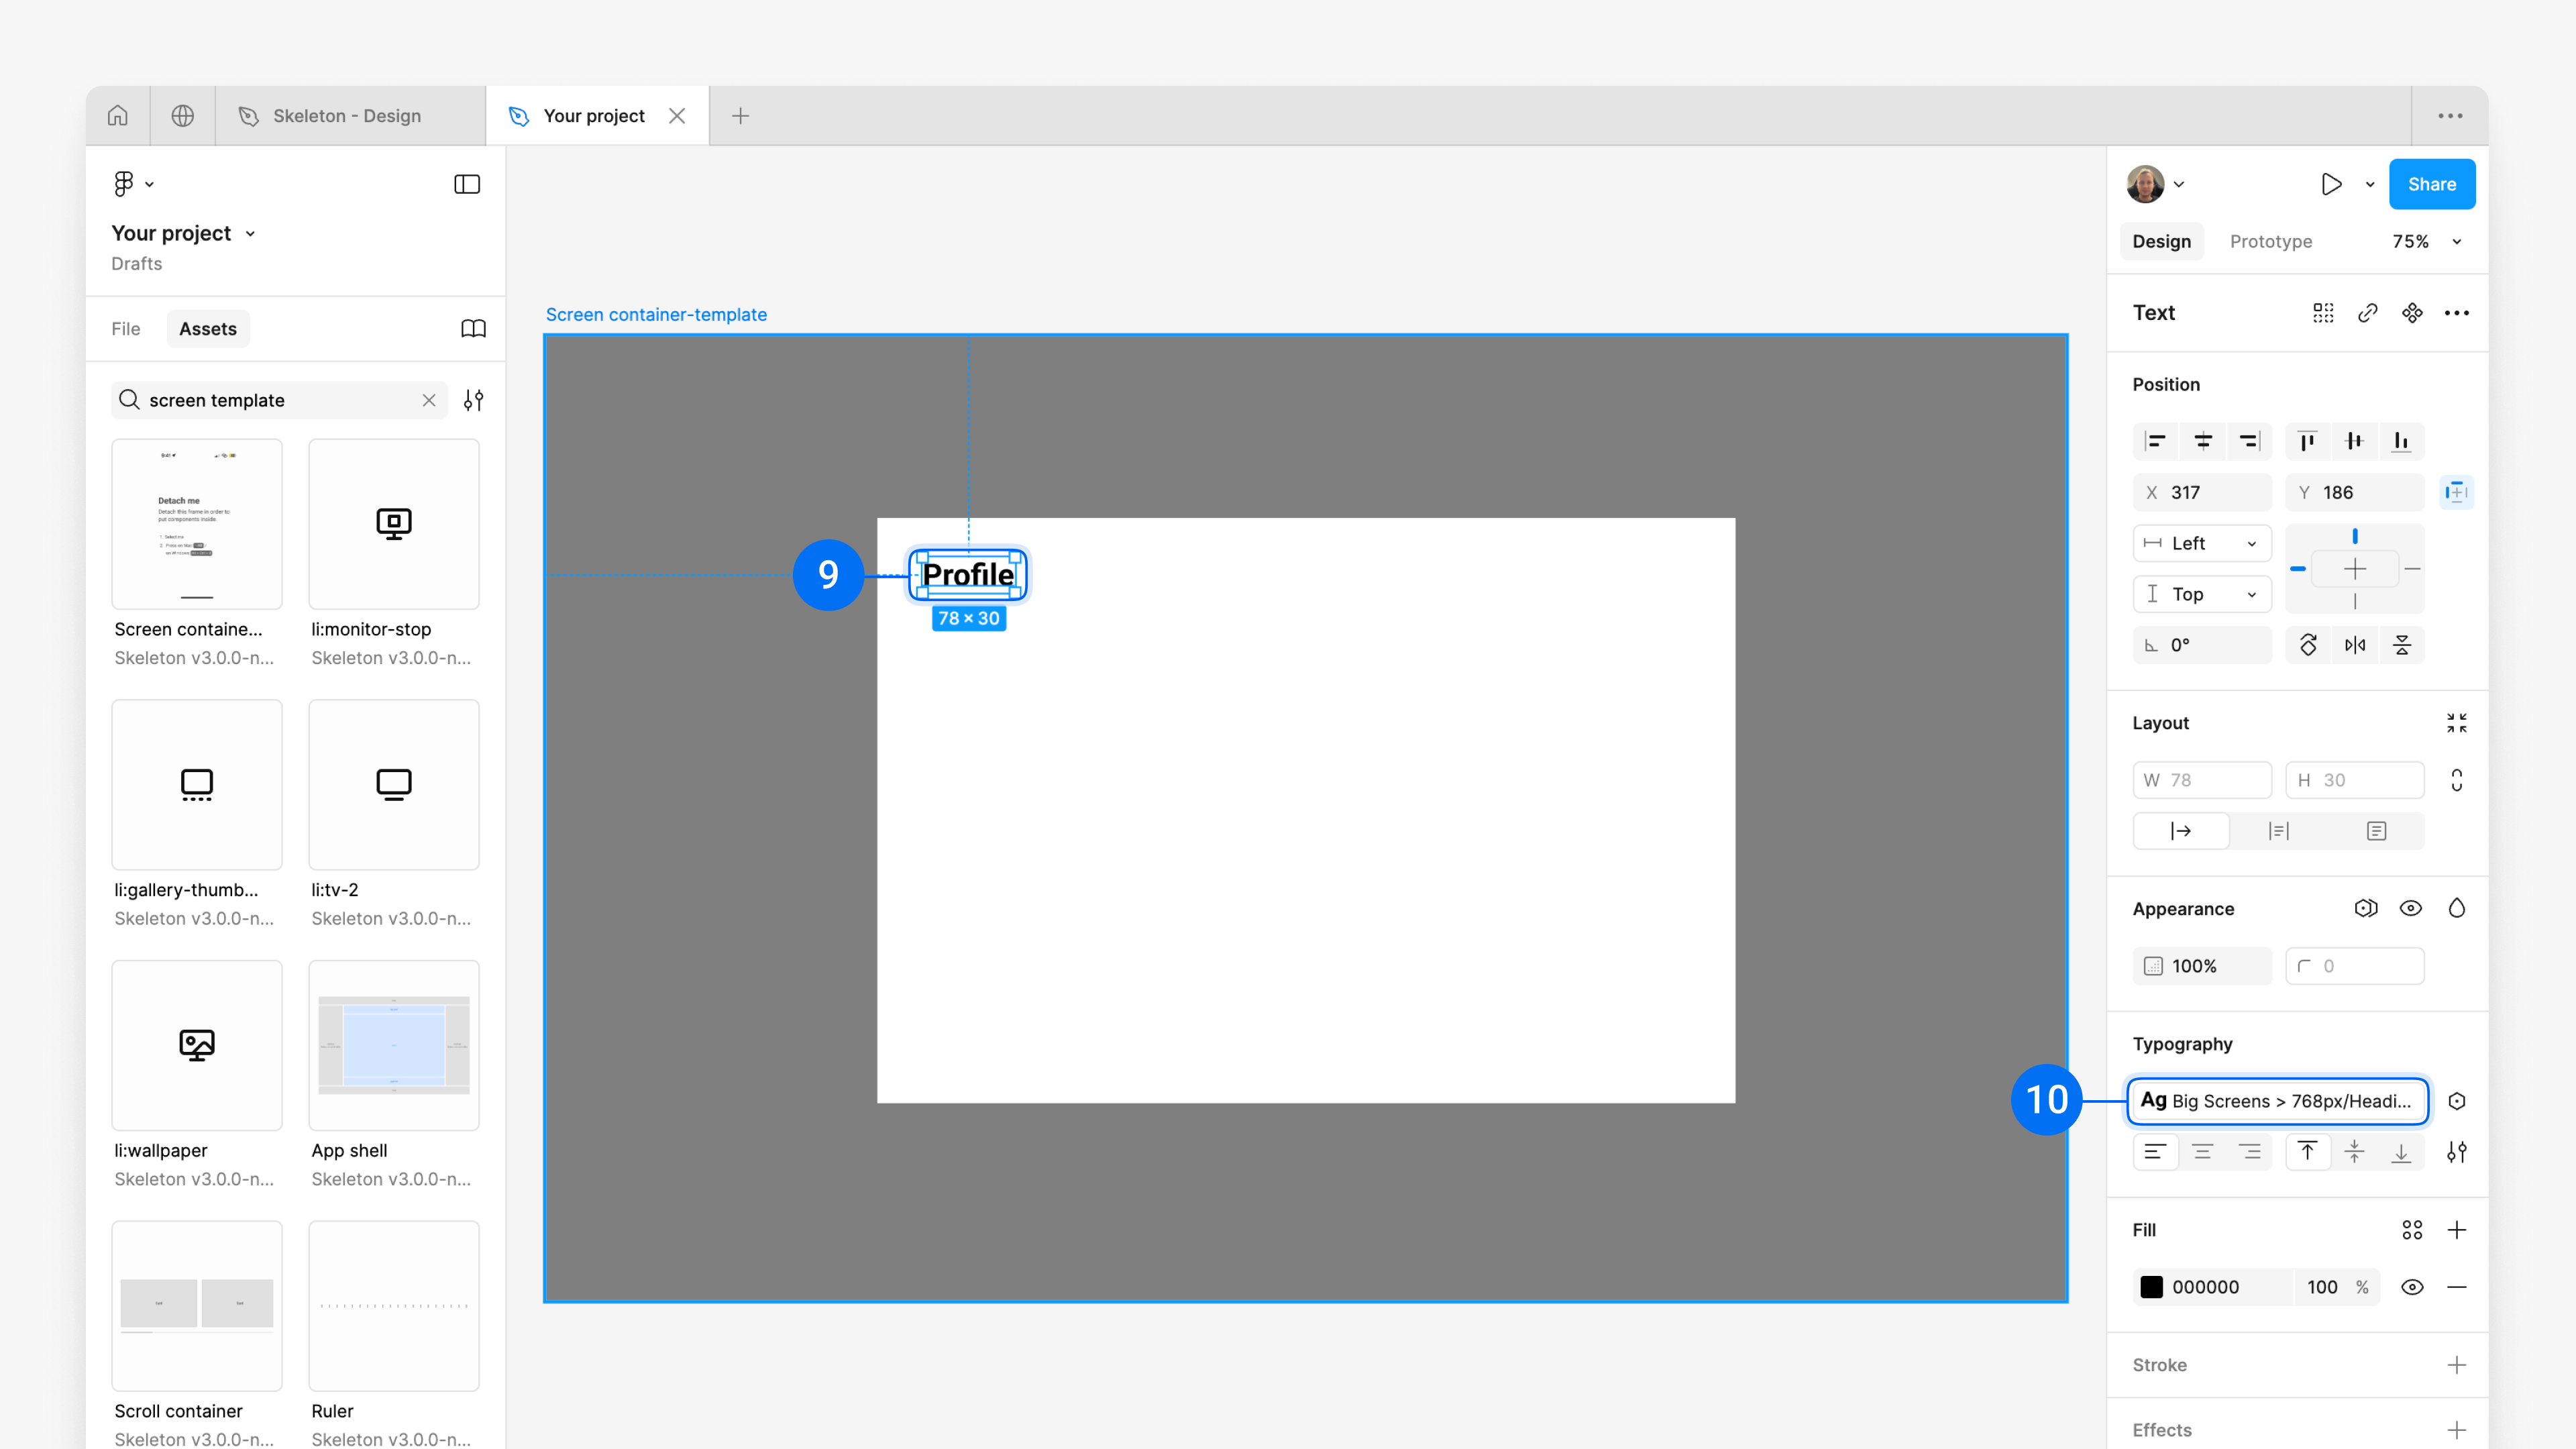
4. Modal headline
Each page, drawer, or modal should have a heading to provide clear context, help users quickly understand the purpose of the content, and make navigation intuitive.
and
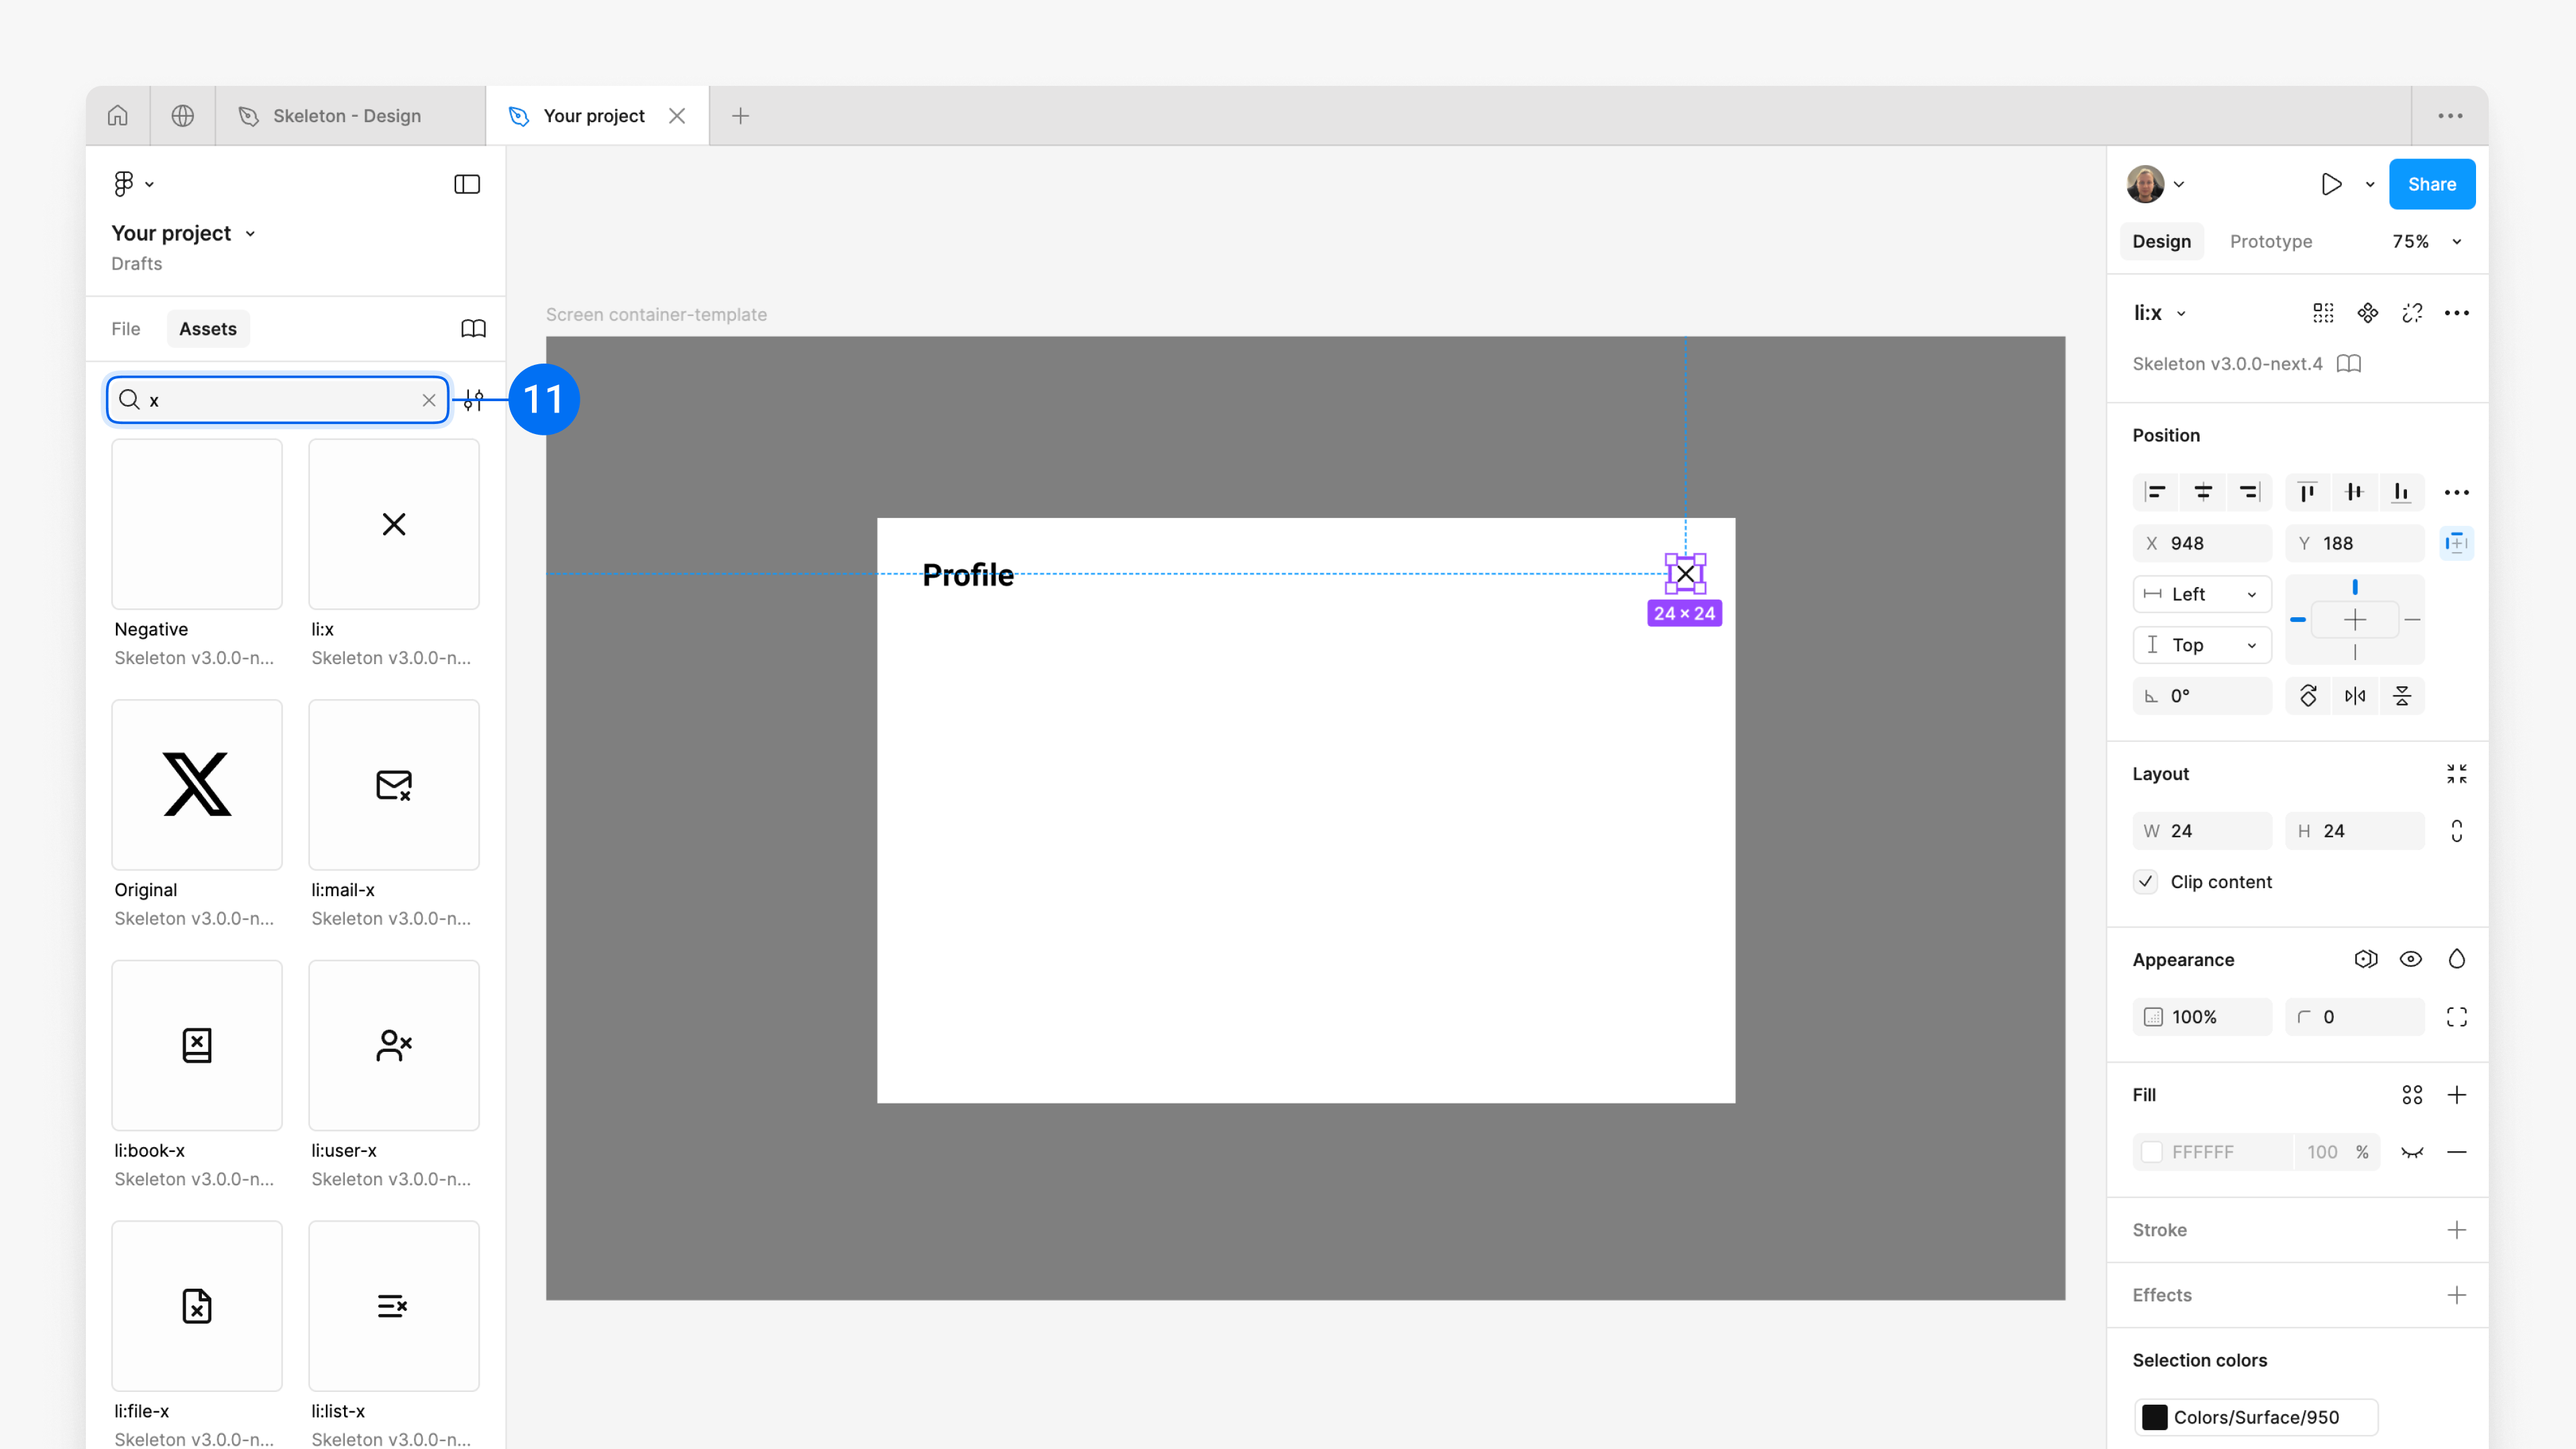
5. Close button
Modals usually have a 'Close' button in the top right corner.
to the top right corner of the modal.
'li:' stands for lucid icons. By typing **'li:'** at the beginning of Assets, you can search specifically for icons.
6. Add Avatar
the ,'Avatar' component and place it below the 'Modal headline'.
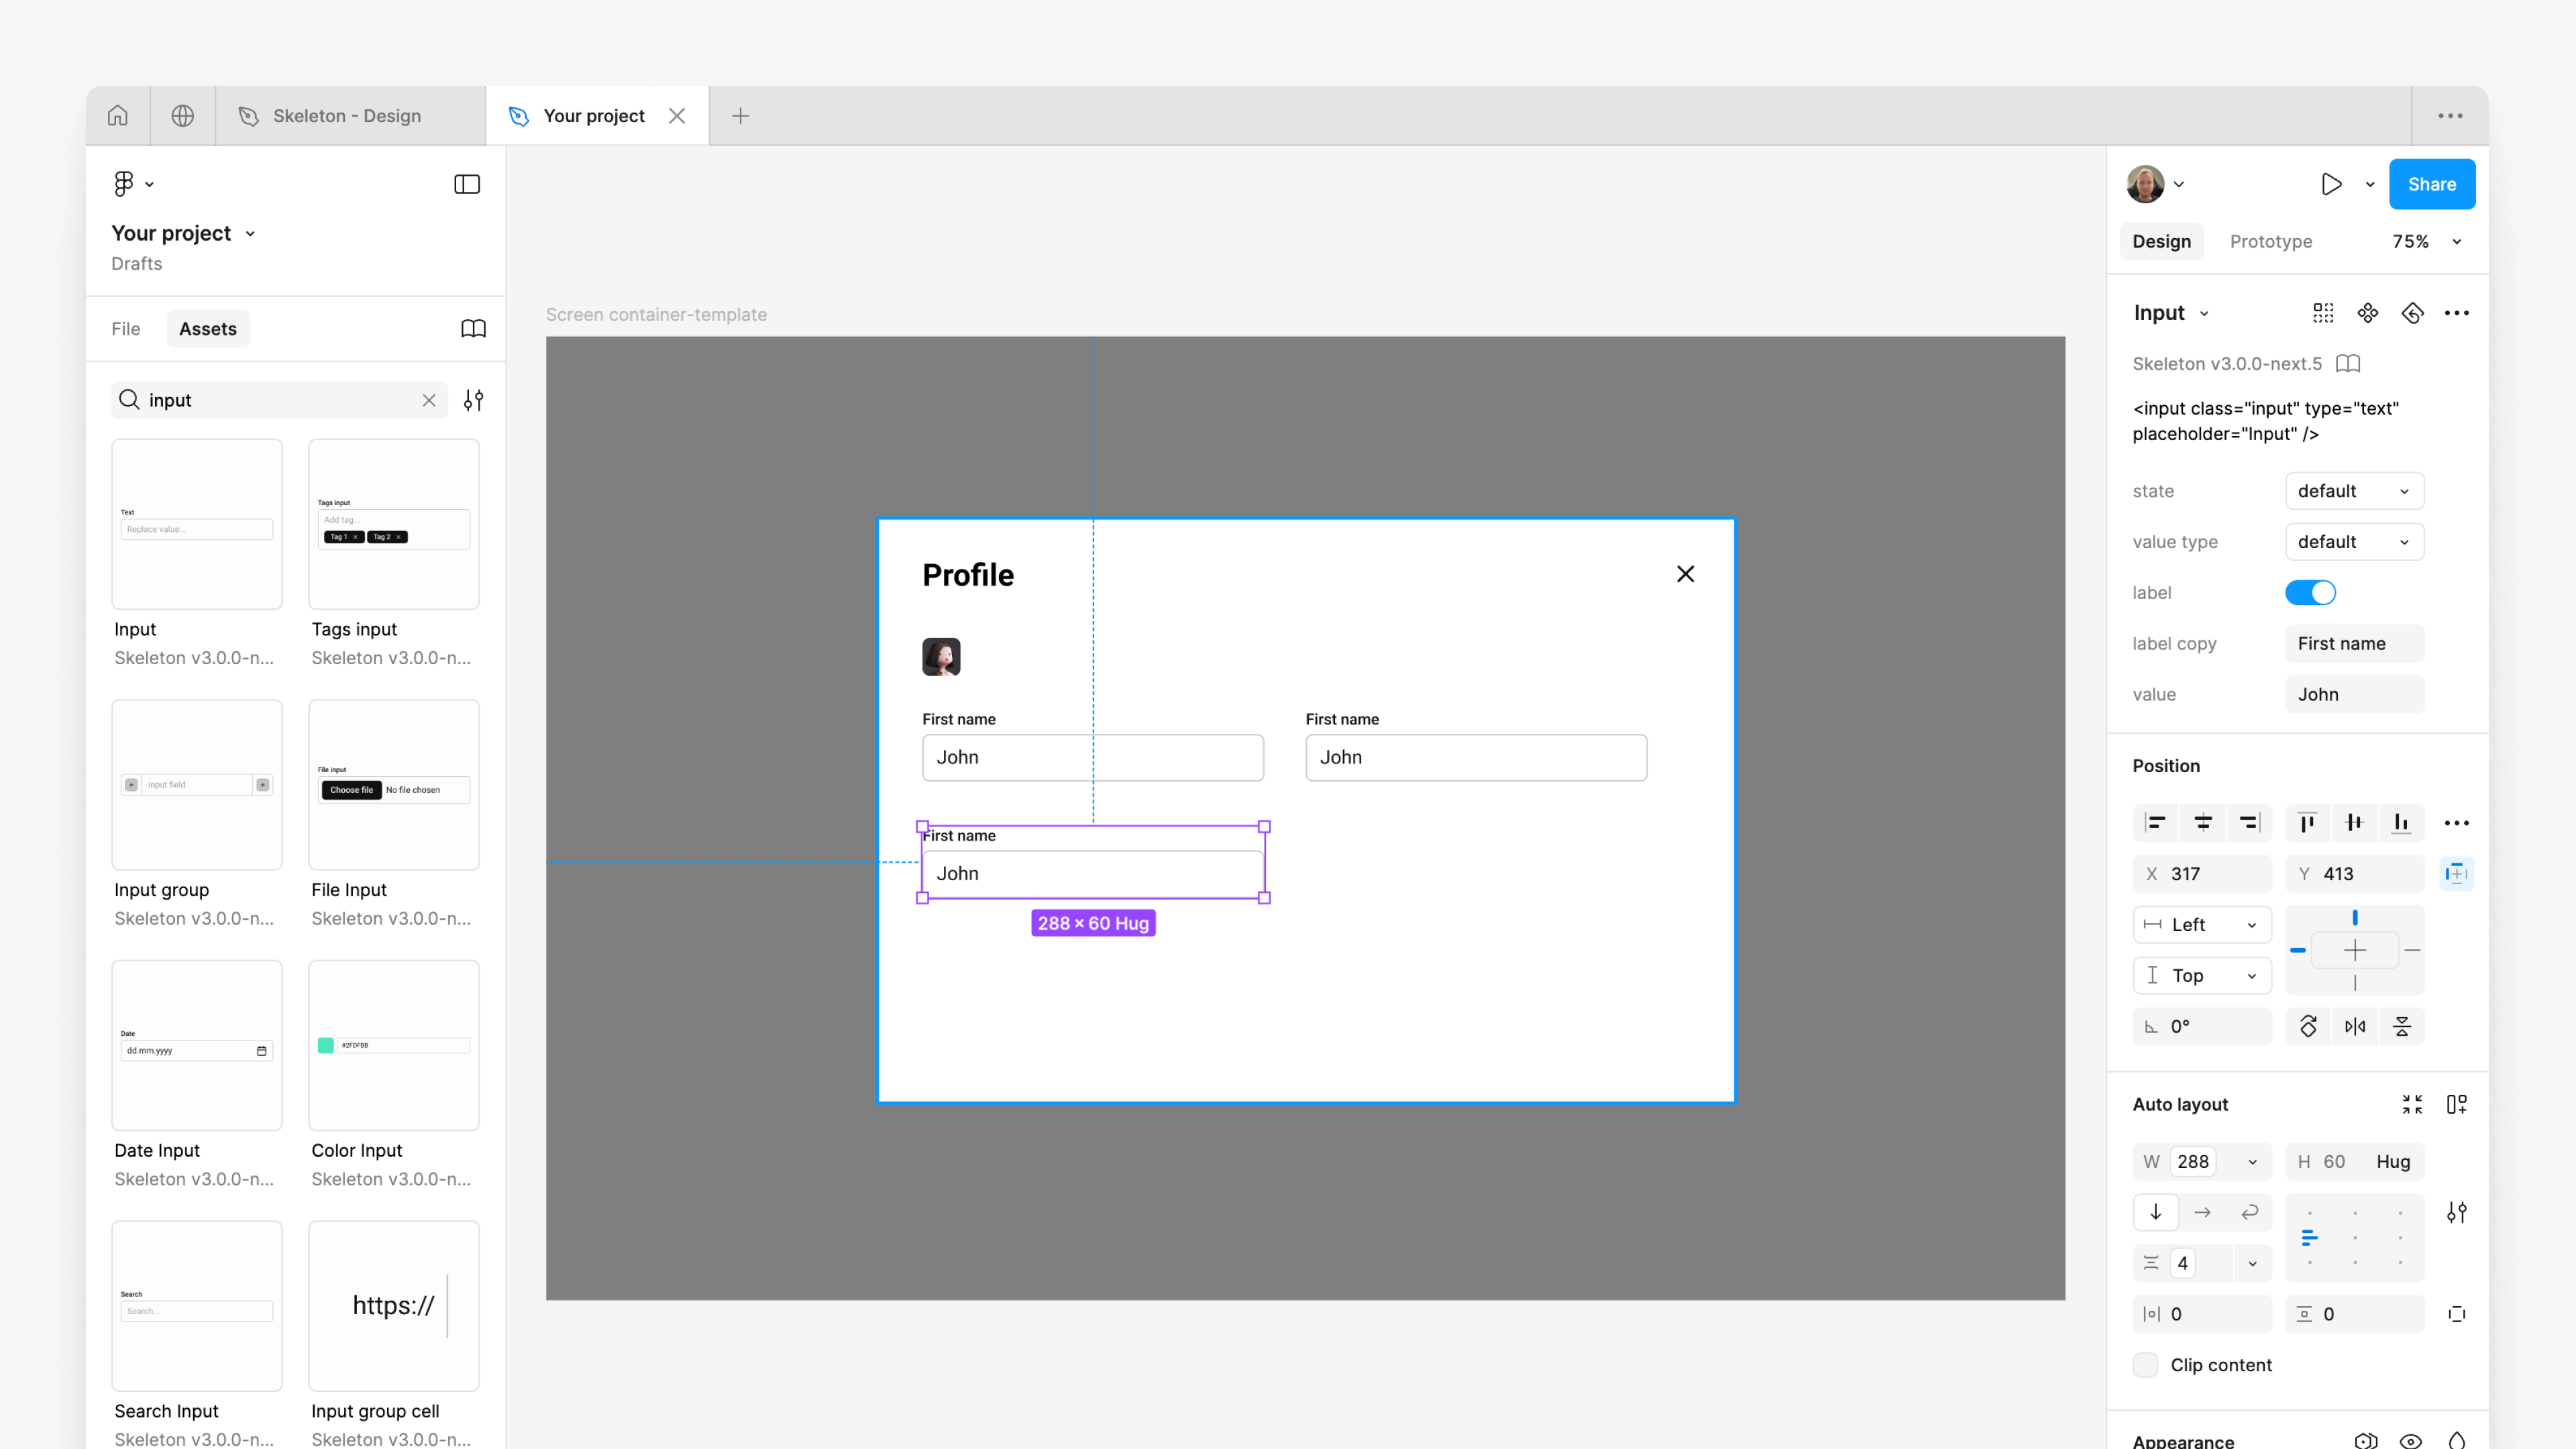
7. Add Input
the 'Input' component below the 'Avatar'.
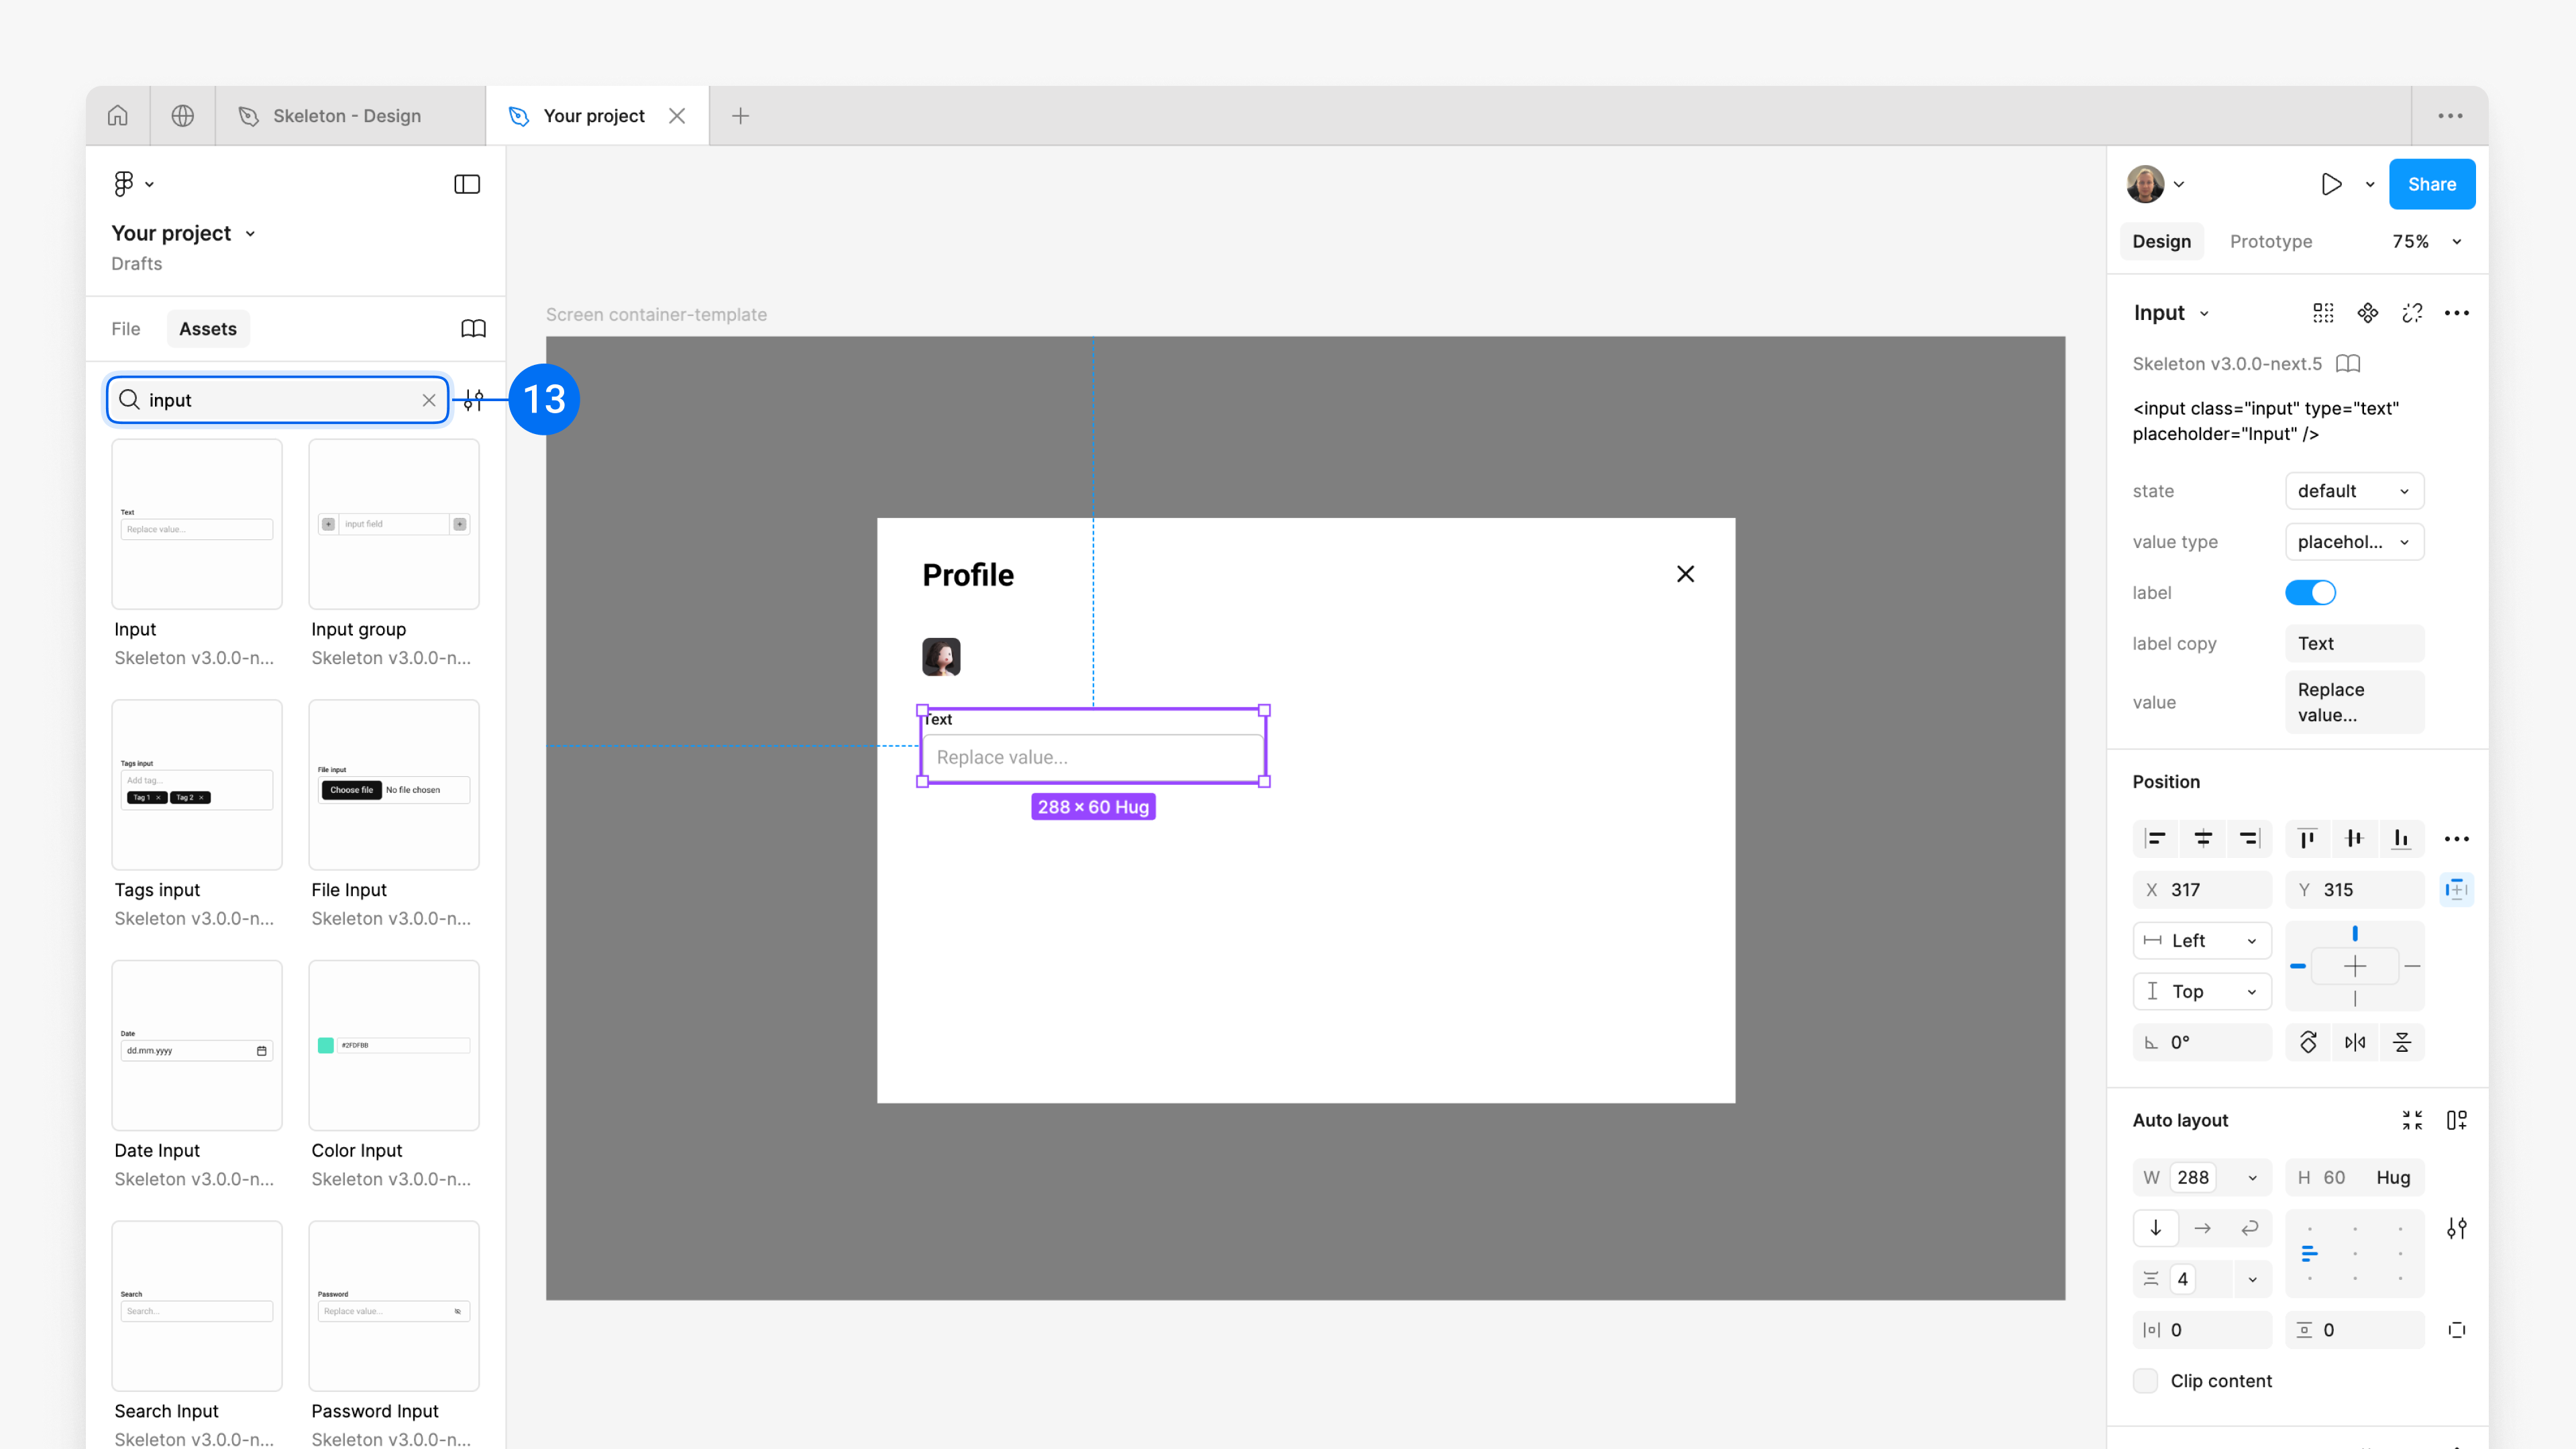
the 'Text' label into 'First name'.
And afterwards

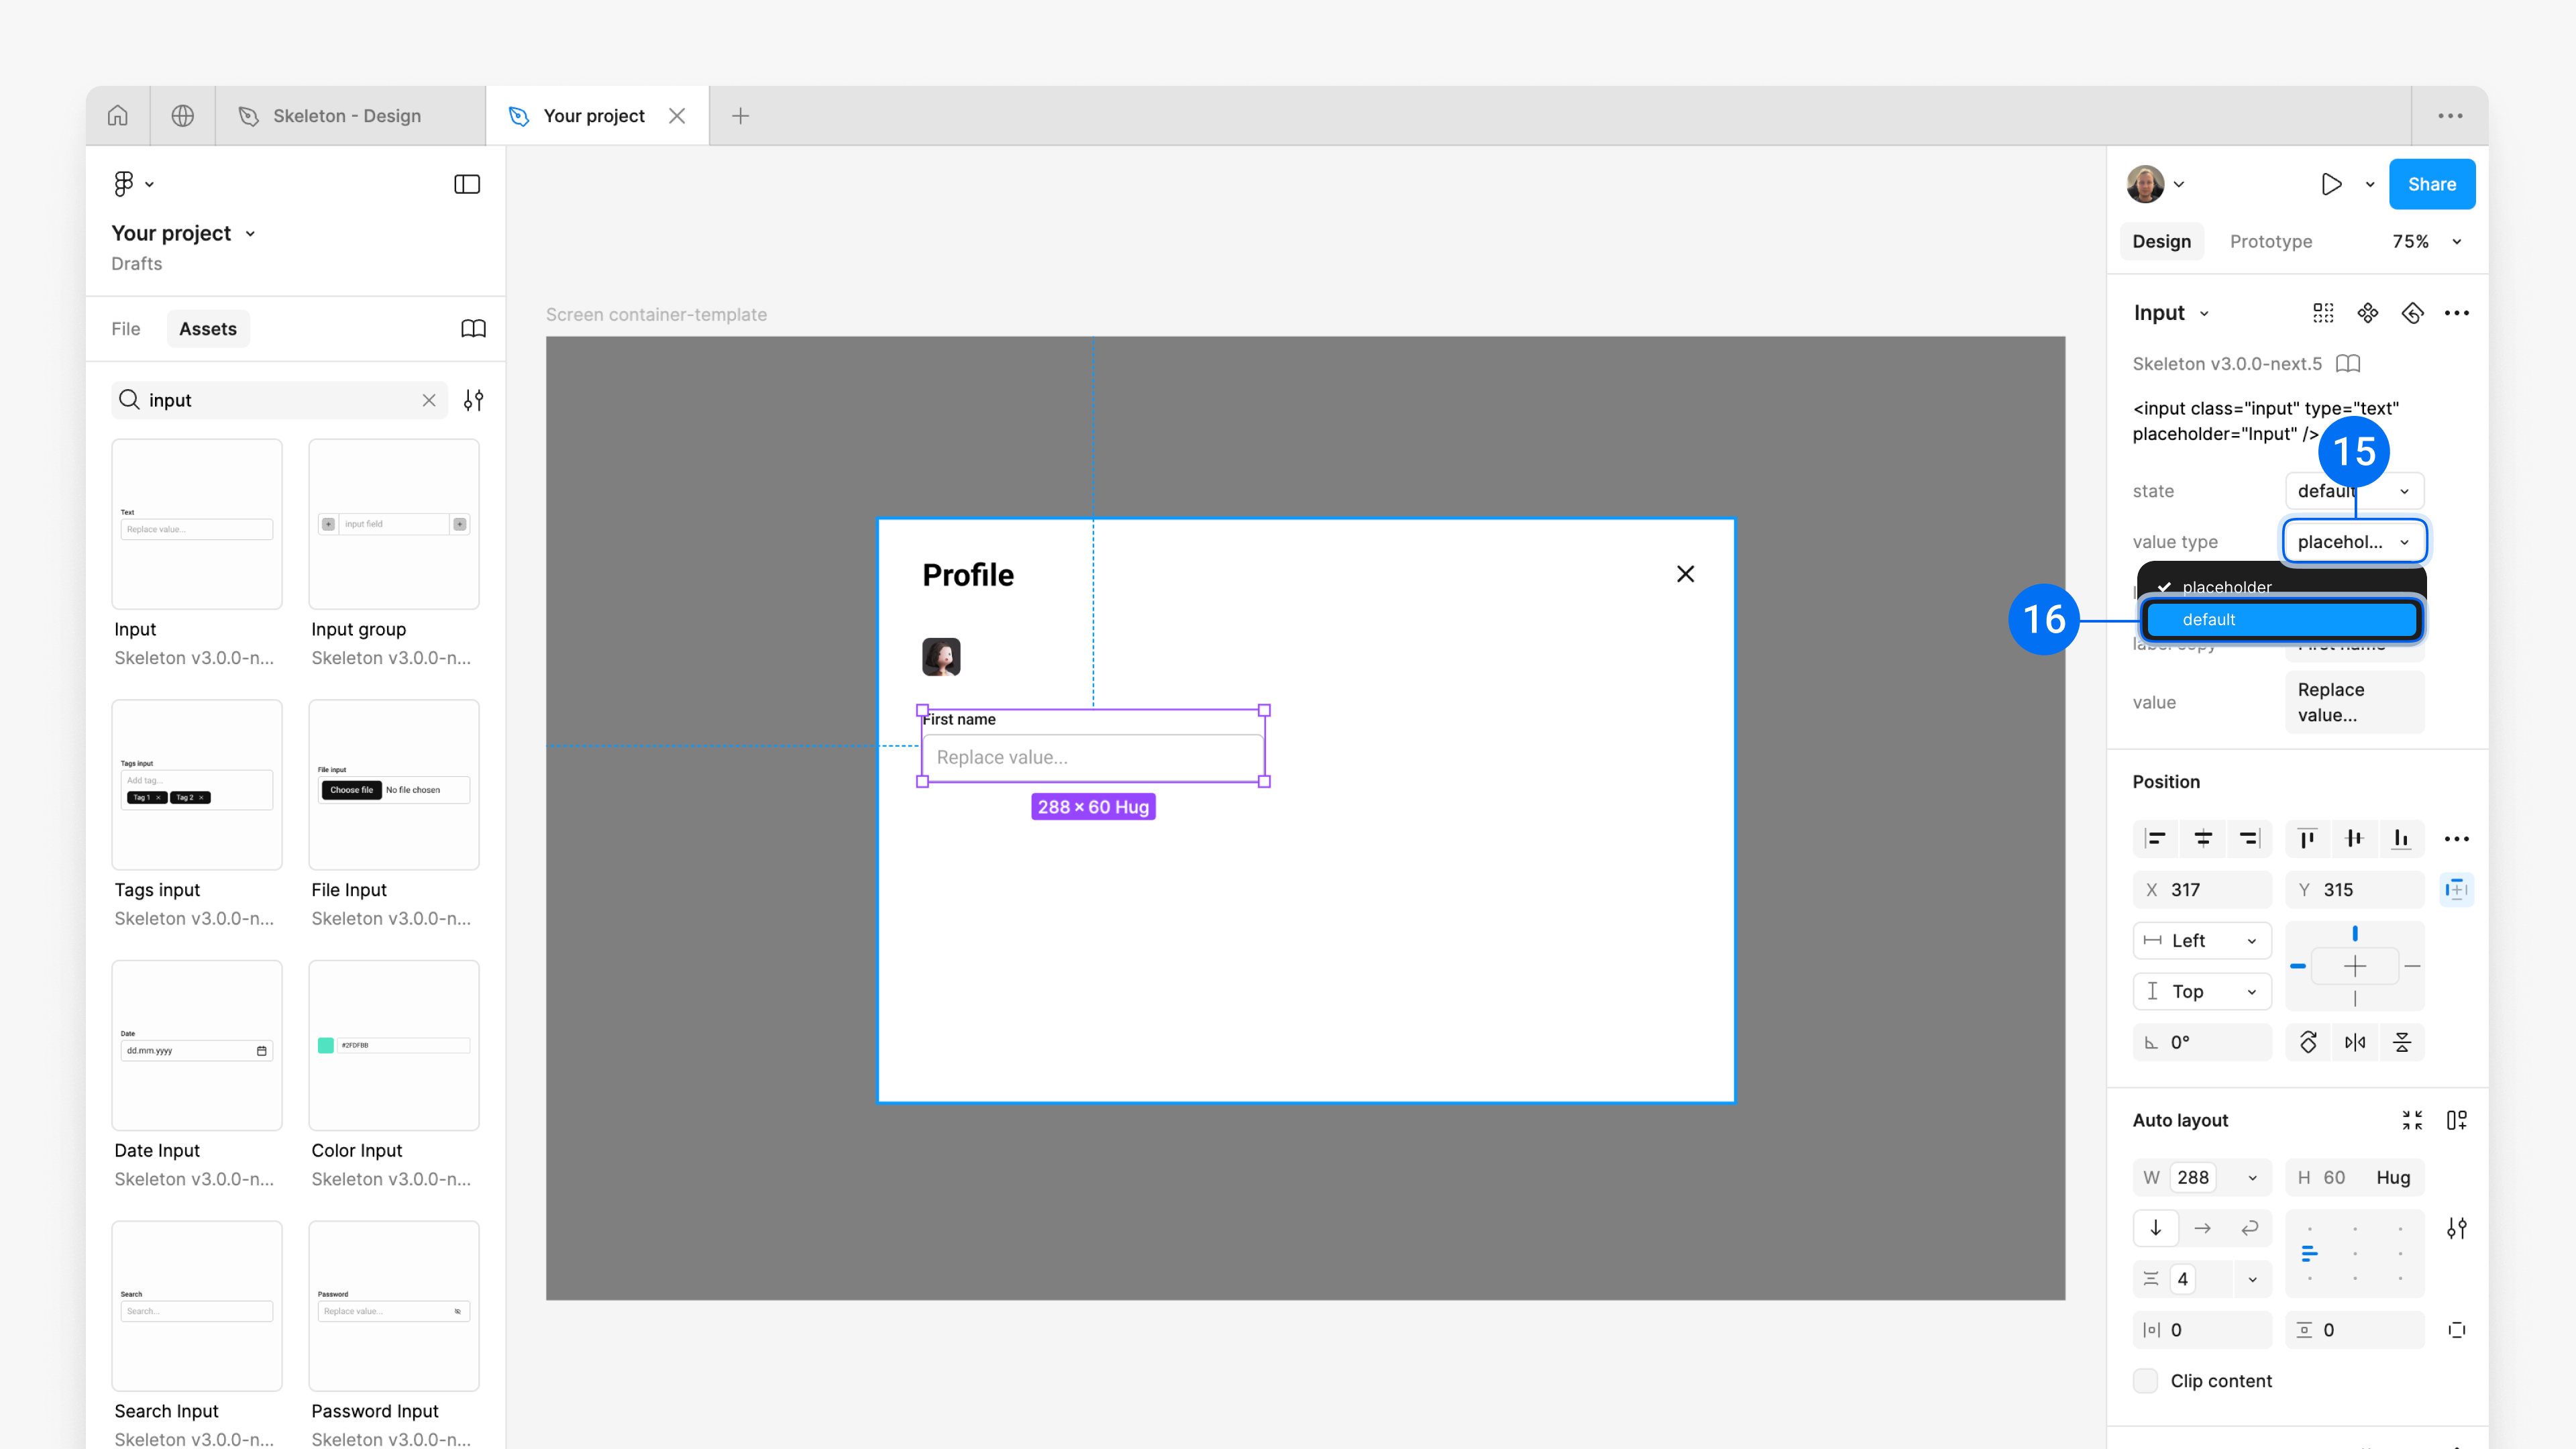
In our situation, we require that the input fields be pre-filled with a username. Select the input, and on the right sidebar, change the 'value type' property from 'placeholder' to 'default'.
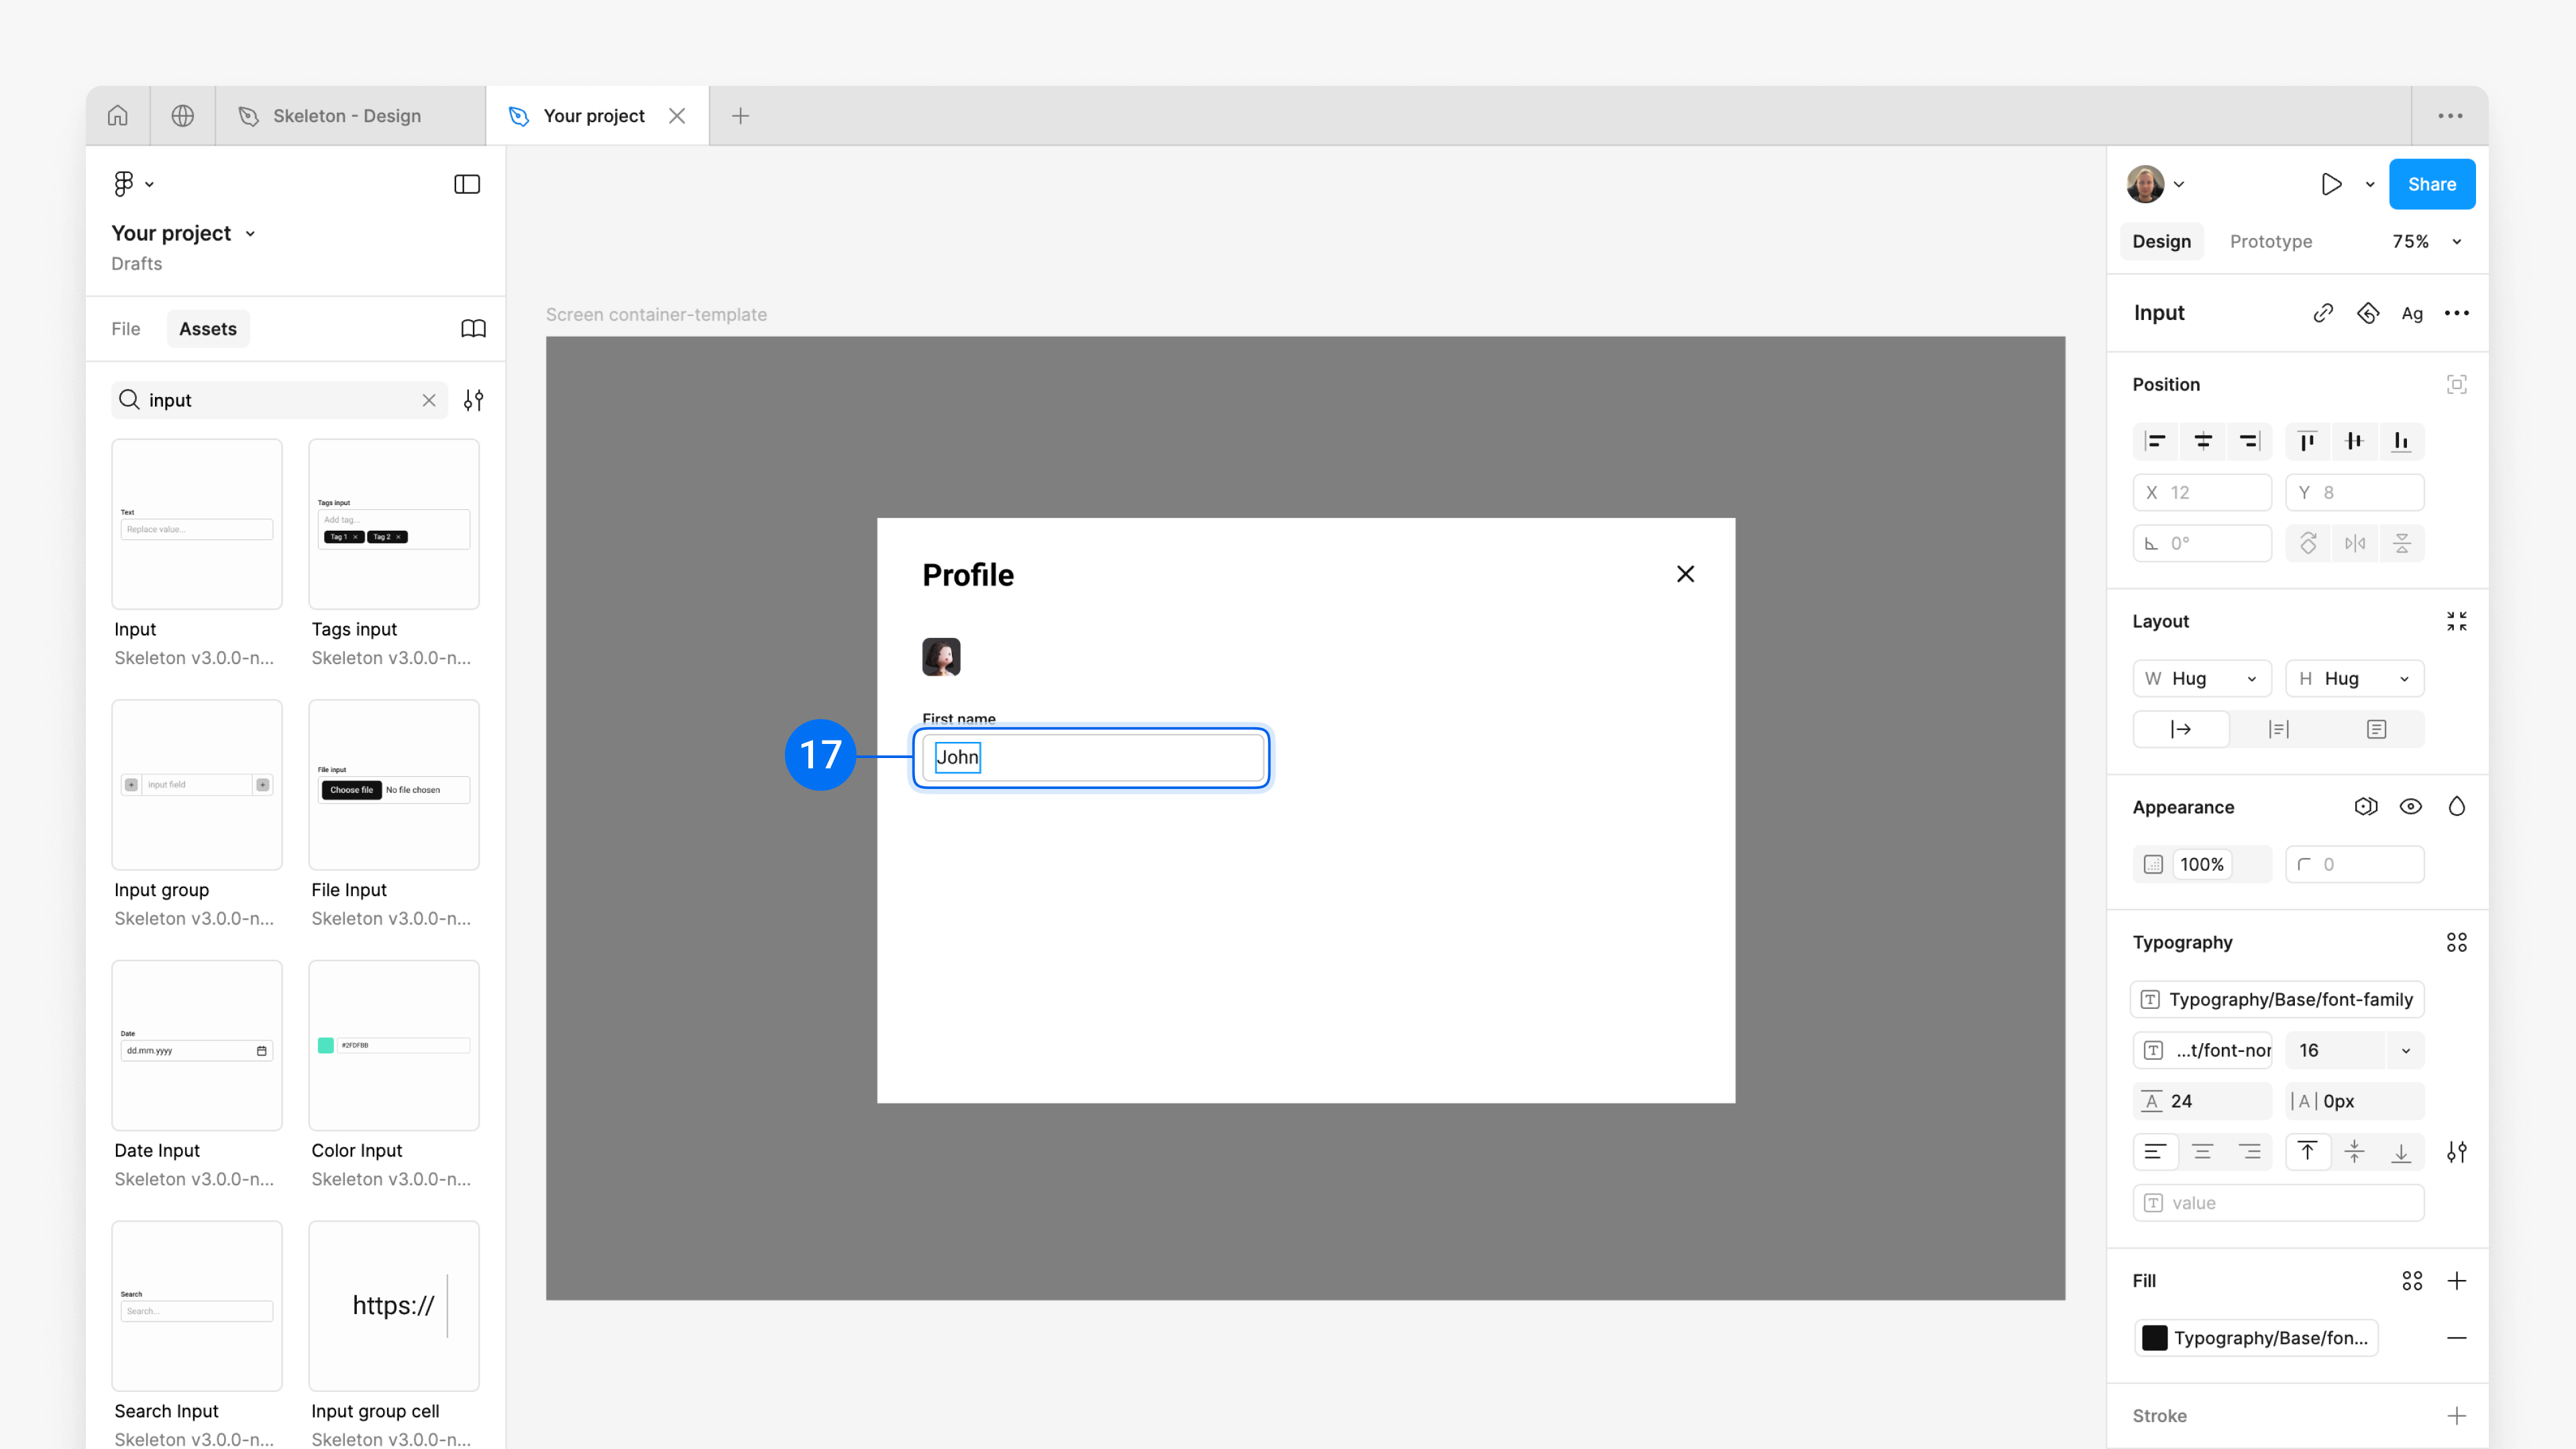
the placeholder 'Replace value...' value to 'John'.
And afterwards
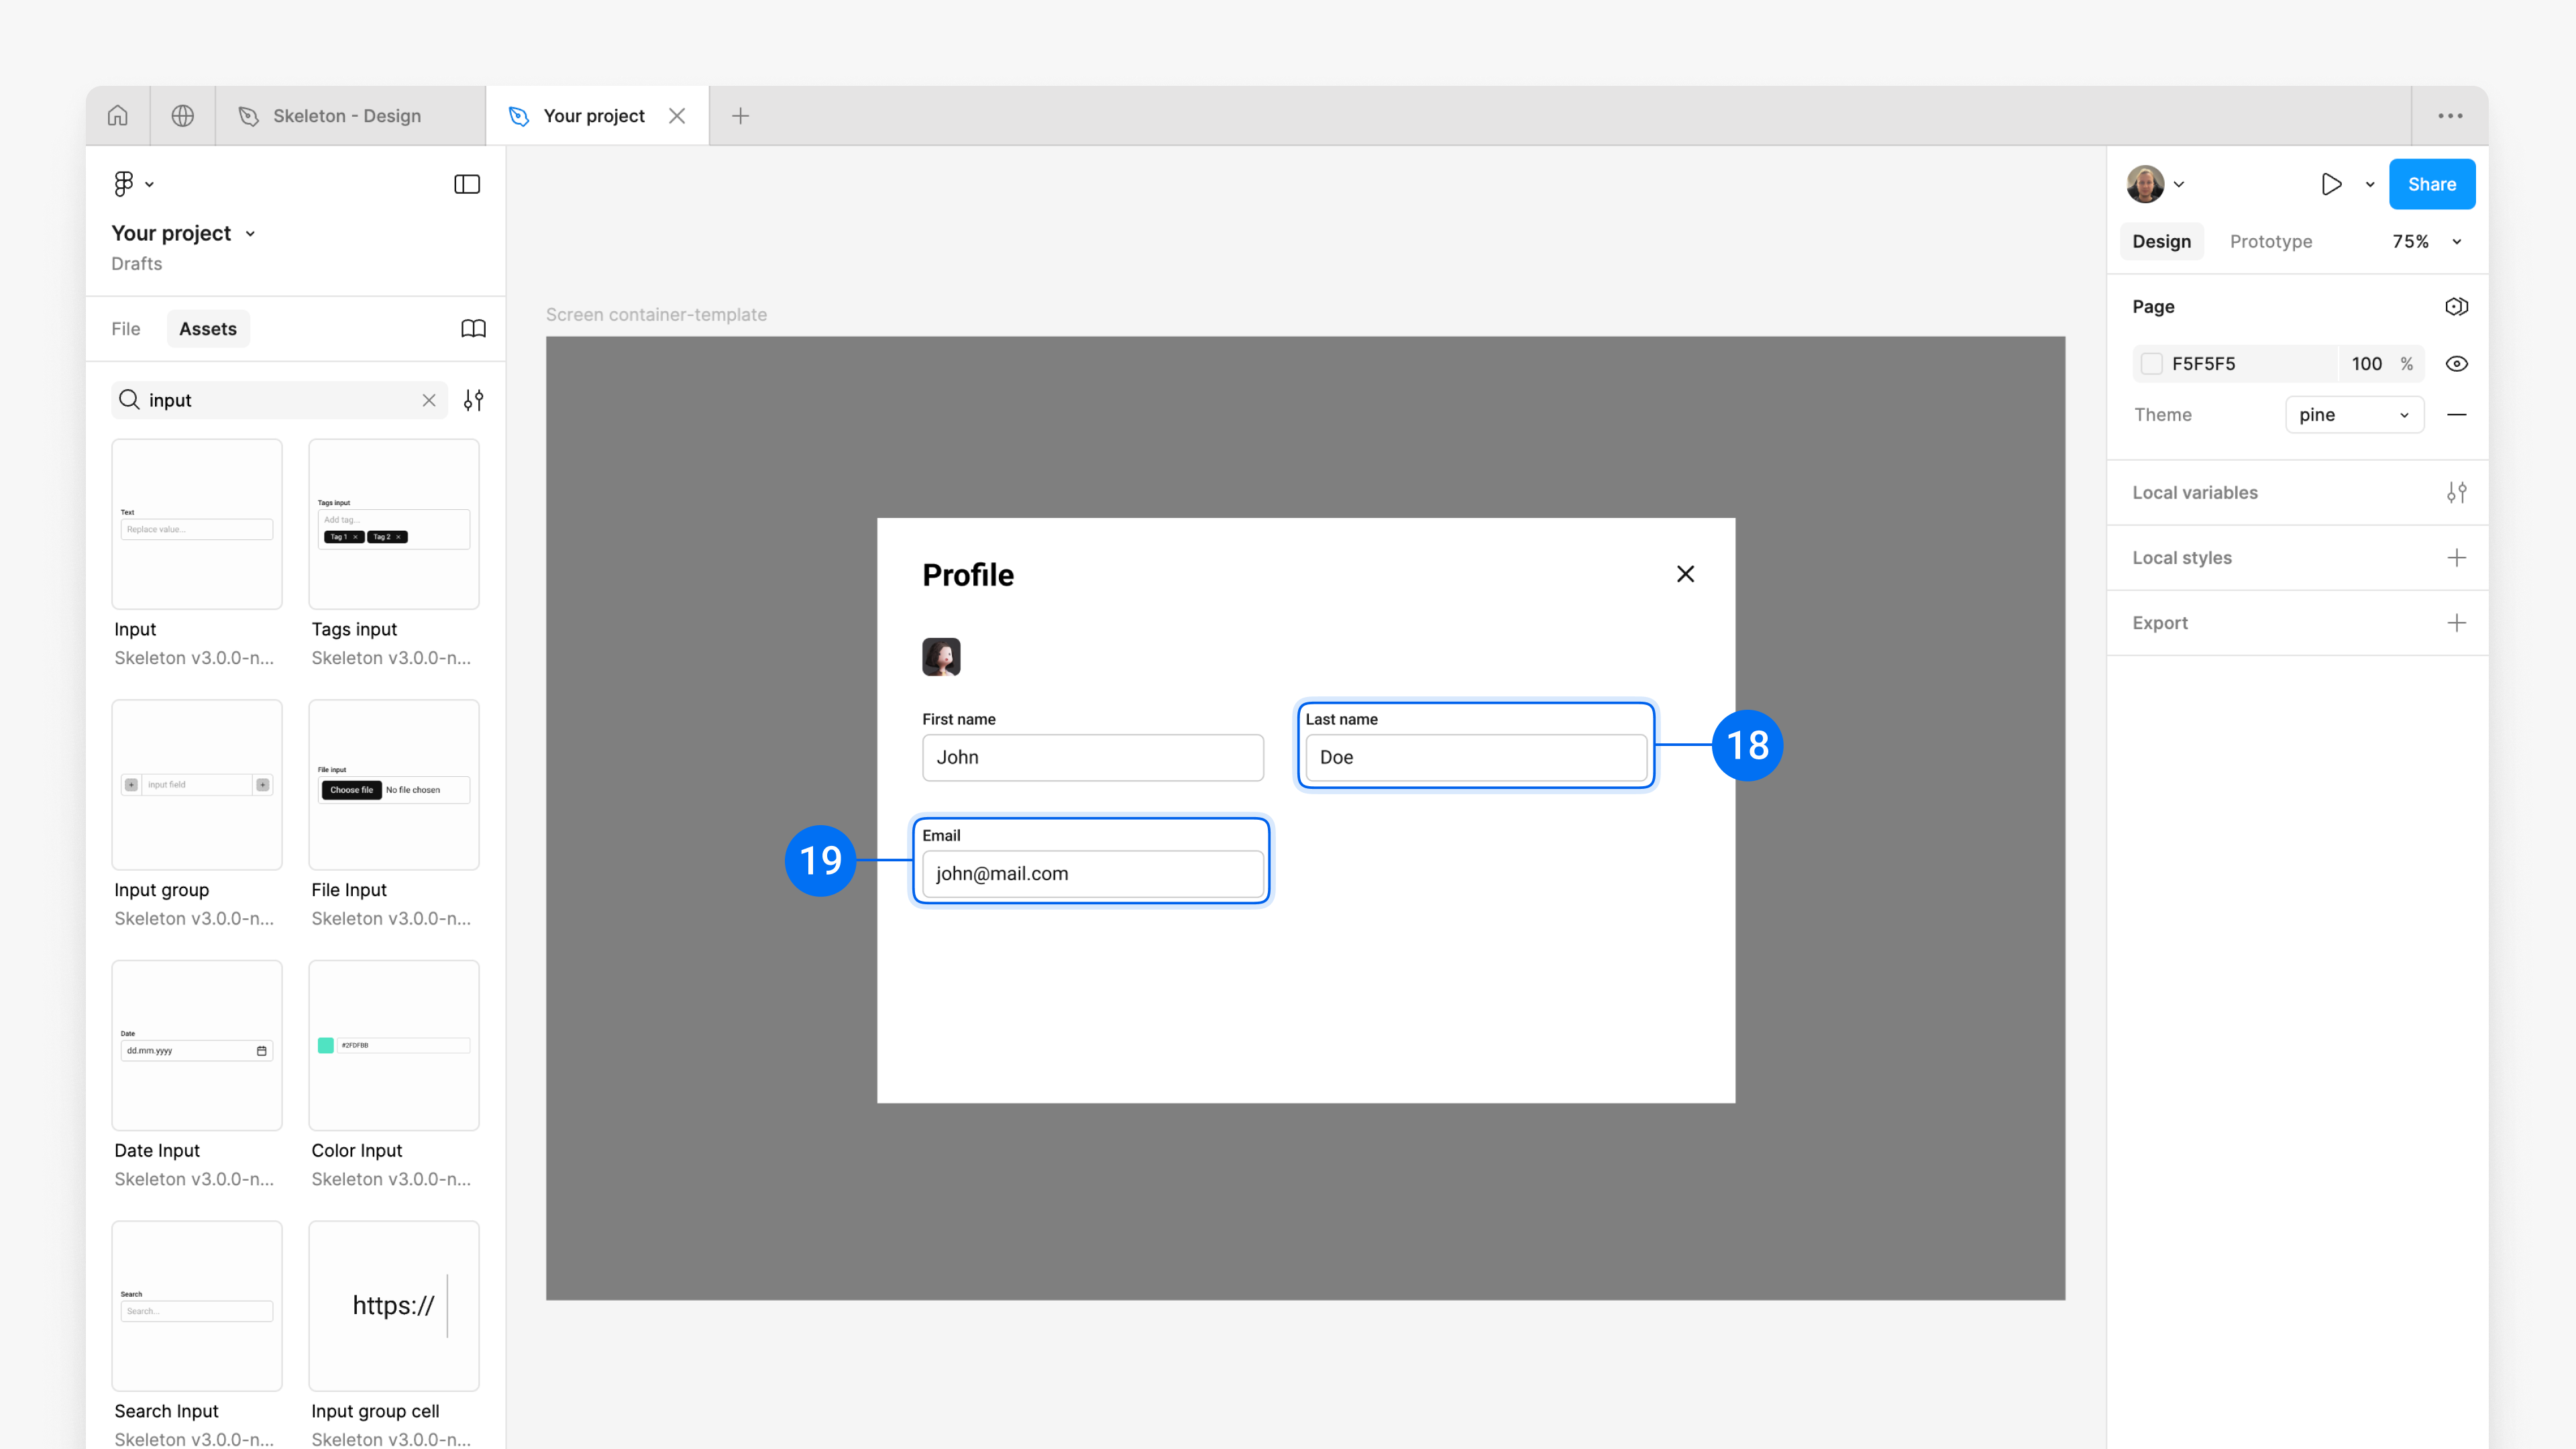
8. Add 'Last name' and 'Email' inputs.
We do the same for 'Last name' and 'Email', but this time we duplicate the 'First name' input and rename it to speed up the process.
'First name' inputtwice.
to 'Last Name' and the value to 'Doe'. And the third 'input label' to 'Email' and the value to 'john@mail.com'.
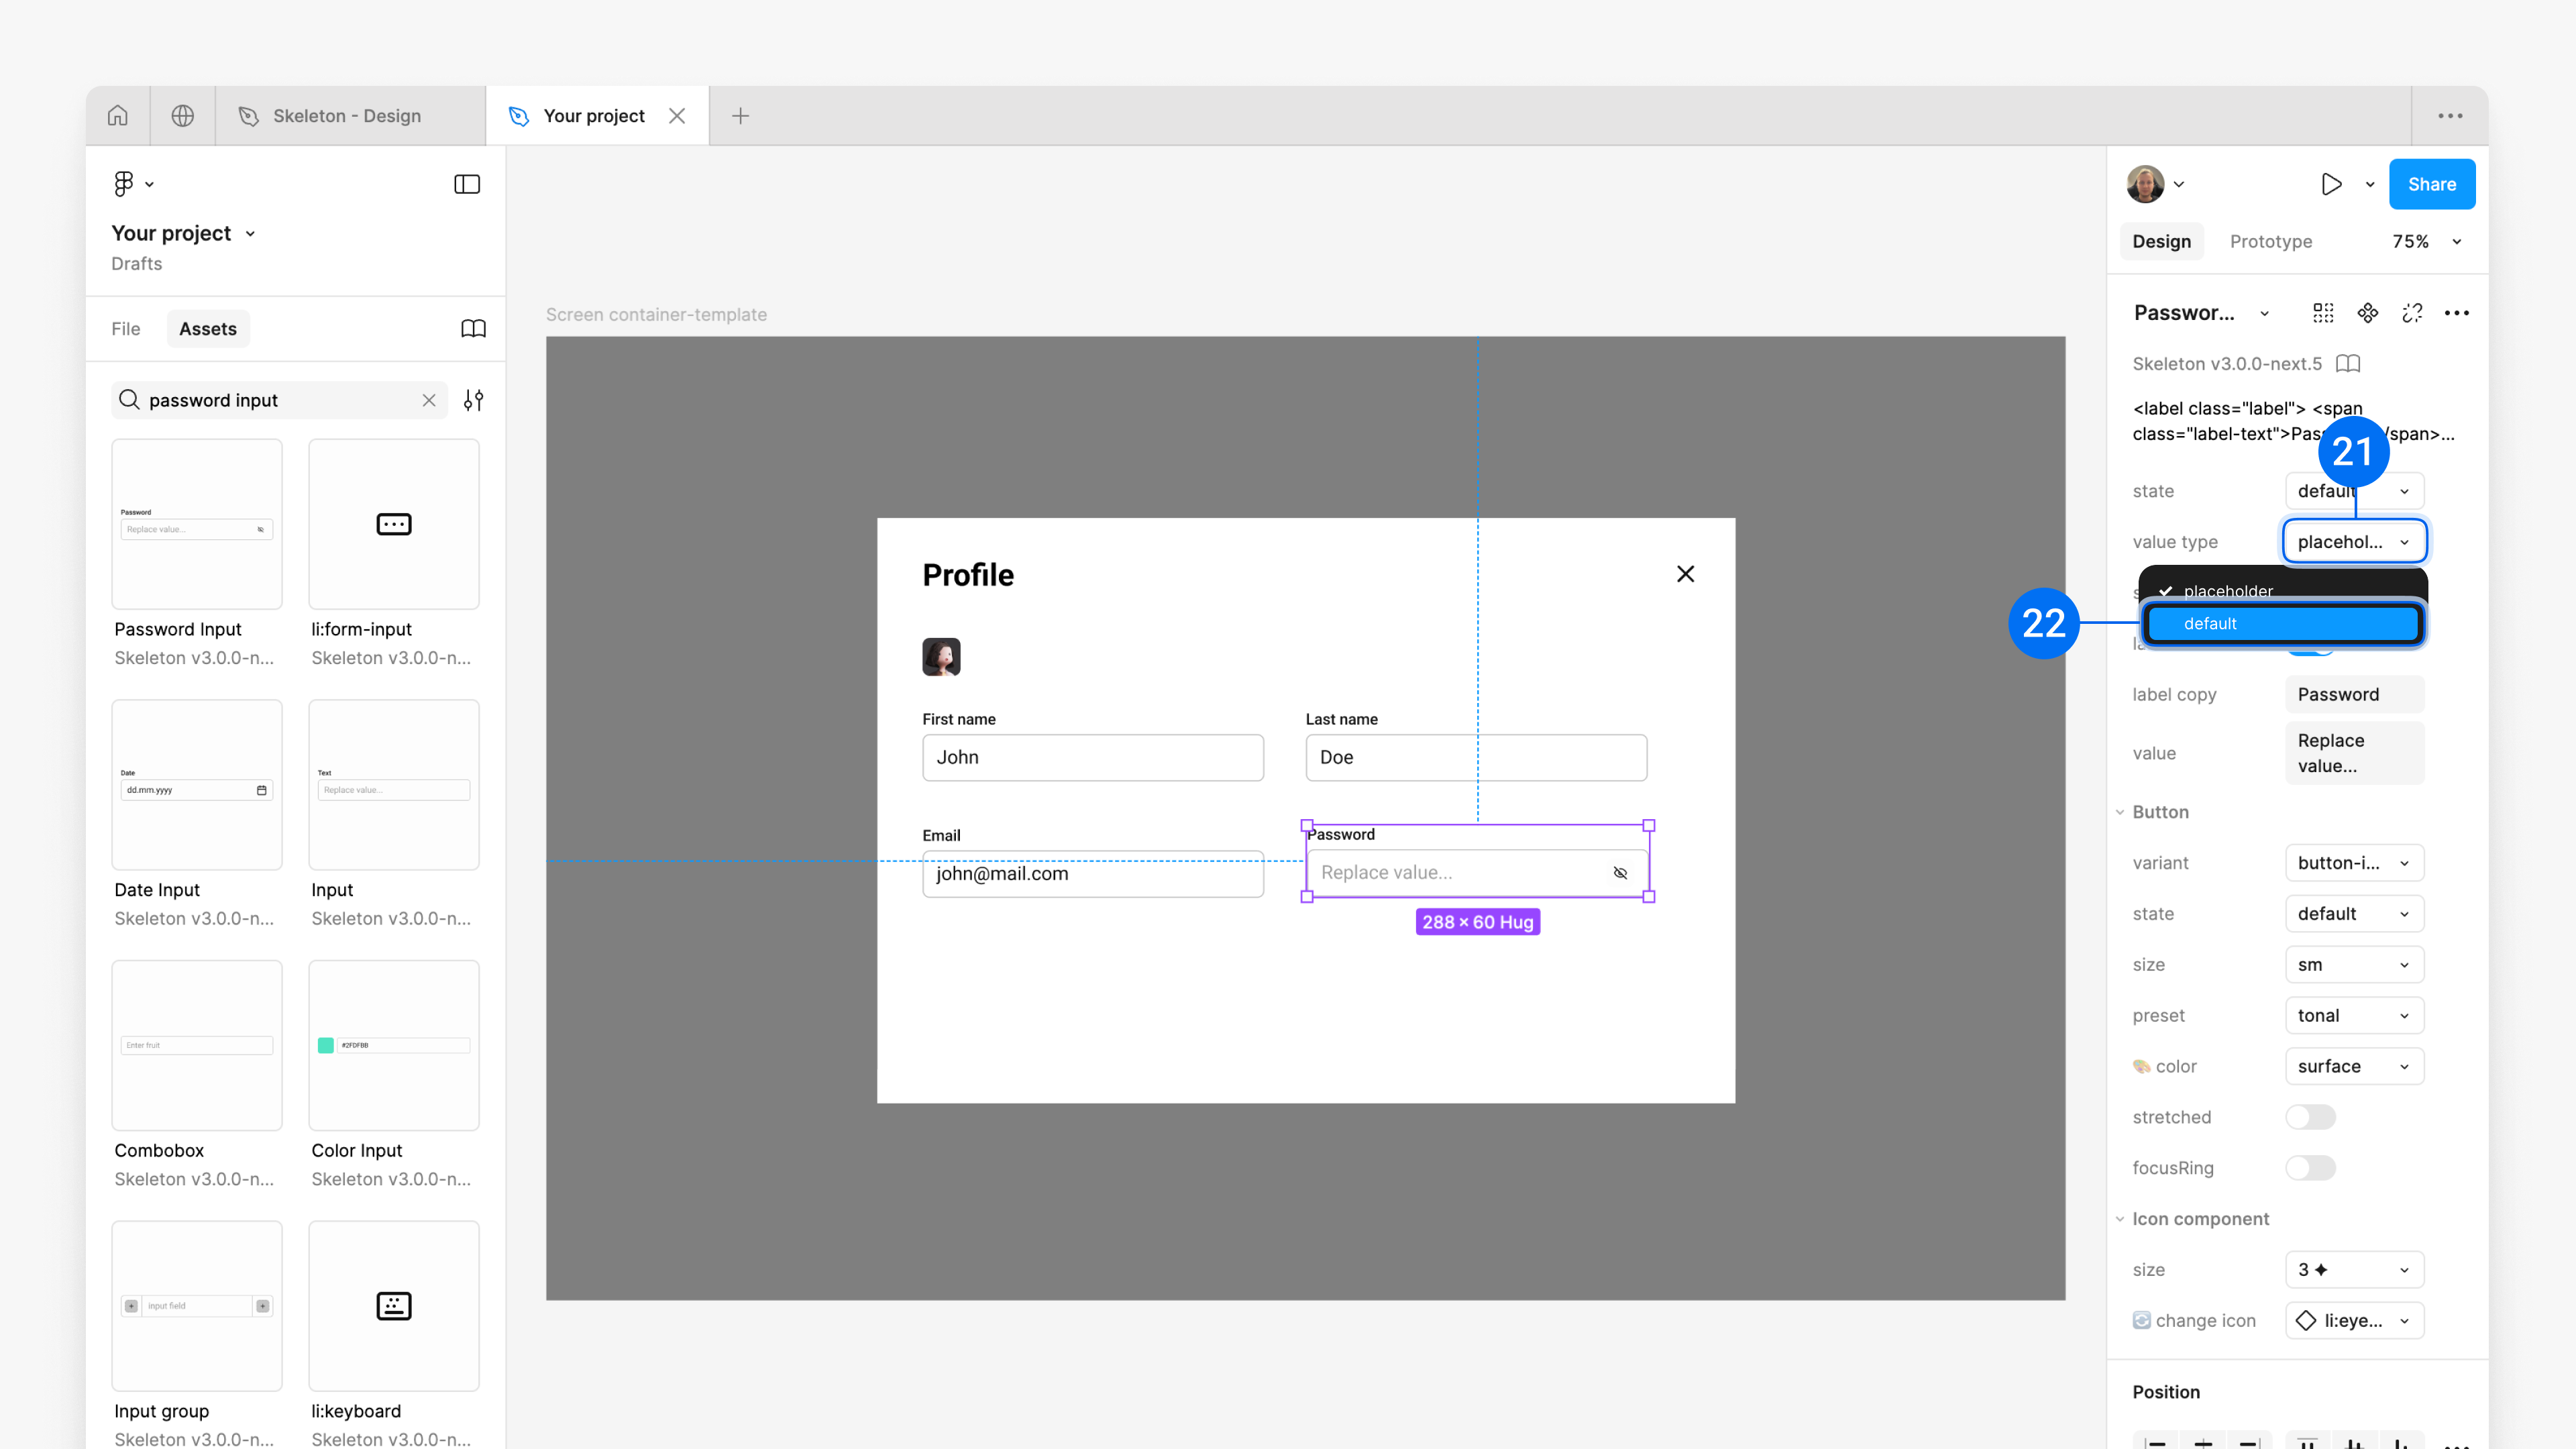
9. Add ‘Password Input’
'Password Input' component.
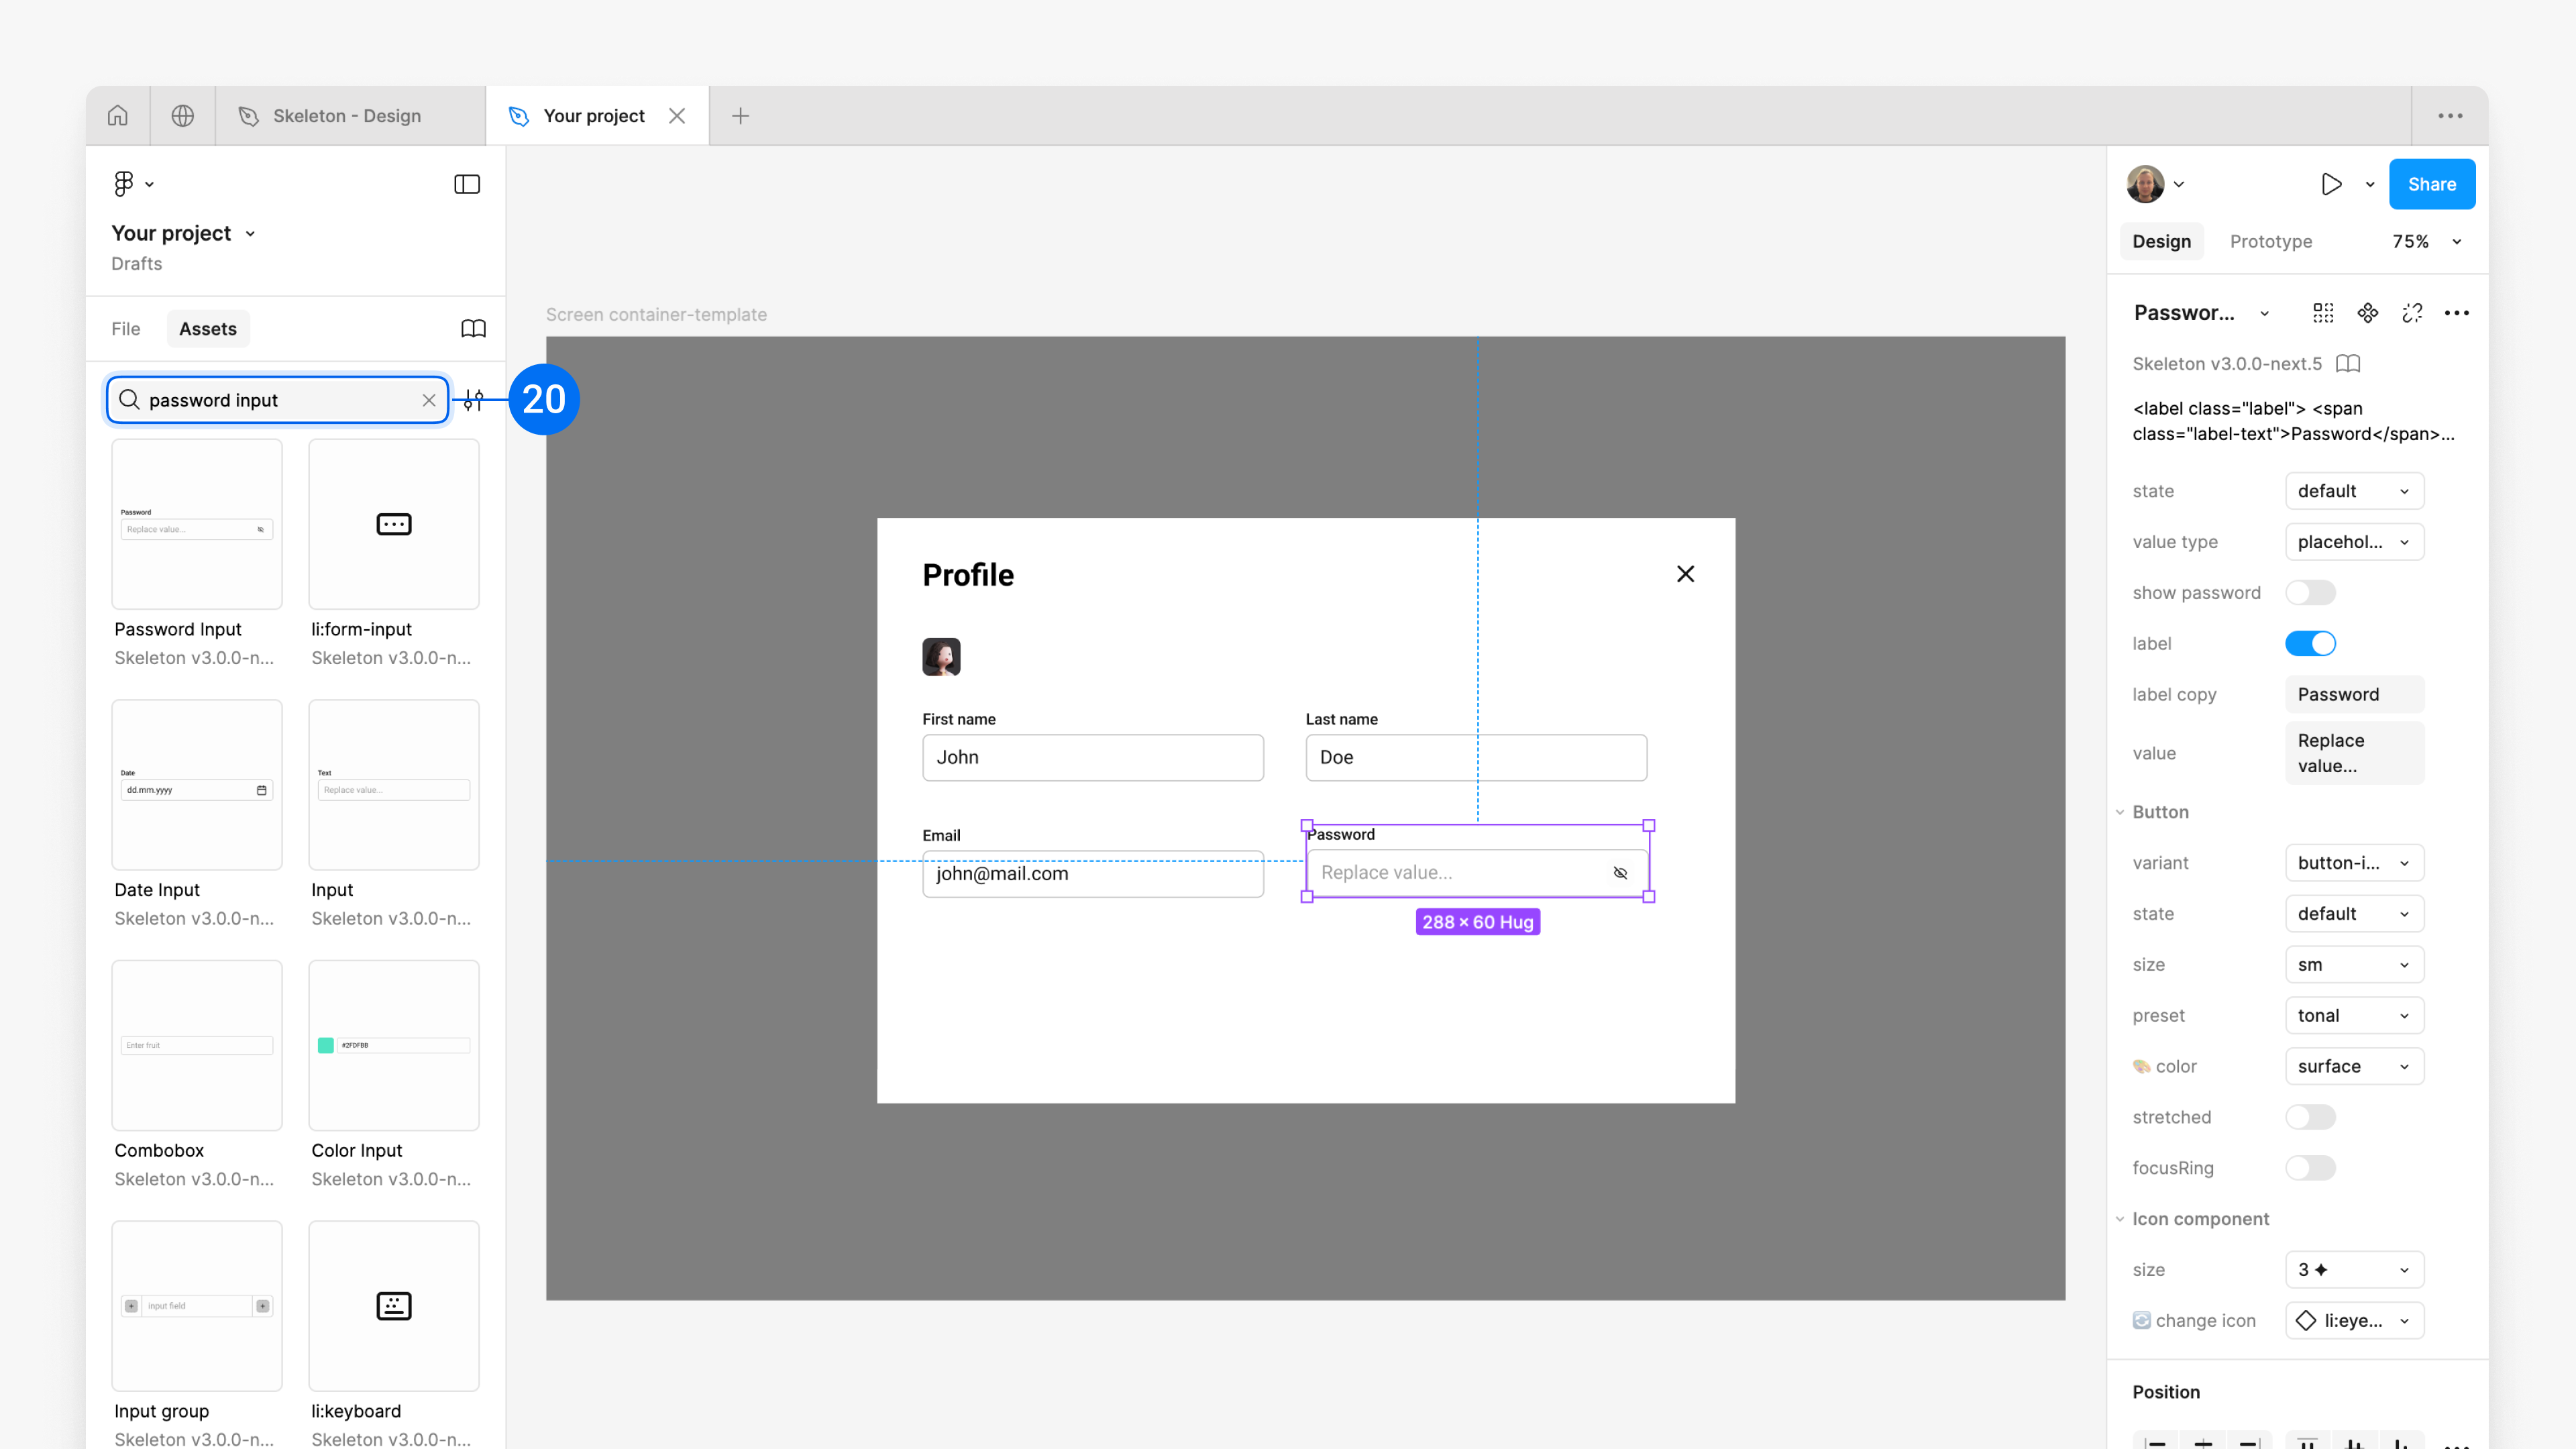
Select 'Password input'; on the right sidebar, change the 'value type' property from 'placeholder' to 'default'.
10. 'Save' button
Users' updates to data must be saved to ensure their changes are preserved. The most common pattern in this case is to have 'Save' and 'Cancel' buttons.
'Button' component.
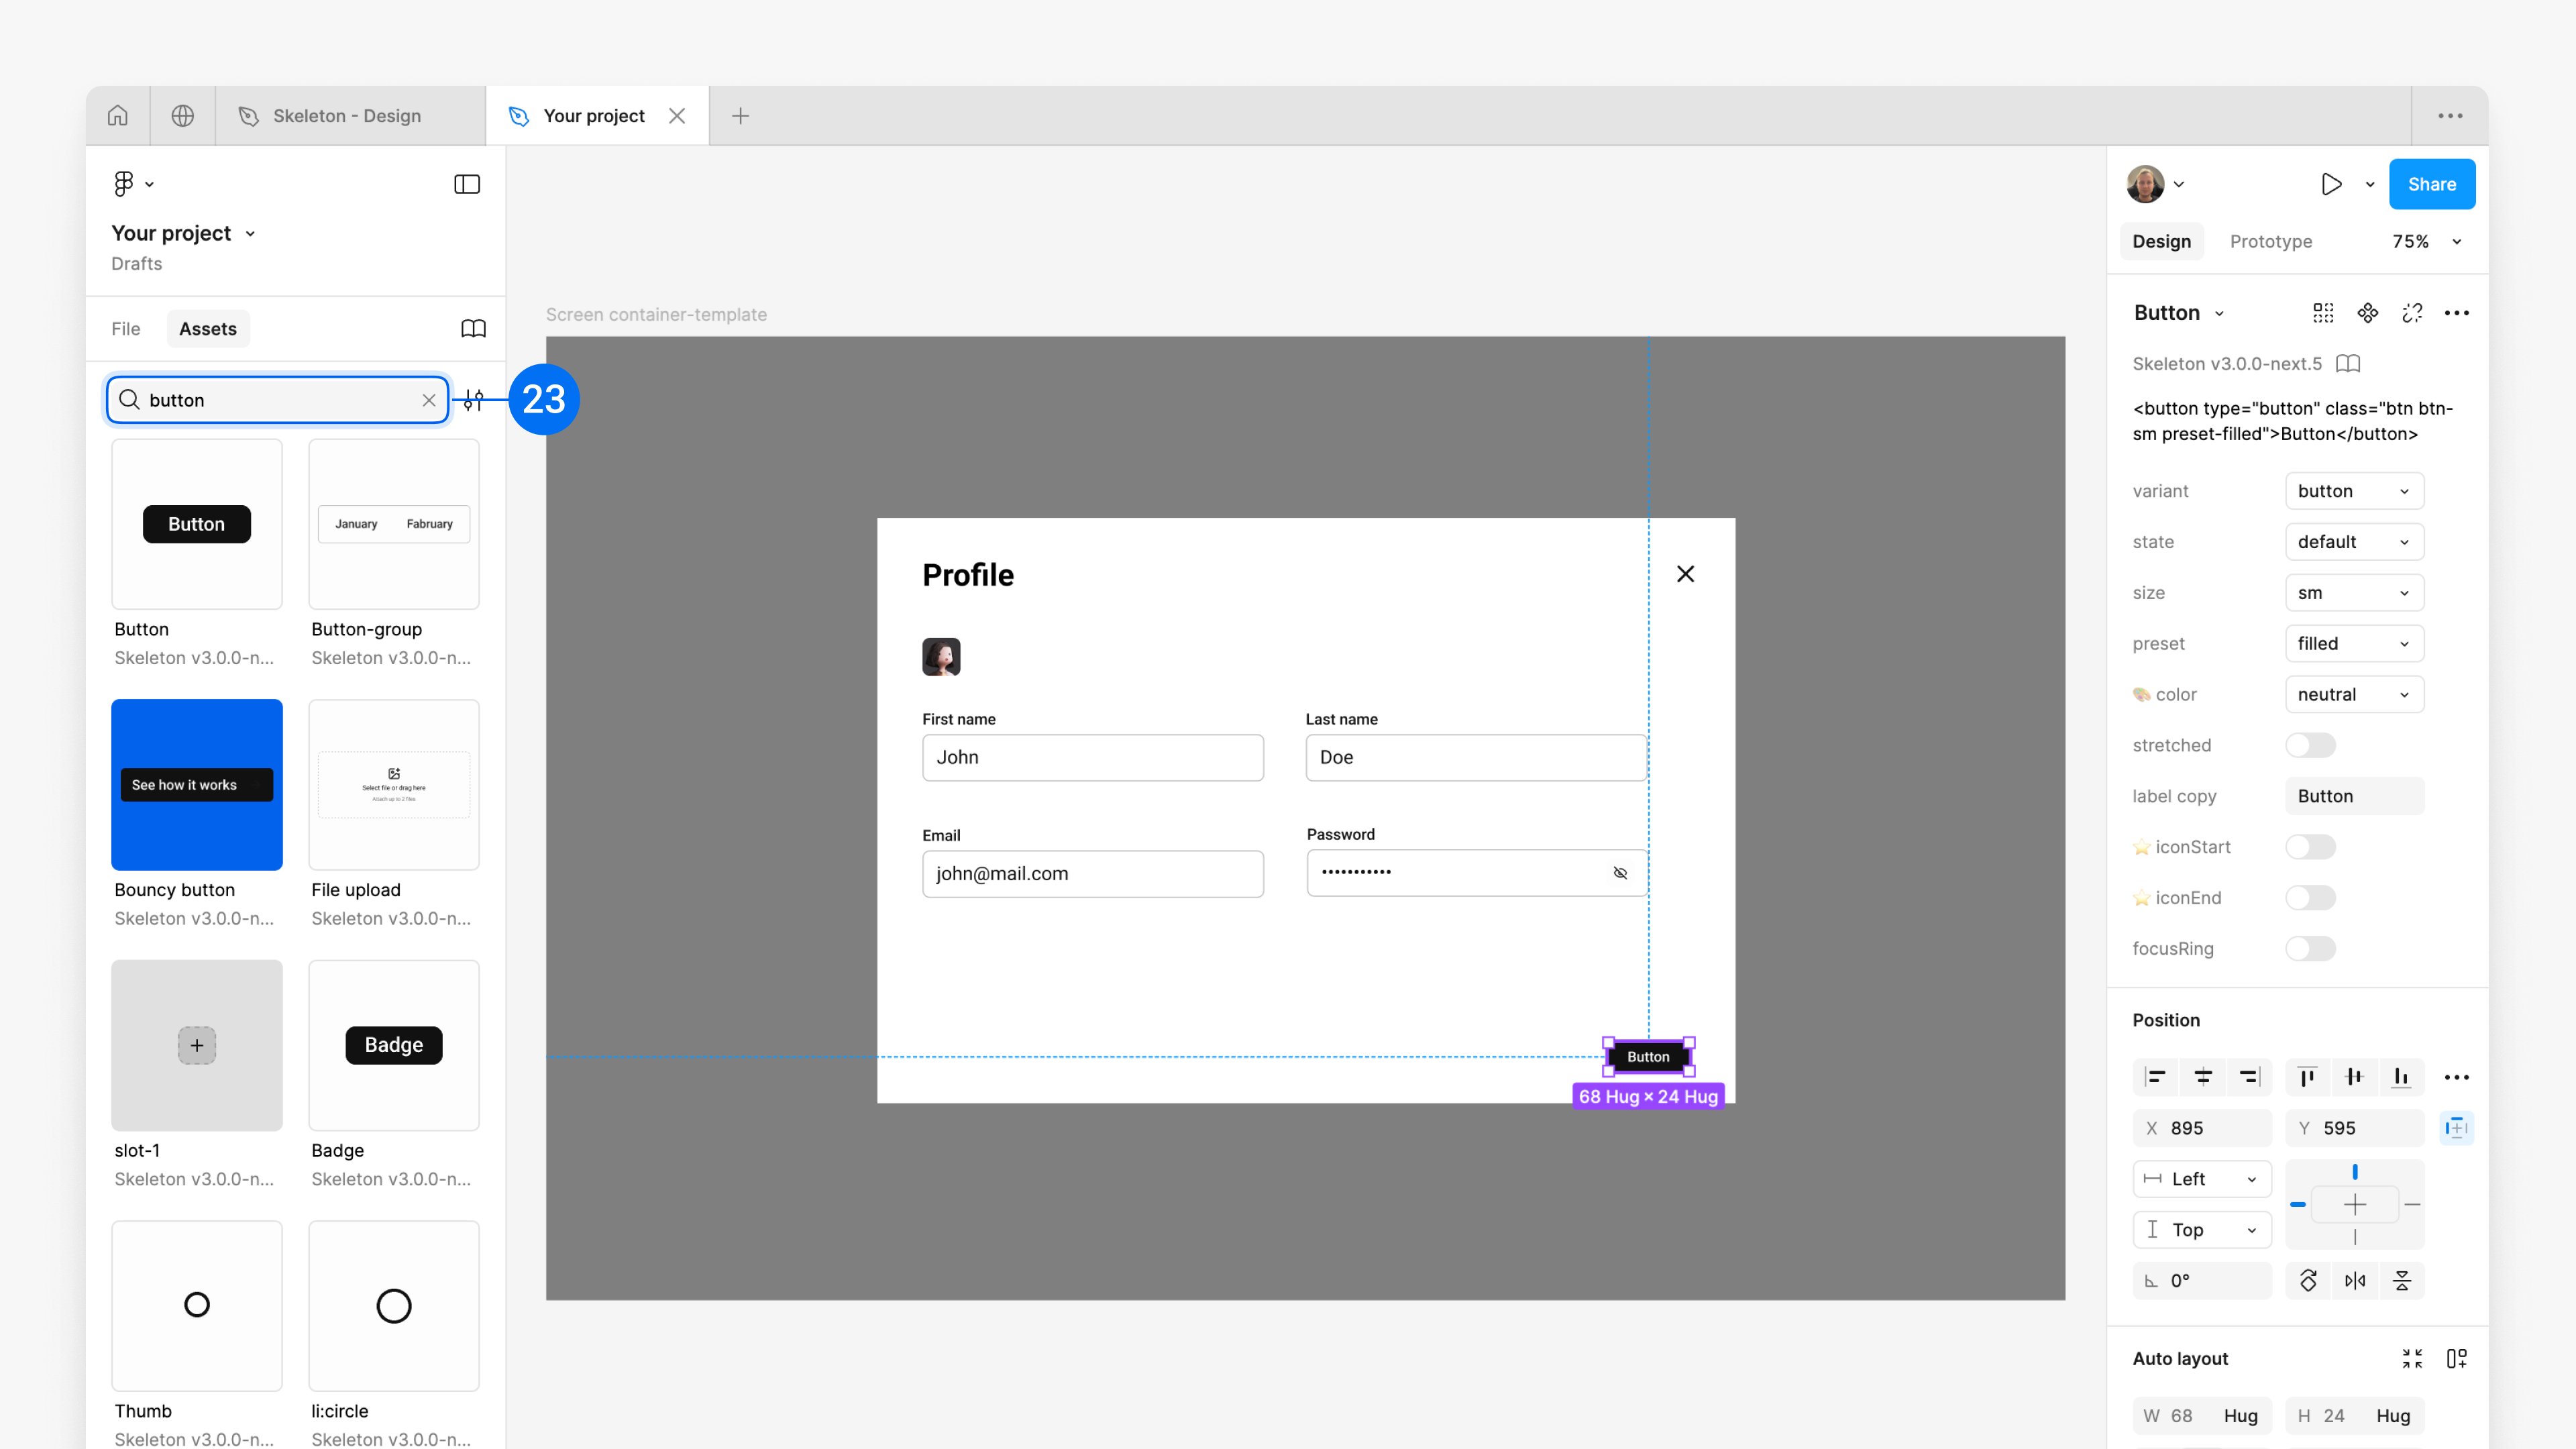
to 'Save'.

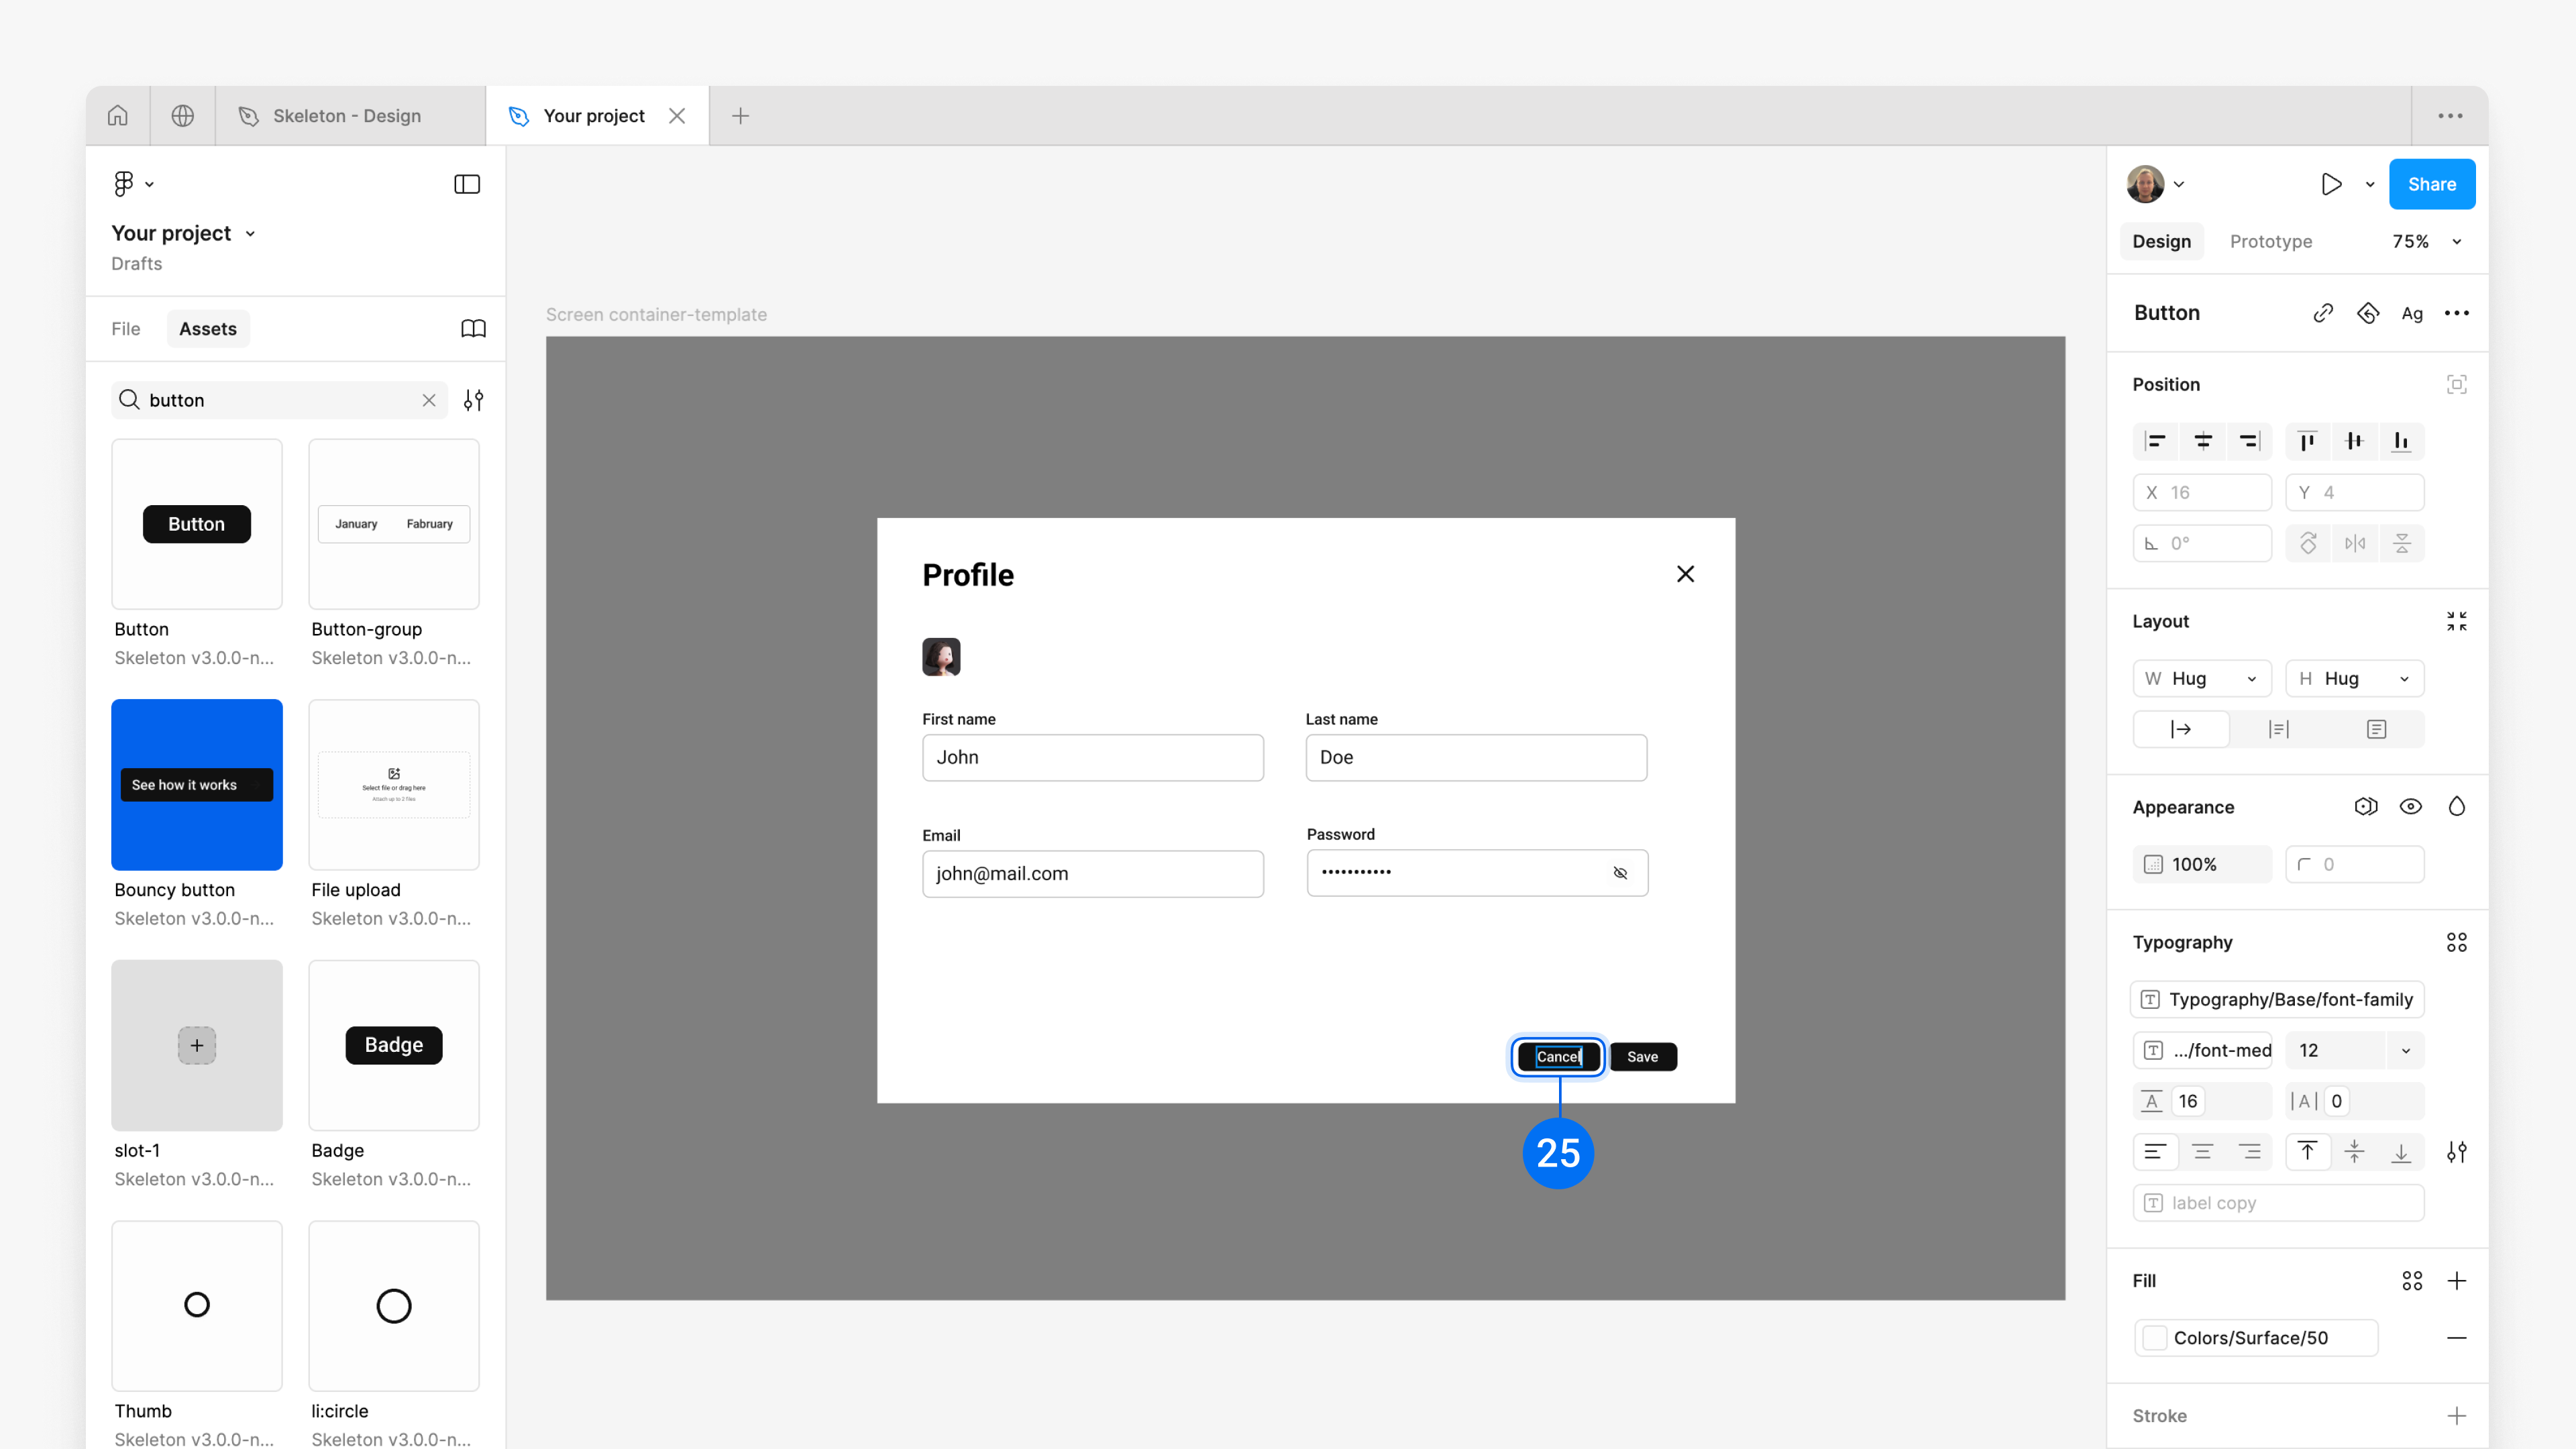
11. 'Cancel' button
and
And afterwards
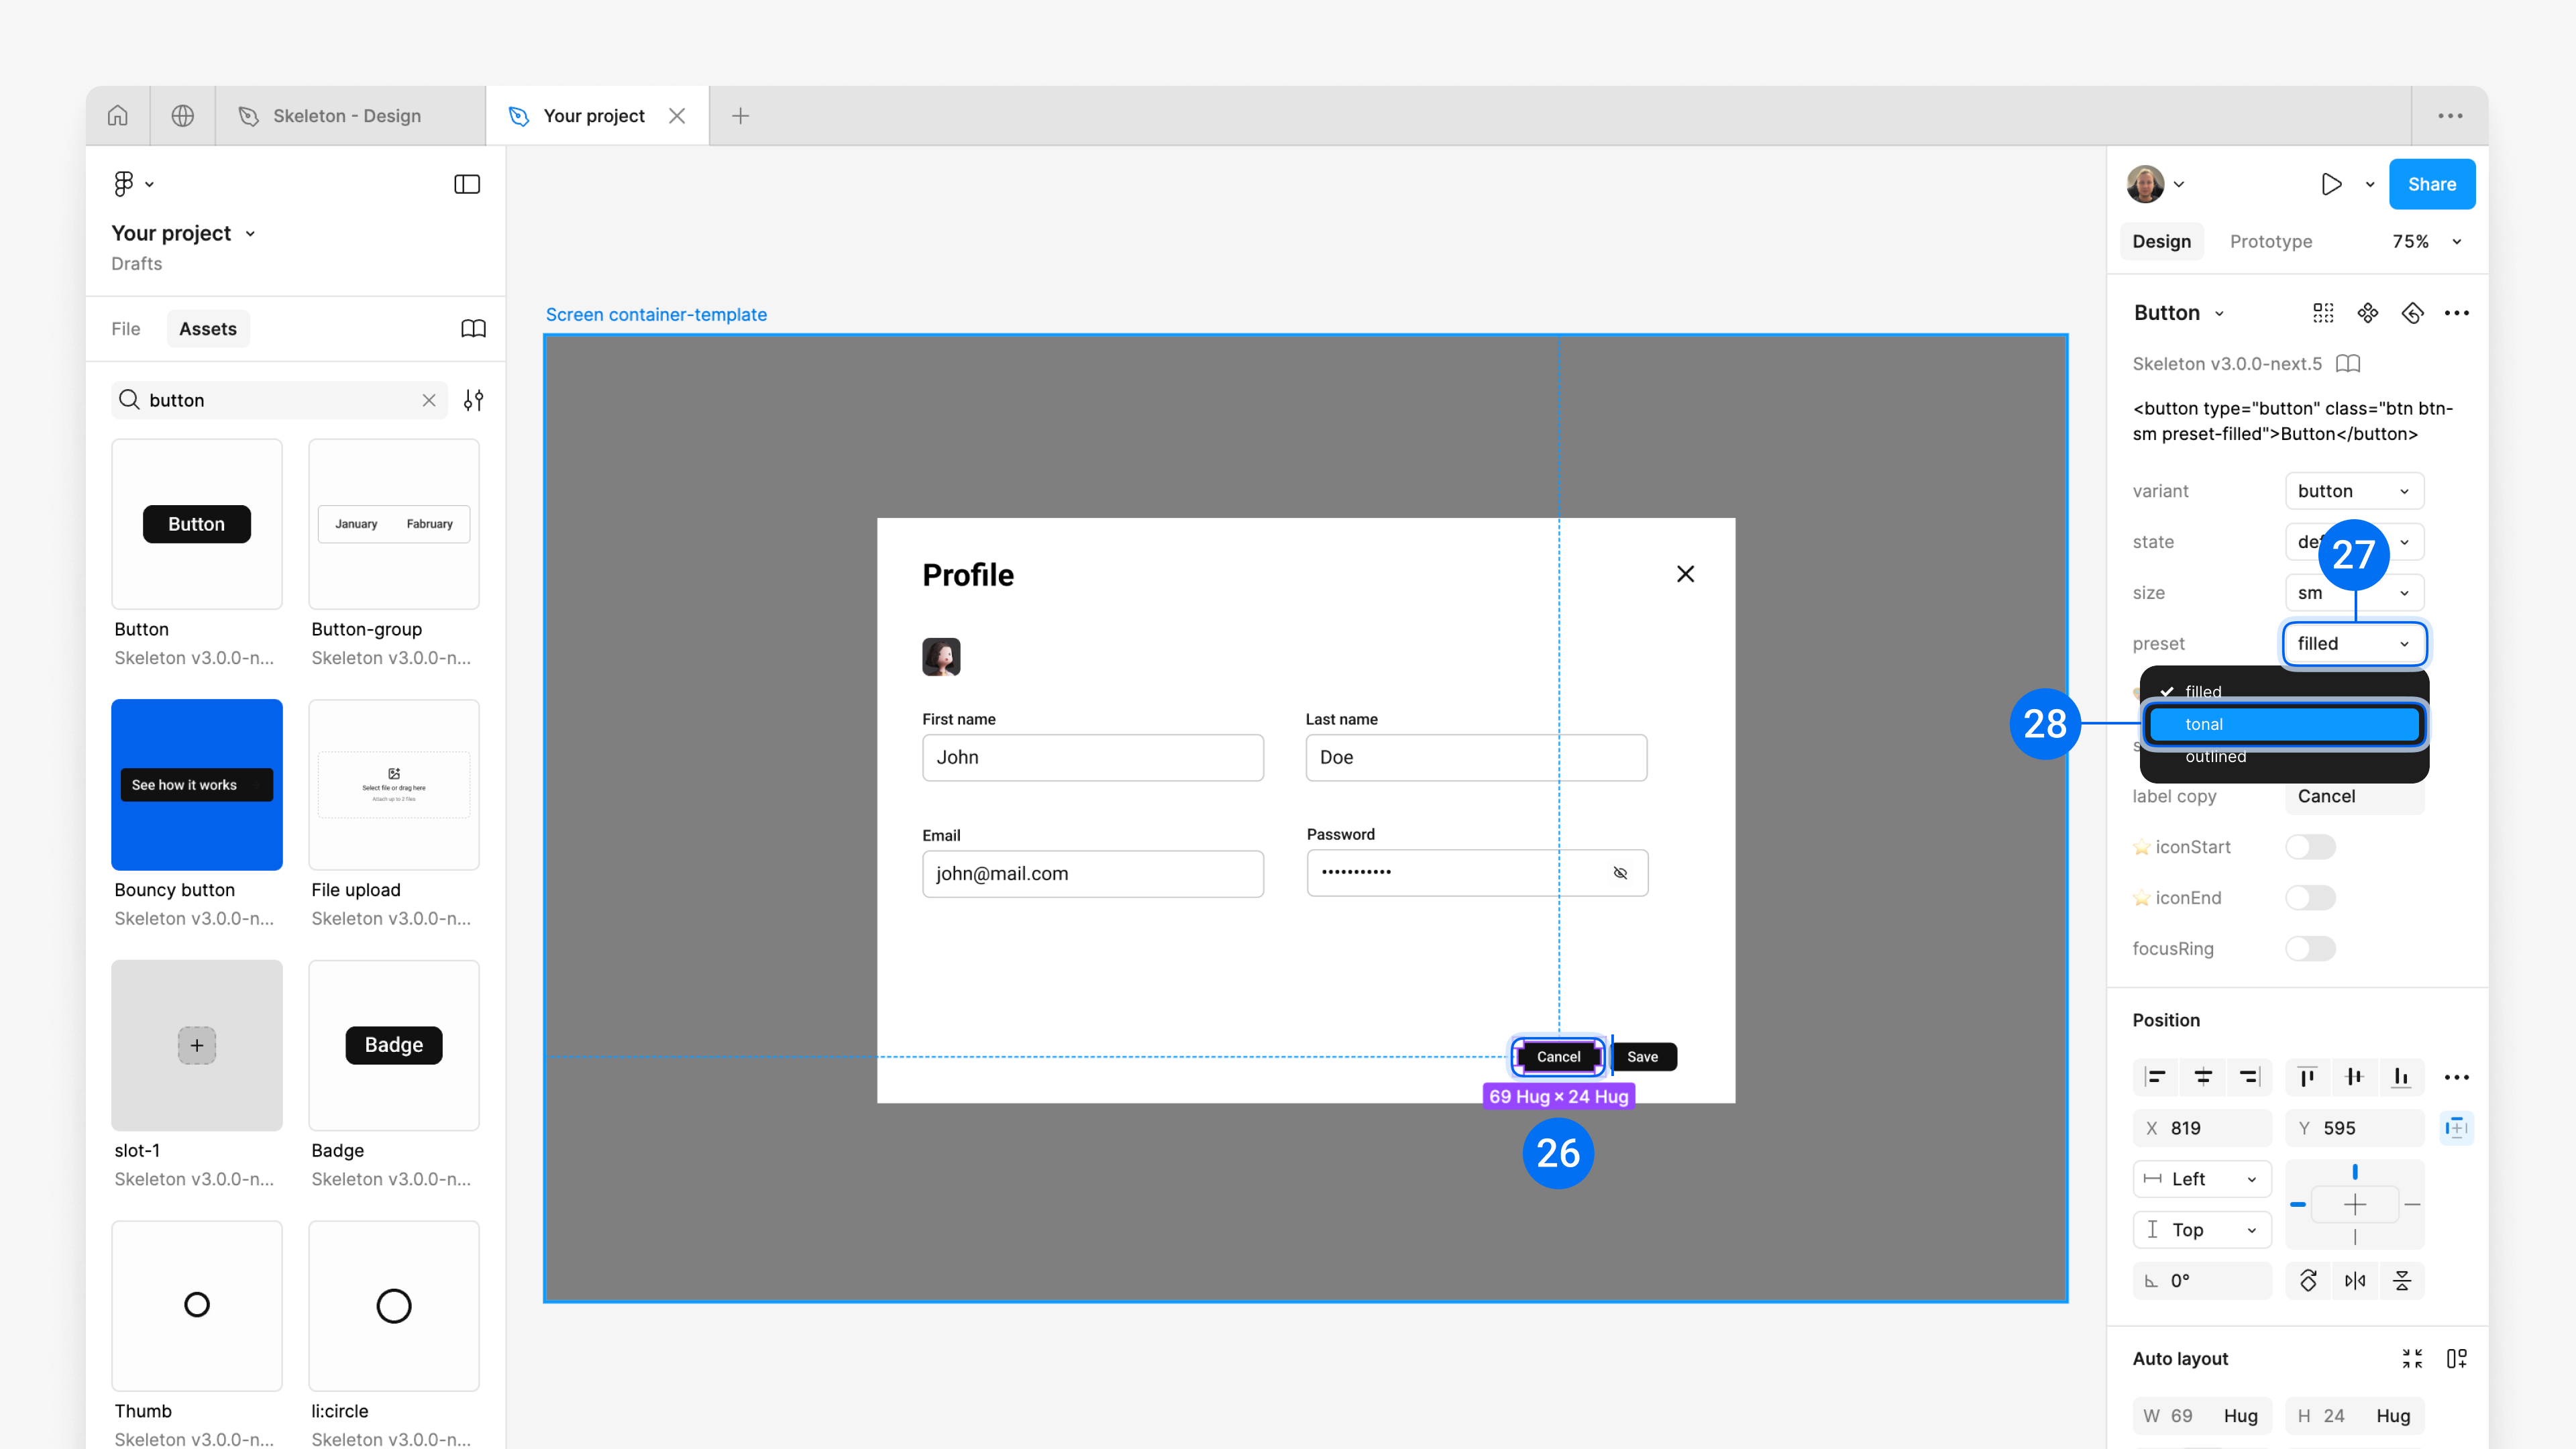
11. 'Cancel' button
Select the 'Cancel button' and on the right panel, change the 'Preset' prop from 'filled' to 'tonal' to make it visually secondary in comparison to the 'Save button'.
Congrats, you’ve created you first wireframe.
Optionally, you can use different Skeleton components from the Assets panel and play with props on the right panel.